STEP4 Mark the Plates
Building walls is like baking a cake. Success depends on having all the right ingredients. When you mark the plates, you’re setting the exact locations for all of the headers, cripples, studs, corners, and wall intersections associated with each wall in the house.
Mark corners and channels first
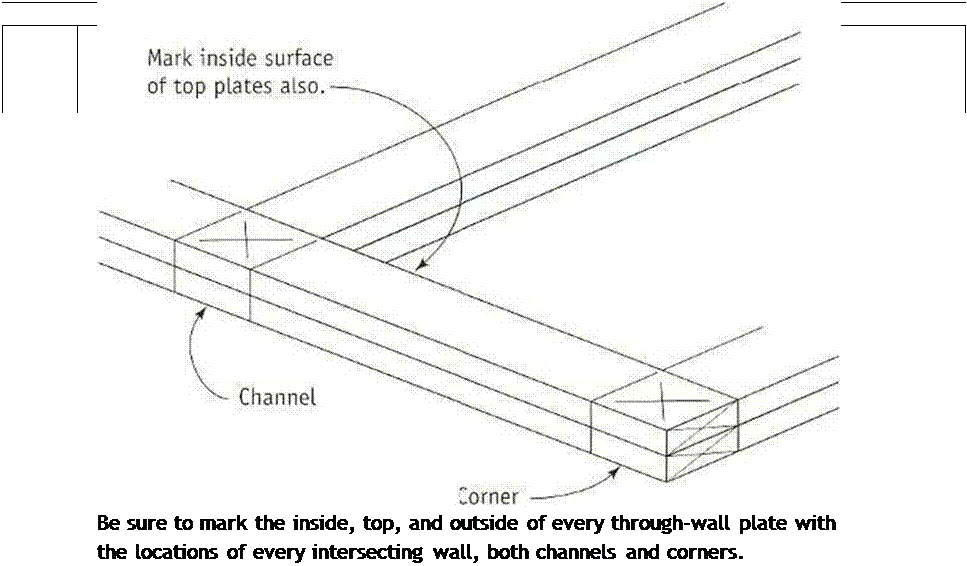
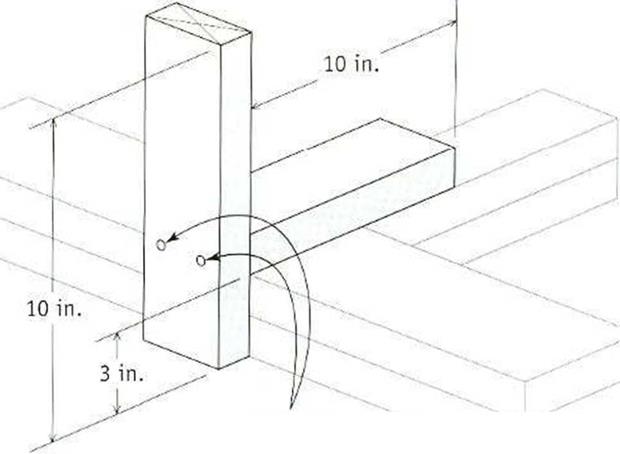
When marking up each plate, start with the locations of corners and wall intersections, which are referred to as channels or tees (see the illustration below). As well see shortly, corners and channels require extra studs so that the walls can be properly nailed together once they are raised. The extra studs also provide backing for drywall. Use a channel marker to mark corners and channels on the plates. Store-bought aluminum markers arc available, as shown in the photo at left on the
facing page. It’s also easy to make your own (see the illustration on the facing page).
Take time to make accurate lavout marks.
4

Sloppy work at this stage means trouble after the walls have been raised and you begin to plumb and straighten them. Draw accurate lines along all edges of the marker, including the inside edges of the plates, where one wall intersects another. In other words, mark the inside, the outside, and the top surfaces ol the through-wall plate. This is important. These corner and channel marks also indicate where the double top (or cap) plates will intersect, tying together through walls and butt walls, Use keel to mark an “X on the top plate to let the wall-builder know the location of a corner or channel. Some carpenters write out the word “tee" to note the location of an intersecting channel.


![]()


Keep layout marks clean and simple
Methods of marking header locations on plates differ regionally. Whichever system you use, keep it simple! Check the floor plans for eadi header location, then position the header on the top plate, aligning the sides of the header with the edges of the plate. Mark down from both ends of the header, across both the top and the bottom plates. On outside walls, make these marks on the outside; on interior walls, make marks on the stud I avoid side.
4
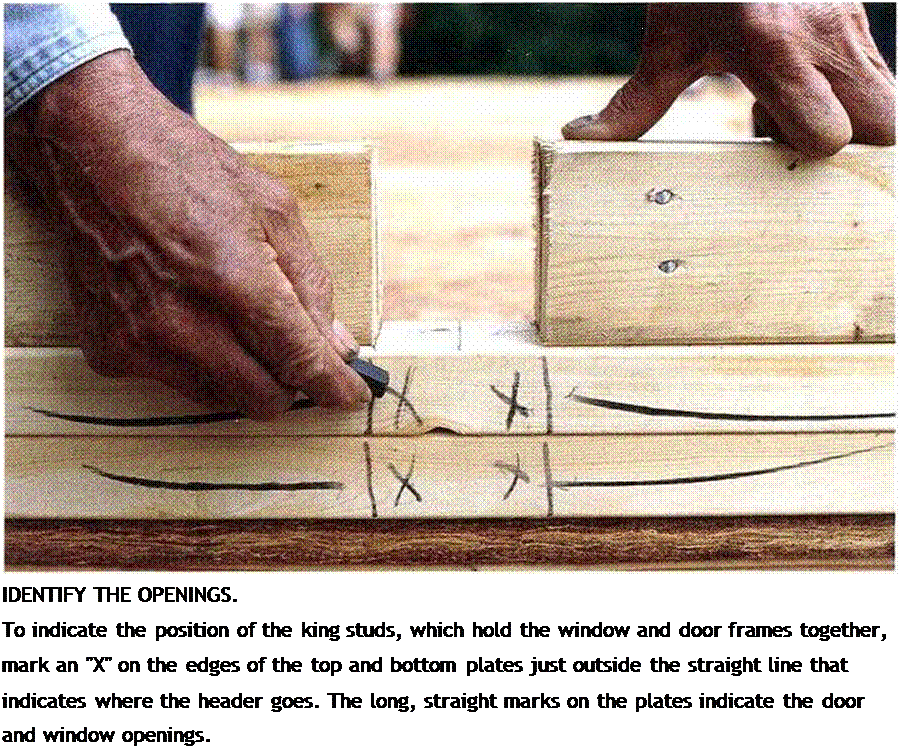
Next to the end line, mark an “X" on both plates on the side away from the header to indicate the king-stud location (see the photo onp. 88). King studs are nailed alongside headers and hold door and window frames together. On the other side of the line, underneath the header, make a long, straight line along both plates to indicate that there will be an opening at that location and dial no sluds should be nailed there.
No matter what the plans indicate, keep interior wall headers at least I ‘/* in. avvav from
 corners and channels so you’ll have space on which to nail door and window trim. In hurricane and earthquake /ones, exterior walls must not have window or door openings less than 4 ft. from an exterior corner.
Above all, mark clearly. These plates will be pulled up and moved during framing. Gear marks improve the odds that all framing members will be attached accurately.


Leave a reply