STEP 8 Seal the Roof with Felt Paper
Now that the house has been framed and sheathed, its time to seal it from the elements.
As long as you are able to work safely on a roof, voucan cover it with rooting felt and shingles. It’s best if all the plumbing and beating vents are through the root before you install the felt.
If that isn’t possible, just make sure they’re installed before you begin shingling.
Felt paper, sometimes called tar paper or builder’s felt, is the first protective layer installed over roof sheathing. This material has evolved in a fashion similar to that of a candvbar. In the old davs, you could buv a good-size candy bar for a nickel. Today, you getamuch smaller bar at a higher price.
Similarly, the felt paper available today is much lighter, even though it’s sti. l sold as
15- lb. and 30-lb. felt. I like to use 30-lb. felt for theunderlayment because it provides extra protection and the cost difference isn’t that
great. Roofing felt has horizontal lines marked
О c?
on it. Follow a line that provides a minimum 4-in. lap as you roll one row over another.
Some builders like lo snap a chalkline on the sheathing 36 in. up from the edge of the gutter or fascia board and lav the first roll of felt
4
![]()

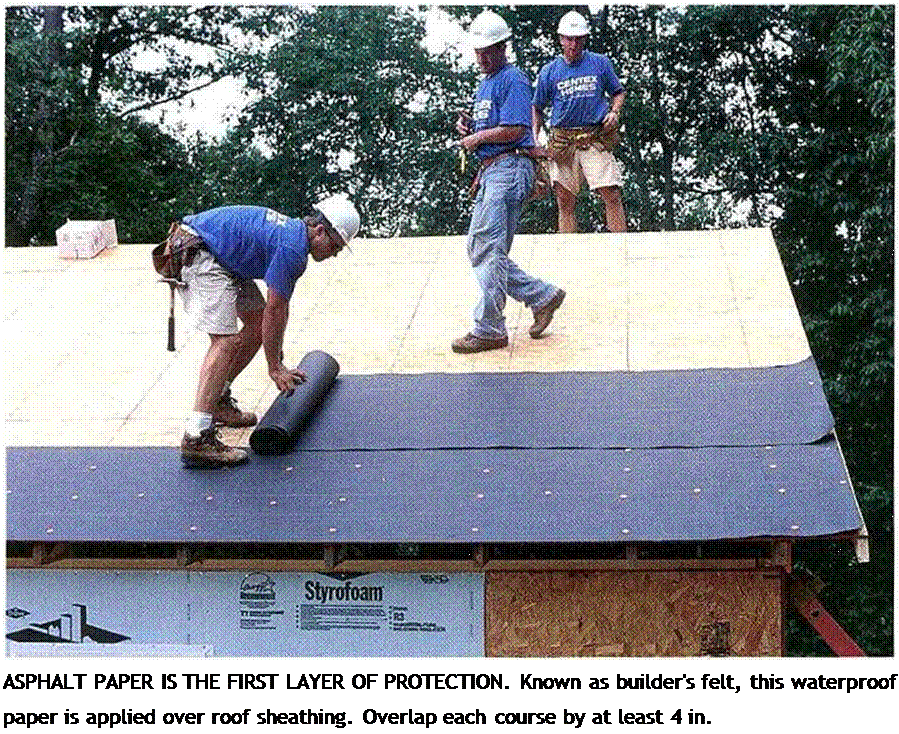
 to that line. This makes the roll lay down straight. Alternatively, you can hold the felt Hush with the edge of the roof. Unroll the felt Hat (with no bumps or wr nkles) and tack it down with roofing tacks. A roofing tack is a small nail with a large plastic button (generally green, orange, or red) on top (see the bottom photo on p. 136). Stepping on felt that is not nailed well can cause you to slip off the roof, so use plenty of roofing tacks (6 in. o. c. at the bottom and ends and 10 in. o. c. from top to bottom every 24 in. o. c. across the roof). Roofing tacks hold the felt in place, which is especially important if the roof won’t be shingled for several days. Pick up any tacks that fall to the ground so that no one steps on them. Finally, trim the felt flush with the gable ends.

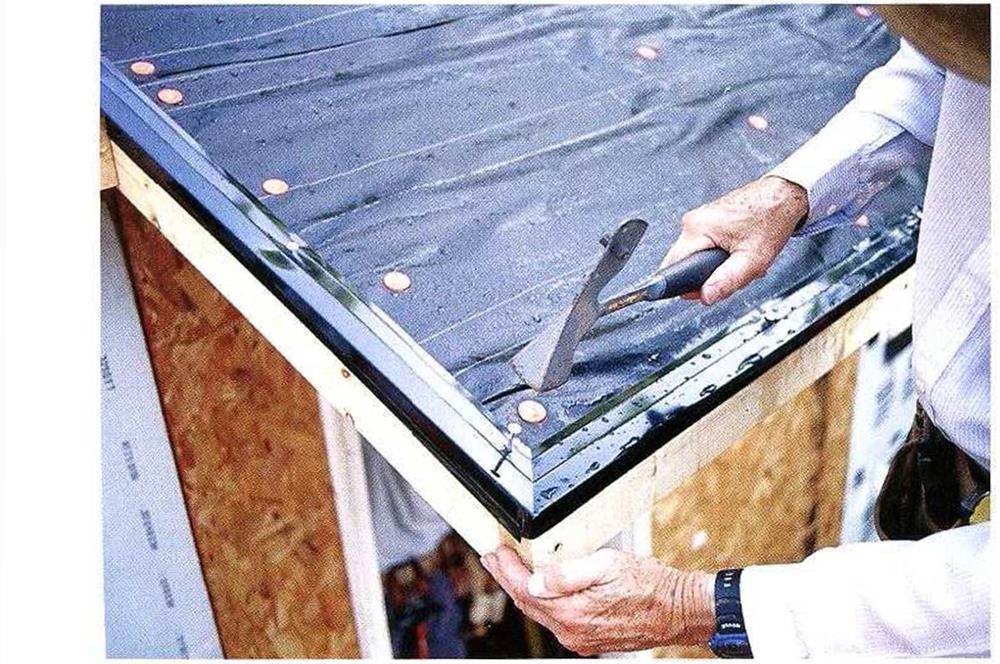 Whether you are tacking down roofing felt or nailing on shingles, it’s important in consider whether the nails can be seer, from below. When the eaves around t he house are open (no soffit), a long nail penetrates the roof sheathing and is visible to anyone who looks up. I kindreds of shiny nails sticking through the plywood or OSB is ur at tractive. Therefore, when tacking felt around the perimeter of the roof, take care to nail the tacks into the barge rafters and gable-end rafters—not just through the sheathing into the air. When nailing shingles, use %-in. nails at the gable overhangs and eaves. When working over the house frame, nails that penetrate the sheathing in the attic are not a problem.
The vent pipes that extend through the roof are flashed with special rubber or metal boots when the shingles are installed. But here in rainy Oregon, roofers take the time to make a double seal around these pipes. This is sort of like wearing a slicker and carrying an umbrella, too—but there’s no such thing as being too careful when it comes to roofs and water. To provide this extra protection, cut a 3-ft.-sq. piece of felt and cut a hole in the center the size of the vent pipe. Slip the felt over the vent and seal around the pipe with a tube of roofing tar. Do the same when you roll out the long strips of roofing felt. Cut the second layer of felt around each vent and again seal it around the pipe with roofing tar. You can lap the fell over the ridge, but remember to cut it away when you shingle to permit airflow into the ridge vent.
Protect valleys and intersections
When a porch roof intersects the main root at a right angle, valleys are created on each side of the intersection. Valleys divert more water
4




![]()
than a regular gable roof does, so I always provide extra protection in the form of flashing.
I like to roll at least two lavers of 30-lb. felt
4
right down the center of the valley. Even better is to cover the valley area with a sheet of 90-lb. rolled roofing. Then, when you install regular roofing felt, lay each row 12 in. or more beyond the valley and keep all roofing tacks at least 12 in. from the center of the valley. This technique provides a double layer of protection prior to shingling.
When working on a roof that butts into the sidewall of a house (a porch roof connected to a gable end, for example), lap the felt on the sidewall by at least 6 in. to prevent leaks at the intersection.
Install a drip edge
Once the fell is in place, make i: more secure around the edges bv installing sections of vinyl or metal drip edge. Drip edge is an L-shaped metal or vinyl flashing that comes in 10-ft. sections. One leg of the I profile extends about 13 in. up the roof; the other leg extends down the fascia or barge rafter by the same distance (see the bottom photo on the facing page). It has a slight lip on the lower edge to divert water from the roof.
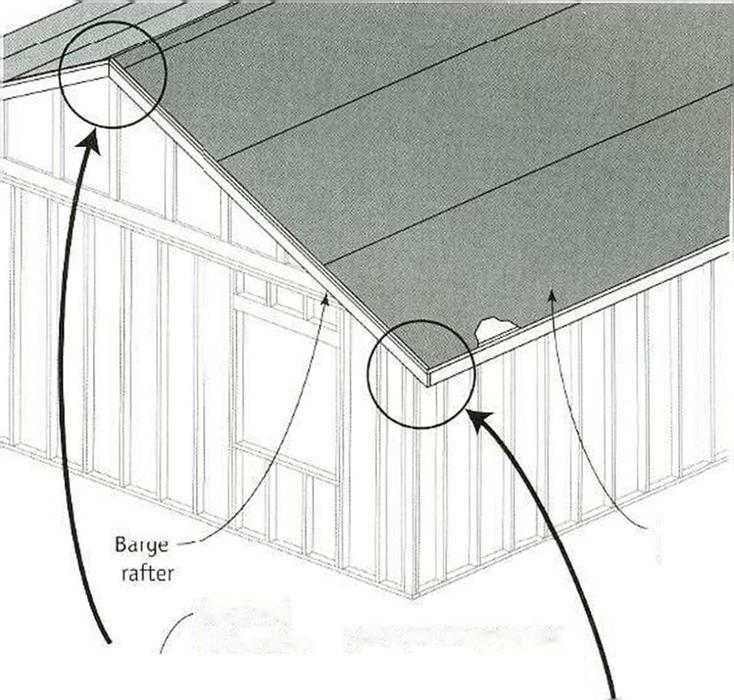
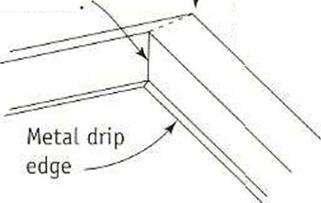
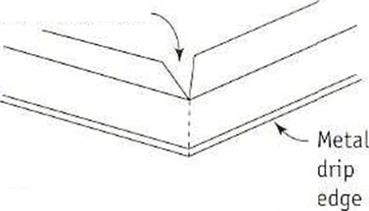
Using roofing nails, install the drip edge wider the felt at the eaves and on top of the felt at the rakes, or gable ends. Space nails about 2 ft. apart. Where one length of edging joins another, overlap the joint by about 4in. Along the gable ends, make sure the top length of the drip edge laps over the one below. At the corners, cut a pie-shaped slice out of the top section. This allows you to bend the drip edge at a 90-degree angle and nail it around the corner. At the ridge, make a plumb nit in the vertical leg and bend the edge over the ridge, allowing the plumb cut to overlap, as shown in the illustration above.


Leave a reply