STEP 1 Seal Penetrations in the Walls, Ceilings, and Floors
When you think about sealing a house, remember how much frigid air can go through a small opening in a sweater or a jacket. Even a tiny hole in a woolen mitten can make your finger numb with cold. The same thing can happen in a house. We had single – glazed, double-hung windows in that old prairie home where I grew up. In the spring, the windows were nice—we could open them wide to let in fresh breezes and the songs of meadowlarks announcing warmer weather. In the winter, though, that loose-fitting sash was a fright. My mother gave us thin strips of cloth to stuff between the window frame and the sash in hopes of slowing the icy winds that would soon roll down from the north.
Today, we have the materials and the knowhow to seal a house effectively. The materials and techniques vary, depending on the type of sealing work that needs to be done.
Sealing a house to limit air infiltration and energy loss begins early in the construction process and continues until the last bit of insulation work is done. As explained in chapter 3, the mudsill should be sealed to the foundation with a resilient gasket material, known as sill seal, or with two thick beads of silicone caulk. Before the exterior walls are raised, it’s also a good idea to apply two beads of silicone sealant beneath their bottom plates. If this was

![STEP 1 Seal Penetrations in the Walls, Ceilings, and Floors Подпись: HOUSEWRAP ACTS AS A WATERPROOF WINDBREAKER. Tyvek and other modern housewraps are installed beneath the exterior siding. They block wind and water while still allowing vapor to pass through. [Photo ® Mike Guertin.]](/img/1312/image734_0.gif) not done for some reason, you can run a heavy bead of sealant where the inside edge of the bottom plate meets the subfloor.
not done for some reason, you can run a heavy bead of sealant where the inside edge of the bottom plate meets the subfloor.
Once the walls are framed, its important to install insulation in the sections that will be inaccessible after the wall sheathing is applied. As discussed in chapter 4, these areas include the voids or spaces in the framing for corners, channels, and headers. Likewise, pay attention to areas where tubs and shower units will be installed in exterior walls. You don’t want the stud cavities in these areas to be blocked off before you have a chance to insulate them.

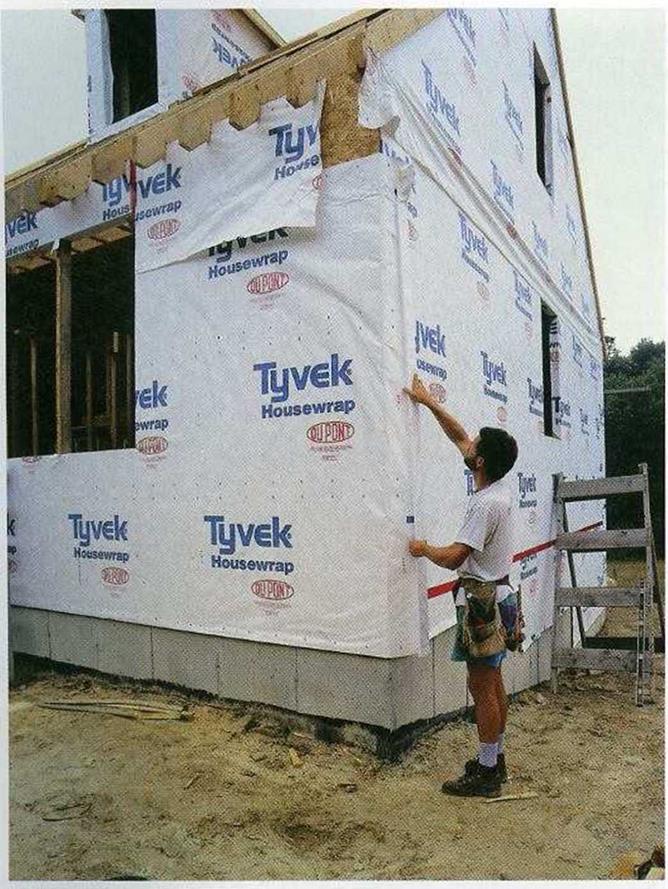
Part of a sealing strategy may include housewrap. Modern housewraps, such as Tyvek and Typar, are wrapped around the framed exterior walls and stapled over the exterior sheathing or (if exterior sheathing is not used) directly over studs and plates (see the photo at left). Housewrap is effective at stopping cold air infiltration during winter months. And at all times of the year, it serves as a drainage plane behind the exterior siding, directing water that gets behind the siding downward, instead of into the wall cavity. (For details on installing housewrap, see pp. 153-155).

![]()

When installing windows and doors, apply a generous bead of sealant on the flange or the back of the exterior trim. Do this just prior to installation, as explained in chapter 6. Make sure that kitchen soffits and dropped ceilings (especially those with heating or cooling ducts inside) are completely sealed off from wall and attic spaces. Use drywall or OSB, and do it now, if you haven’t already. These steps help prevent moisture-laden indoor air from moving into wall or attic areas, where it can condense and create major moisture problems.
Spray-foam insulation can handle a multitude of sealing tasks
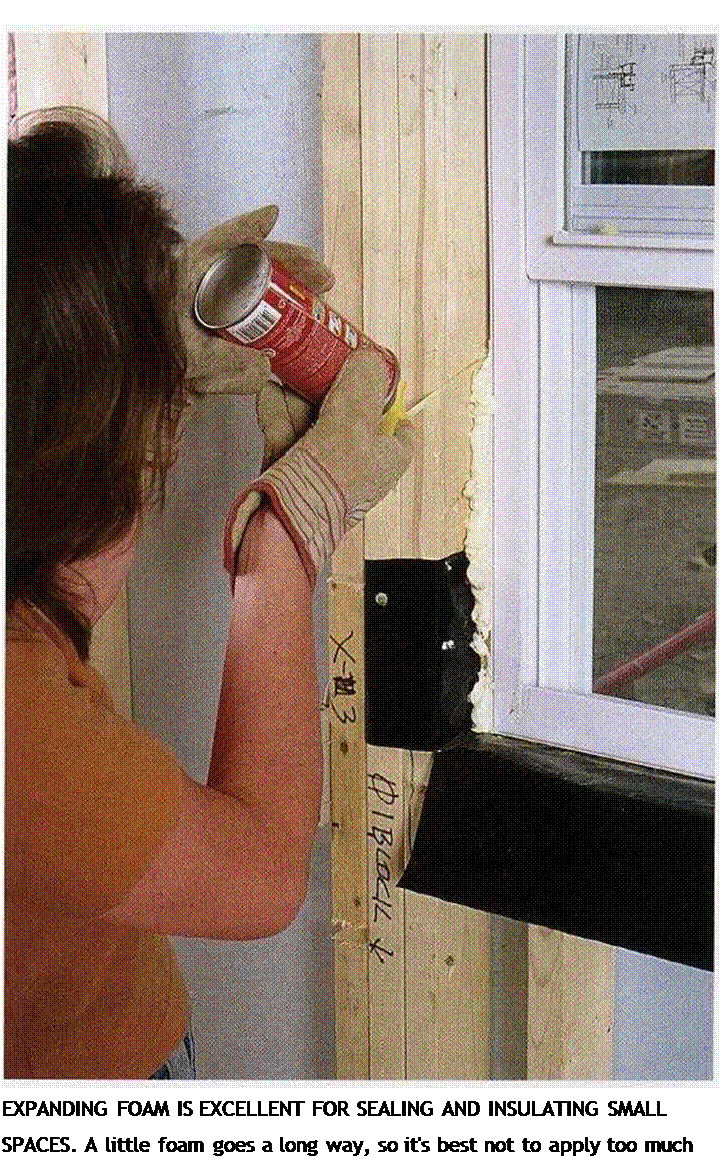
Packaged in a pressurized can, foam insulation is extremely useful when it comes to filling gaps; sealing openings; and insulating narrow, confined spaces where fiberglass insulation doesn’t easily fit (see the photo at right).
Although it’s not cheap, spray-foam insulation is so helpful that I don’t build a house without it. It’s available in expanding and nonexpanding versions. I prefer the expanding type, because it does a better job of spreading out to fill voids. If you apply too much and the foam starts to expand beyond the intended area, don’t worry. Come back later, after the foam has hardened, and trim off the excess with a utility knife. Don’t try to wipe off excess foam when the material is still sticky; you’ll just create a mess. Here are some of the areas in the house where spray foam can be used:
IN HOLES IN BOTTOM PLATES. Use foam to fill the spaces around plumbing pipes, electrical or cable wires, and ducts that pass through the bottom plates of walls. It’s especially important to seal off these routes, which can bring cold air into your living space, when building on a crawl-space foundation.
IN HOLES IN TOP PLATES. It’s very important to seal holes in the top plates of walls. This helps prevent moist indoor air from entering a cold attic, where it can condense and cause moisture problems.
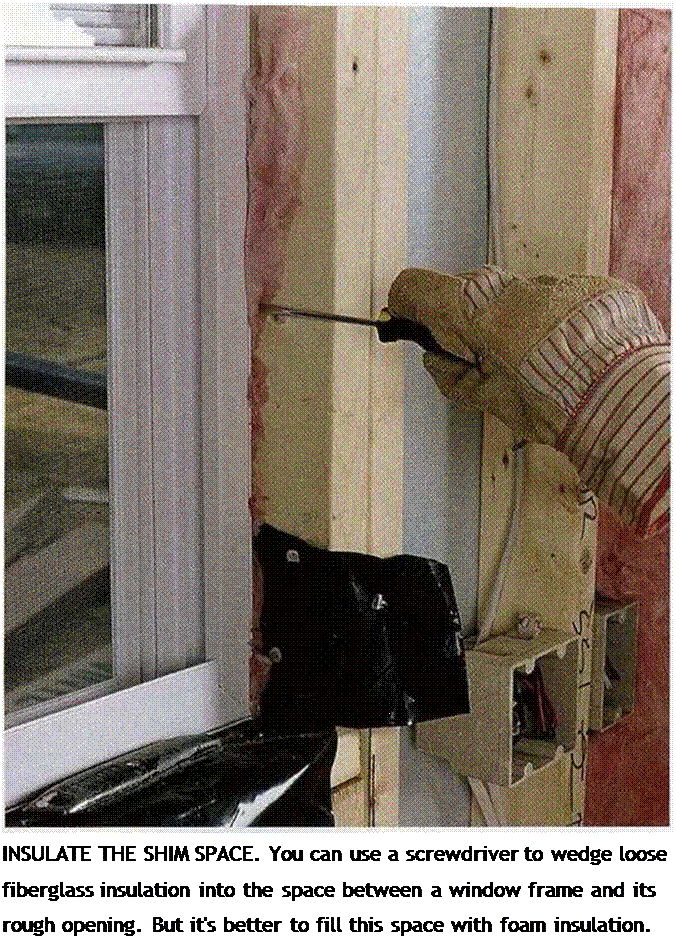
AROUND WINDOWS AND DOORS. I’ve often seen folks use a screwdriver or another narrow tool to stuff fiberglass insulation between trimmers and king studs (see the photo on p. 198). Although this helps to some degree, fiberglass insulation loses insulating value
 when it is compressed. Its better to insulate narrow spaces with foam insulation. The spaces between the window or door jamb and the rough opening can also be “foamed,” but be careful not to apply too much expanding foam in those areas. Since jambs are usually only}/ in. thick, the foam’s expansive action can cause them to bow inward.
AROUND PLUMBING AND ELECTRICAL LINES THAT PASS THROUGH EXTERIOR WALLS. If
your house has exterior faucets, seal the hole around each one with foam insulation. Holes for outdoor electrical lines and outlet boxes in exterior walls should also be sealed.
Caulks and sealants can be useful on small openings
For Filling small gaps (up to Z in. or so), caulks and sealants sometimes work as well as, or better than, foam. A good sealant has


Leave a reply