Safety on the Job WORKING WITH FIBERGLASS INSULATION
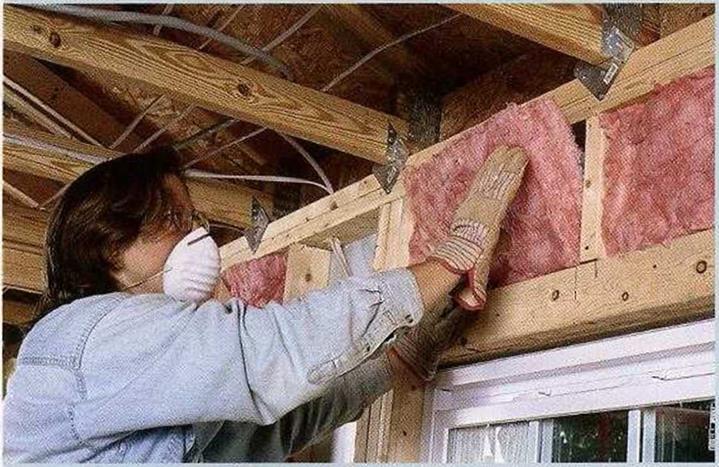
GLASS FIBERS CAN irritate your skin and damage your eyes and lungs, so safety precautions are very important when working with fiberglass insulation. Cover your body with a loose-fitting, long-sleeved shirt and long trousers, and wear gloves and a hat, especially while insulating a ceiling (see the photo below). It’s best to wear a pair of quality goggles, too, because eyeglasses alone don’t keep fiberglass particles out of your eyes. Make sure the goggles fit properly; goggles that fit well don’t fog over. Wear a good-quality dust mask or, better yet, get yourself a respirator. Don’t scratch your skin while you’re working (you’ll just embed glass fibers), and be sure to wash up well when you are finished.
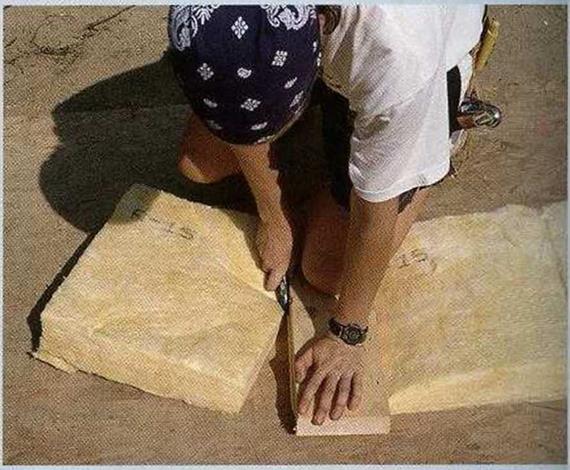
Cutting Batts. Cutting fiberglass batts to size is straightforward. The best tool for the job is a sharp utility knife. Note that I said "sharp." A dull blade will tear paper-faced batts, and torn paper doesn’t work as a vapor barrier. A sheet of plywood or OSB makes a good cutting table. Place the insulation batt on the worktable, with the paper side down if you’re using faced batts. Measure where the batt should be cut and add at least Уг in. (it’s better for a batt to be a bit snug than to have a gap at
the edge or the end). Compress it with a straight board, then run the knife along the board, as shown in the photo above. Be careful with the utility knife. If it’s sharp, you don’t have to exert a lot of pressure. Keep the hand that is holding the board out of the blade’s path.
When fitting batts around windows, you’ll need to cut pieces to fit above and below the window. To speed the process of insulating walls, I measure both spaces, mark their lengths on the cutting table, and cut as many pieces as I need. Don’t be sloppy with your cuts. Even small holes or gaps in fiberglass insulation can dramatically reduce its effectiveness.
Installing Batts. Batts faced with kraft paper have a foldout tab that should be stapled to the face of the studs or ceiling joists. The most common method of attaching faced batts to wood is with a hammer-type stapler and V^-in.-long staples. Make sure the staples go in all the way, so that you won’t have problems hanging drywall later. Unfaced batts are held by friction between studs or joists until the vapor barrier or drywall is in place.
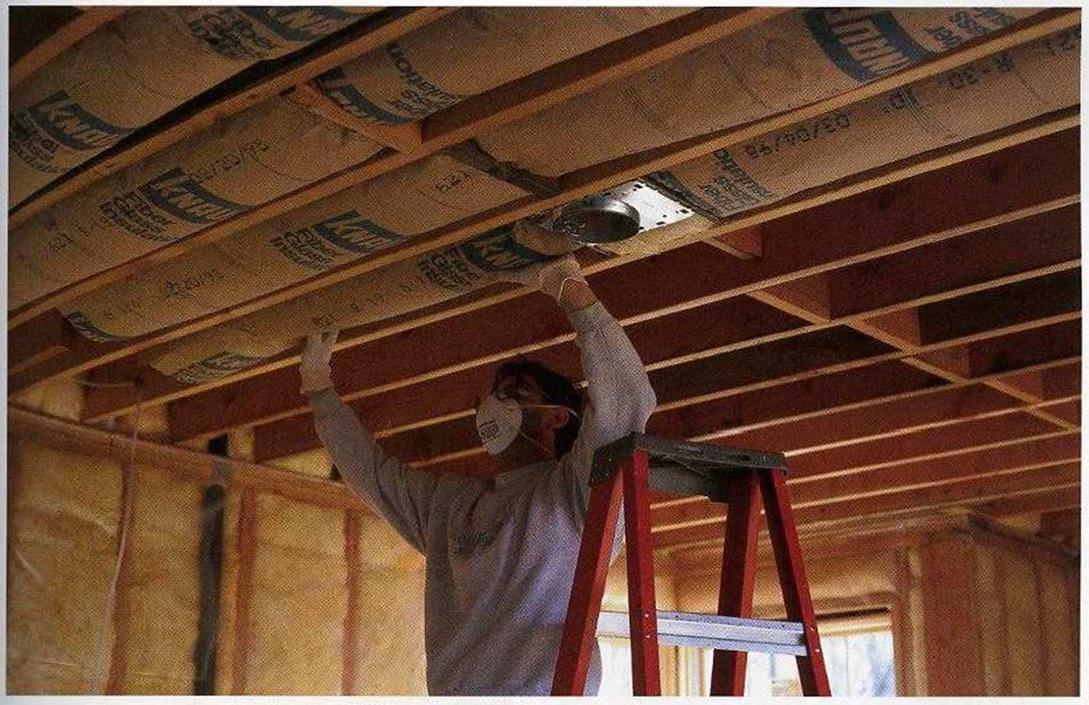 INSULATE THE CEILING. Be sure not to leave any gaps between batts that butt together. Heated air that enters the attic can cause severe moisture problems, especially in cold climates.
[Photo by Charles Bickford, courtesy Fine Homebuilding magazine. The Taunton Press, Inc.)
say, 14 in. to 18 in. rather than just 12 in.—but it will save on heating and cooling costs for the life of the house.
Allow for ventilation space when insulating attics and ceilings
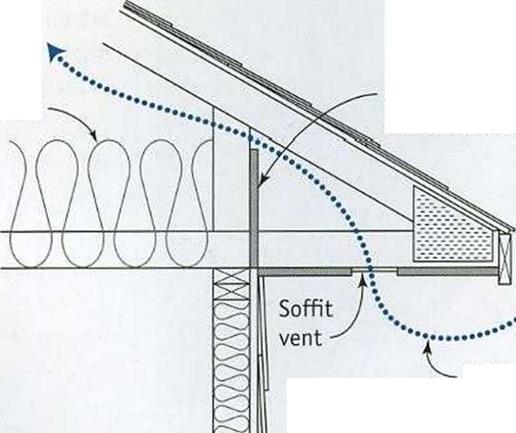
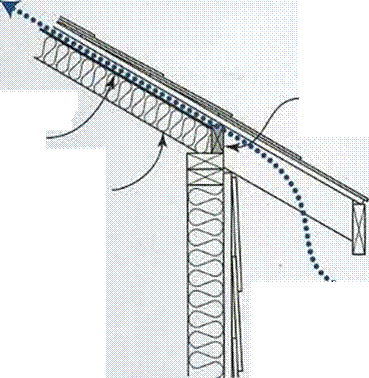
With insulation, the only time you can have too much of a good thing is when the ceiling or attic insulation blocks the roofs ventilation. As shown in the illustration on p. 204, there must be a clear pathway for air to move from the eaves to the ridge.
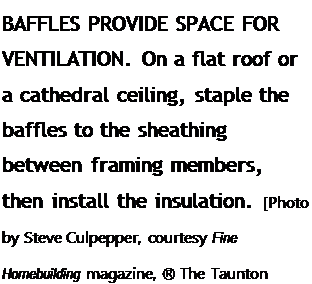
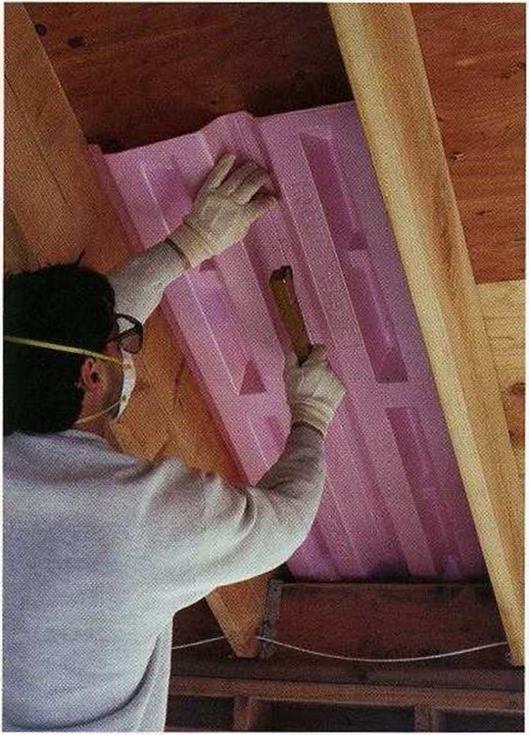
In the Charlotte house, we nailed OSB baffles in place on the walls between the roof trusses to prevent the attic insulation (blown-in cellulose) from spilling into the eaves and covering soffit vents. When a house has a cathedral ceiling, there is no attic space to fill with insulation. Instead, fiberglass batts must be installed between the rafters. Be especially careful not to block the ventilation space between the rafters. Various cardboard and foam baffles are available to provide ventilation space and room for insulation according to the ceilings design. Staple the baffles between the rafters before installing the insulation (see the photo at right).
While you’re insulating the ceiling or attic, don’t forget the attic’s access cover or stairs. Rigid foam can be cut to insulate those openings. Using a compatible construction adhesive, glue several layers of foam on the top of the stairway or access hole cover (see the bottom left illustration on p. 130).
|
|
If all we had to do were to fill the stud and joist bays, then insulating would be easy. Problems often arise because of all the pipes, wires, light fixtures, and outlet boxes that are in walls and ceilings. For wires and pipes, cut a slice halfway through the batt and encase the pipe or wire in the insulation. Its important not to compress the batts. In cold regions,
make sure that you have insulation on the back of pipes (between the pipe and the exterior wall sheathing or siding) to keep them from freezing.
For electrical boxes, split the batt so that the insulation goes behind the box, as shown in the photos on the facing page. The front part of the batt can be neatly cut with a knife or scissors to fit around the box. Once the drywall is installed, you can use cover plates with a foam or rubber gasket over outlet and switch boxes to further reduce air passage.
Many recessed light fixtures generate so much heat that you have to leave a З-in., uninsulated space around them. Don’t use these fixtures. Its much better to choose models that require no insulation gap. You can insulate right up to and on top of those fixtures. Some states require that fixtures be airtight, too, so check with your building inspector.







Leave a reply