Plan panel installation
It’s smart to plan an installation sequence when there are a number of walls to finish with drywall. Determining which walls to cover first, and how panel layout will work, saves time and aggravation. Here are some tips to help you plan the installation sequence for walls:
HANG PANELS HORIZONTALLY. By installing 12-ft. panels horizontally, you greatly reduce the number of joints in a wall. The top panels
should be hung first. Don’t worry if the bot-
*
tom panel doesn’t extend all the way to the subfloor; this small gap will be covered by the baseboard trim. For rooms with 9-ft.-high walls, use 54-in.-wide drywall panels instead of the standard 48-in.-wide panels.
START ON CLOSETS FIRST. Check to see whether there are any closets that must be drywalled before working on long walls. Sometimes it’s easier to get large drywall pieces into a closet through a wall rather than through the closet door. Don’t bother cutting and installing small pieces of drywall to completely cover a closet. You can do that later
|
|||
|
|||
|
|||
|
|||
|
|||
|
|
||
|
|||
|
|||


![]()

![]()

panels. By wedging the beveled edge of the tool under a bottom panel and stepping on the outboard end, you can lever the bottom panel against the bottom edge of the top panel and hold it there until you drive a few fasteners. Although you can buy a panel lifter, it’s easy to make one. Cut a piece of 1×4 about 16 in. long, then cut a taper on the flat face at one end. If the drywall must be lifted more than % in., add a piece of 1×2 to the bottom of the lifter.
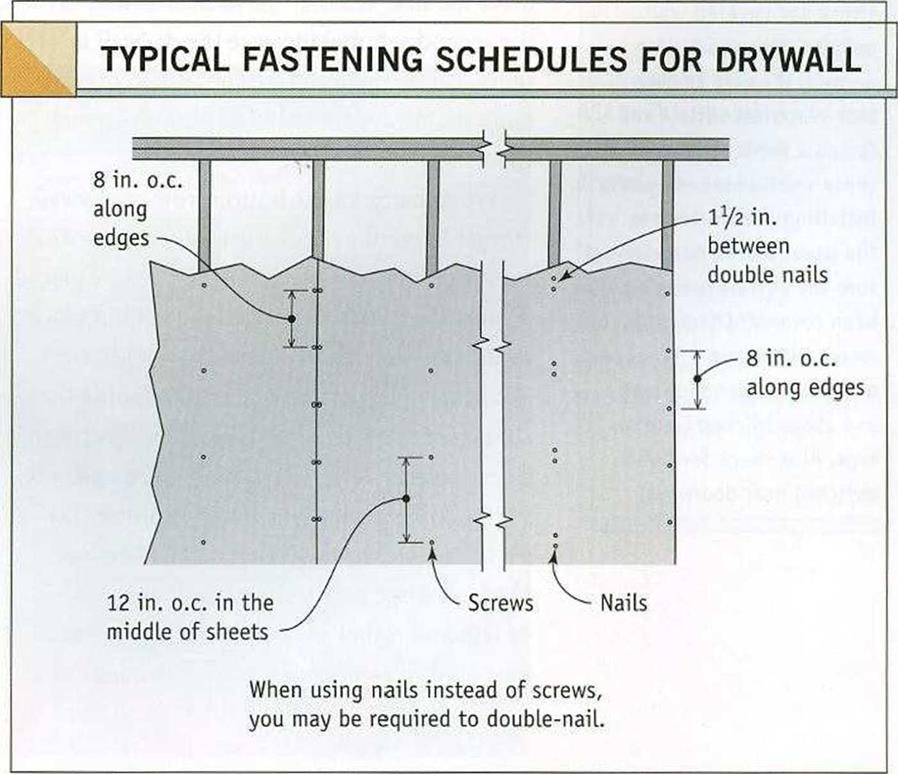
When fastening a panel, work from the center to the outside edges. If you do use nails, drive the first set, then go back later and drive the second set, making sure the drywall is tight against the wall framing. When driving nails, it’s always advisable to push the panels tightly against the wall.
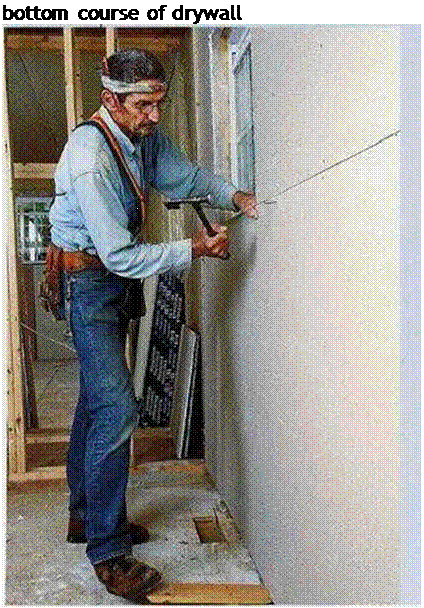
When hanging the bottom row of drywall, stagger the end or butt joints, just as you did on the ceiling. The bottom panels can be placed against the wall, then raised and held in place against the top sheet with a drywall lifter, allowing you to concentrate on fastening the sheet (see the sidebar above). Long sheets can be raised with a drywall lifter at each end.
Try to keep butt joints away from the center of the wall so that the joints will be less obvious. Also, have a sheet break over a door or window rather than right at the edge of a king stud or trimmer. A joint at the edge of a
door or window increases the likelihood of a crack in the drywall as the wood dries. Run panels all the way across doors and windows when you can, then cut them out later with a saw or router. You can also run a panel past an outside corner, then cut it flush with a utility knife after the panel has been fastened in place. This eliminates the need to measure and mark the panel.
Window trimmers and headers are often wrapped in drywall. The same is true of trimmers and headers in closets where bifold or bypass doors will be installed. In these locations, drywall can replace the wood jamb as the finished surface. This is a good place to use up some of the scrap you’ve created. I try to select straight factory edges to go against the window frame. But other builders install vinyl J-bead trim where the drywall meets the window frame (see the illustration on the facing page). Nail the J-bead to the trimmer, then slip the drywall into the J-channel. This is an easy way to obtain a clean, straight, durable drywall edge.
I also install drywall about 2 in. up the attic access hole and cap it with J-bead. This leaves a trim surface on which the lid can rest. The lid can be made from a piece of drywall with several layers of rigid-foam board glued to the back for insulation.


Leave a reply