Materials BUILDING WALLS WITH INSULATED CONCRETE FORMS

INSULATED CONCRETE FORMS (known as ICFs) offer builders an easy way to build insulated concrete walls for crawl space and basement foundations. Made from polystyrene or another rigid foam, these forms are designed to stay in place; they aren’t stripped off like standard forms.
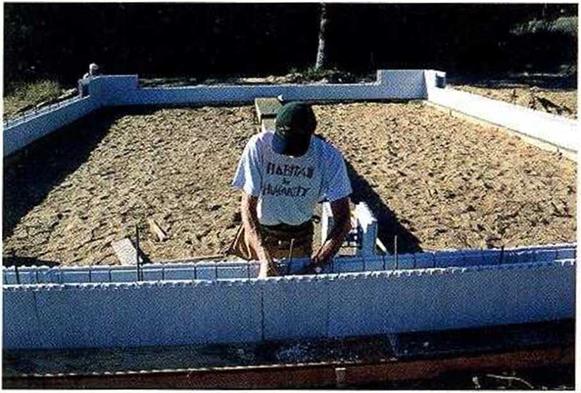
It doesn’t take a lot of building skill to stack these blocks properly. On a recent job in Oregon, we snapped chalklines on the concrete footing to mark where the first course of form blocks would fit. We then started from the corners and laid two courses of blocks to form the crawl space walls.
With four of us working, it took less than two hours to lay the blocks.
Polystyrene blocks interlock, so very little extra bracing is needed to hold them in place as concrete is poured into them. A horizontal 2×4 screwed to the outside or inside of the wall helps hold the forms straight. Drive a stake in the ground every 4 ft. or so, and run a brace between the stake and the horizontal 2×4. This will keep the walls straight
|
|
throughout the pour. To strengthen the wall and prevent the forms from floating up and away, tie together a network of horizontal and vertical rebar, as shown in the photo above.
There are some concerns with ICF walls. The foam can offer a hidden pathway for subterranean termites. To avoid this, install a metal termite shield under the sill plate. Also, the foam surface is rather soft and can be easily dented and gouged. To prevent this, cover the outside walls with 2-ft. by 8-ft. fiber-cement panels.
lion project, and there’s nothing wrong with that choice. The important thing is to begin building on a base that’s level, square, and guaranteed to remain solid and stable for manv vears to come.
4 4
STEP1 Form and Pour the Footings
Thick, solid, and strong, footings evenly spread the weight of the house (and everything inside it) over a wide area, ensuring that the finished house does not settle. With some slab foundations, it’s possible to pour the footings and the slab at the same time. In other cases, the footings and the slab must be formed and poured separately. In many areas, a footing inspection by the building depart
ment is required; this must be done before the foundation walls are buil:.
l ootings must be set on solid, undisturbed
V’
earth, not on fill dirt. Local soil conditions determine the depth and design of footings.
In areas of the country where the ground freezes solid in the winter, footings must extend below the frost line, which can be 4 ft. or deeper in northern regions. This prevents the freeze-thaw cycle from moving the foundation, cracking it, and causing damage throughout the entire house. The building department in your area will know the fooling depth that is required. They’ll also know about local soil conditions that may require a larger size footing or the use of rebar (steel reinforcing rod) in the footing.
Footings are typically pouted in temporary forms constructed from plywood or 2x lumber. Wood stakes and braces hold the forms in position. The top edges of the footing forms must be level, and the footings must be set to the dimensions specified on the plans. A ready-mix truck is called in to fill the footings with concrete. If the site conditions make it difficult or impossible for the truck to gel close to the forms, a mobile concrete pumper can he brought in to pump the concrete from the truck to the forms. Check with your building department about code requirements for footings. It also mav be necessary to embed vertical rebar in the footings so that the upper part of the reinforcing rods can extend into the foundation wall.
It’s common practice to pour any pads required in the plans at the same time the footings are poured. In a crawl space foundation that includes a posl-and-girder framework, poured concrete pads provide a base for concrete piers and wood posts (see the illustration on p. 44). A common si/e for these pads is I b in. square by 8 in. deep. If you’re building a basement foundation, pads are also required to support each post or Lallv™ column. ‘These pads are poured below the level of the basement floor and will be covered when
the slab floor is poured. If a wall will provide midspan support for joists, a continuous footing is poured instead of separate pads.
STEP 2 Build the Foundation Walls
The Charlotte house has concrete block walls. With a crew of helpers to move blocks and mix mortar, an experienced block mason can erect a simple crawl space foundation wall in just a couple of days. However, in many parts of the country, poured concrete walls have surpassed concrete block walls in popularity.
Subco n tractors—specia I isls wh() have the equipment and experience to do the job quickly and, hopefully, with a high degree of accuracy—often form and pour concrete walls, if a foundation contractor arrives in the morning with a truckload of wall forms and rebar, he or she will probably have everything erected before the end of the day. Don’t forget to have the forms inspected before the ready – mix truck arrives to fill them with concrete.
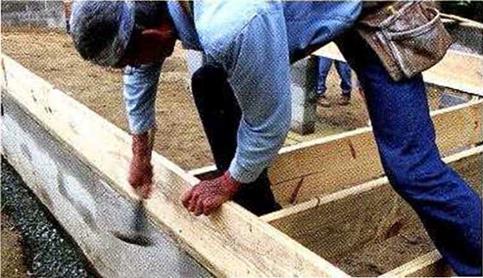
Forms are usually stripped a day or two alter the pour. It takes about a week for concrete to get its first hard set, but you can begin to lay out and install the sills as soon as the forms come off. Even though you may not be forming and pouring the walls yourself, it’s useful to know about some aspects of the process. This applies whether you’re building

Without a floor on top, there’s just a big empty space inside the foundation walls. Getting all the joists in place seems like a huge job. . .
The masonry walls look square and level, but we have to check them anyway. . .
We use pressure-treated 2x6s for the sill plates. . .

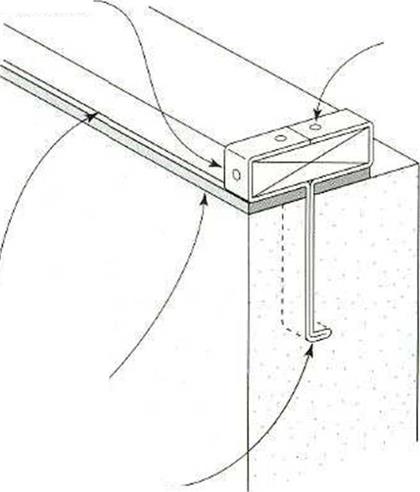
FASTENING MUDSILLS WITH METAL STRAPS

![]()



the foundation walls with concrete block or with insulated concrete forms.
Regardless of the type of foundation, anchor bolts are required around the perimeter to hold the sill plates and the walls securely in place. In earthquake and hurricane zones, the building code may call for additional hold – downs, such as metal straps that are embedded in the concrete and extended to the sills, rim joists, and wall framing (see the illustration at right). Most codes require that a long piece of rebar be planted in the concrete near the planned location of the main electrical panel so that it can be used as a ground for the electrical system.
Beams or girders that tie into the foundation usually do so by means of pockets built into the foundation walls (see the illustration on p. 44). If a post-and-girder system is planned fora basement or a crawl space foundation, the beam pockets are located in the end walls, inline with the concrete piers whore the posts will be installed. Its critical for the pockets to be correctly sized and located as the founda- tion walls are built. To hold a 4×6 girder, the pocket should be A1/’ in. wide and 5Vi in. deep. This provides clearance between the girder and the concrete so that moisture in the con-
crelc doesn’t seep into the wood, potentially damaging it. The 5!Tin. depth also allows a pressure-treated 2×4 shim to be installed beneath the girder, bringing its top edge flush with the sill.
Pockets are cast into poured concrete walls by fastening pocket-sized wood or rigid foam blocking inside the forms. In a concrete block or IСI wall, pockets are created as the walls are laid up.
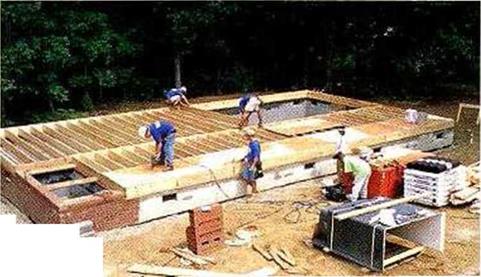
Once they’re installed, we begin with all the joists. . . There’s a rhythm to rolling the joists up onto their layout lines ond then anchoring them in place by driving noils through the rim joists. . .
Before long, it’s time to start installing the floor sheathing. We’re already looking forward to wall framing.
|
|
|
STEP 3 Backfill around the Foundation
The foundation is ready for the floor framing work to begin. Bui the job site isn’t. Backfilling against the walls restores at least some of the sites original contour, making it safer and easier to move around. II you’re building a house with a full basement, the backfilling process is usually delayed until after the first floor is framed and sheathed. Because they
4
are taller, basement walls need the extra rigid ity provided by the floor framing to ensure that backfilling doesn’t damage the foundation. This isn’t a major concern with crawl space walls, so it’s good to backfill now. But first, it’s important to take care ol the following details.
In areas where termite infestation is possible, some builders elect to call in a licensed pest – control contractor to apply pesticide around the base of the foundation before backfilling against the walls. However, if you don’t like
KJ 4
the idea of putting chemicals in the soil, there arc other termite control options to consider (see the sidebar below).
It’s important to keep moisture out of the basement or crawl space area, as well as out of the masonry wall itself. Foundation coatings help accomplish this. Concrete block walls are often parged-covered with a layer of mortar that conceals and protects the joints between the blocks. A waterproof coating should also



Leave a reply