Hurricane clips and frieze blocks
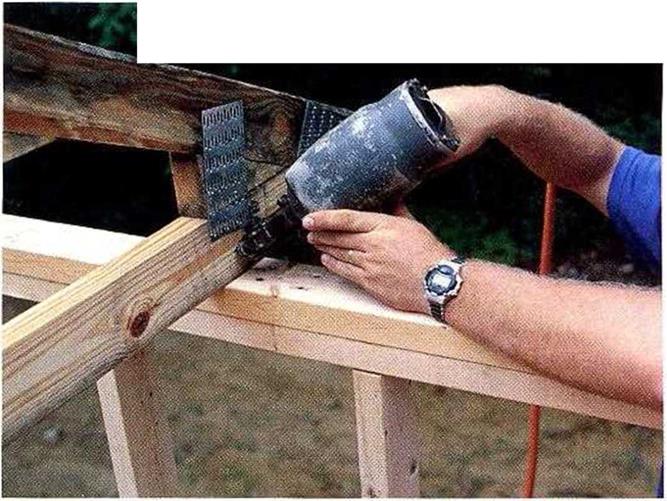
A hurricane can tear a roof completely off a house. Hurricane clips, which are designed to prevent this, are required by code in some parts of the country. After the trusses are nailed in position, hurricane clips are easy to install from inside or outside the house. Drive nails into the trusses and the top p. atesofthe wall (see the photo at left). Be sure to use the special short, strong “hanger” nails that arc sold with the clips.
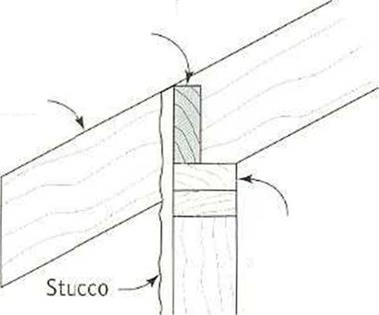
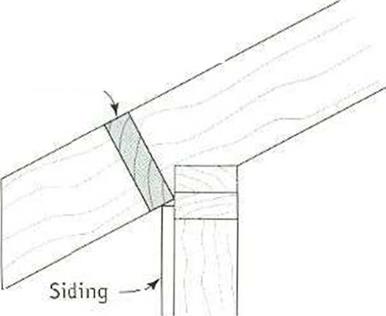
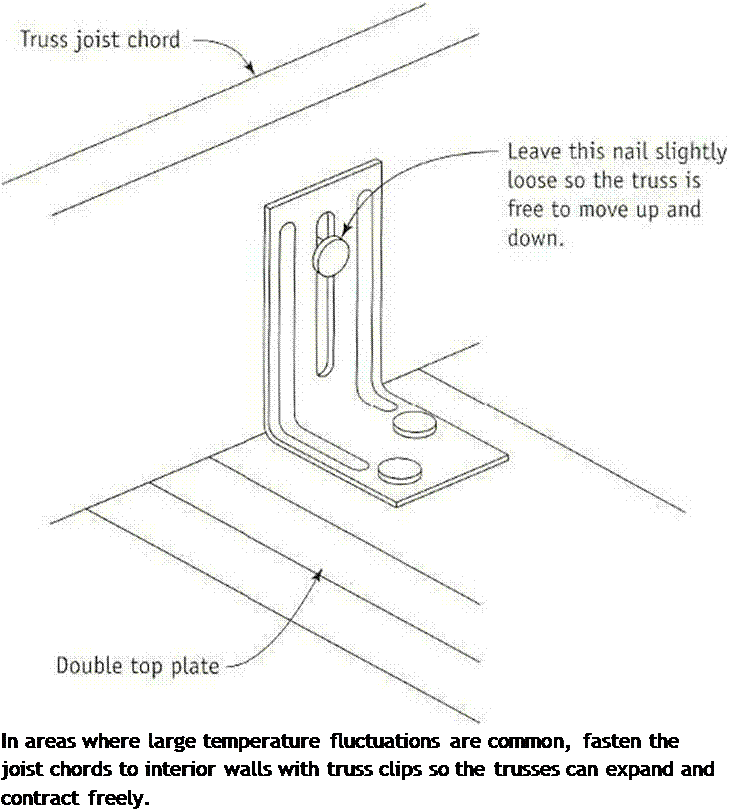
In many parts of the country, frieze blocks are required between trusses. I’m in favor of these blocks, which you can cut from the plentiful supply of 2x scrap that your crew has been collecting. Installed at the top of the wall, these 2x blocks connect the bottom chords or, depending on the truss design, the rafters of adjacent trusses. They provide extra rigidity near the truss ends (see the illustration at left).
1 have seen firsthand how frieze blocks help hold truss systems together in high winds and earthquakes. They offer other benefits as well. The blocks can serve as exterior trim (with or without ventilation holes) if you plan to have an open soffit. If you are installing raised-heel trusses, as we did on this house, you’ll also need to install plywood or OSB baffles between the trusses to prevent attic insulation from spilling into the soffit area (see p. 51).
Install a pair of frieze blocks after each truss is installed. Drive a pair of 16d nails through the truss and into the end of the frieze block, then nail the frieze block to the top plate. You can cut a supply of blocks quickly on a chopsaw. Make sure you cut them to the correct length. If they’re toe long or too short, vou mav force the trusses off of their layout. The normal block length for trusses spaced 2 ft. o. c. is 22; in. However, if the
|
2x frieze block |
|
Rafter |
|
Nailing details: 1. Drive two 16d nails through the opposite side of the rafter or truss chord into the end of the block. 2. Nail the bottom of the block to the wall. |
|
Double top plate |
|
Venting option: З-in. dia. holes can be drilled in frieze blocks and covered (from inside) with screen to provide ventilation along the eaves. |
|
When installed plumb, a frieze block provides backing for stucco. |
|
Rafter 2x frieze block |
|
When installed perpendicular to the rafters, blocking provides a stop for other types of siding. |
![]()
blocks will butt against gusset plates, you’ll need to take the gusset thickness into account. After vou’ve nailed the first frieze blocks
4
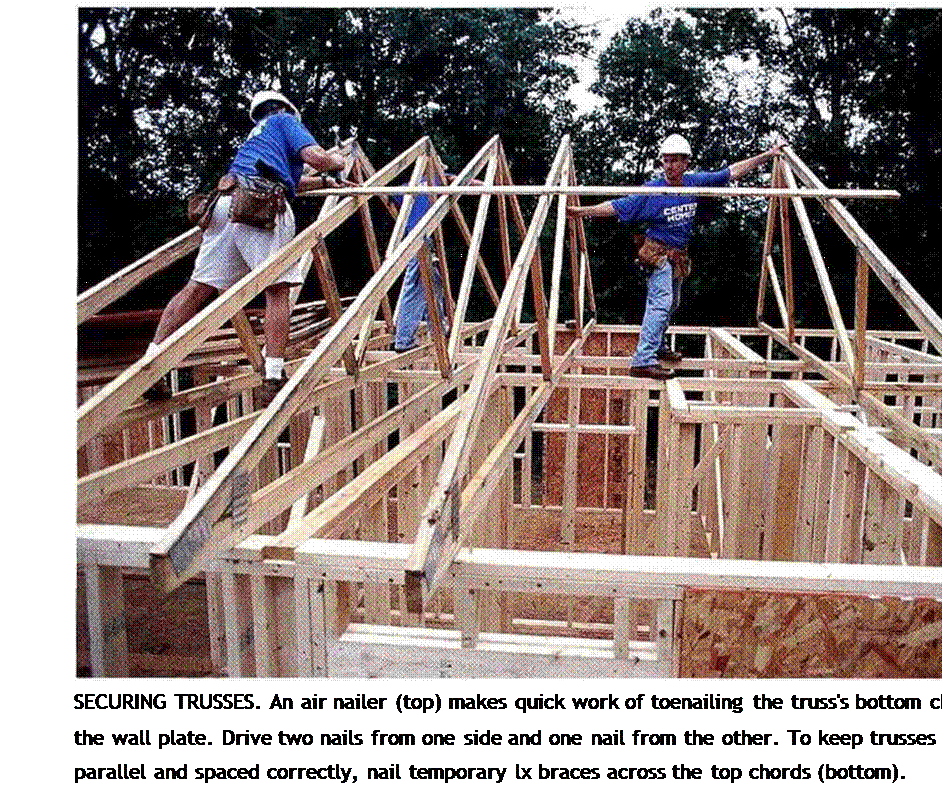
to the gable-end truss, swing the next truss upright. Shift it right or left, as necessary, to obtain the correct cave overhang, then toenail it to the top plate with two 16d nails through the joist chord on one side and one 16d nail on the other side (see the top photo at right). Install the next several trusses in this fashion. As you raise each truss, tack a series of 16-ft. Ix4s (laid out 24 in. o. c.) near the ridge of the rafter chord to keep the truss stable and properly spaced (see the bottom photo at right).
An efficient way to work when installing roof trusses is to have a worker at each cave toenailing the truss to the wall and installing frieze blocks while one or two crew members work on the ridge, moving trusses into position and nailing 1×4 braces to maintain proper spacing.
When bracing trusses, take time to read and follow the directions from the engineering company. These, along with local building codes, must be followed to guarantee that the house will have a strong and stable roof. Most simple gable truss roofs are easy to brace.
After four to six trusses have been installed, plumb the gable-end truss and begin bracing the roof. Use a level to plumb the end truss, then install a diagonal 2×4 swav brace from the double top (cap) plate of the exterior wall (where the gable-end truss is installed) to an inboard truss (see the top photo on p. 126). The brace should extend at a 45-degree angle from the top plate and be nailed to the top chord (or At) or the webbing of an inboard truss.
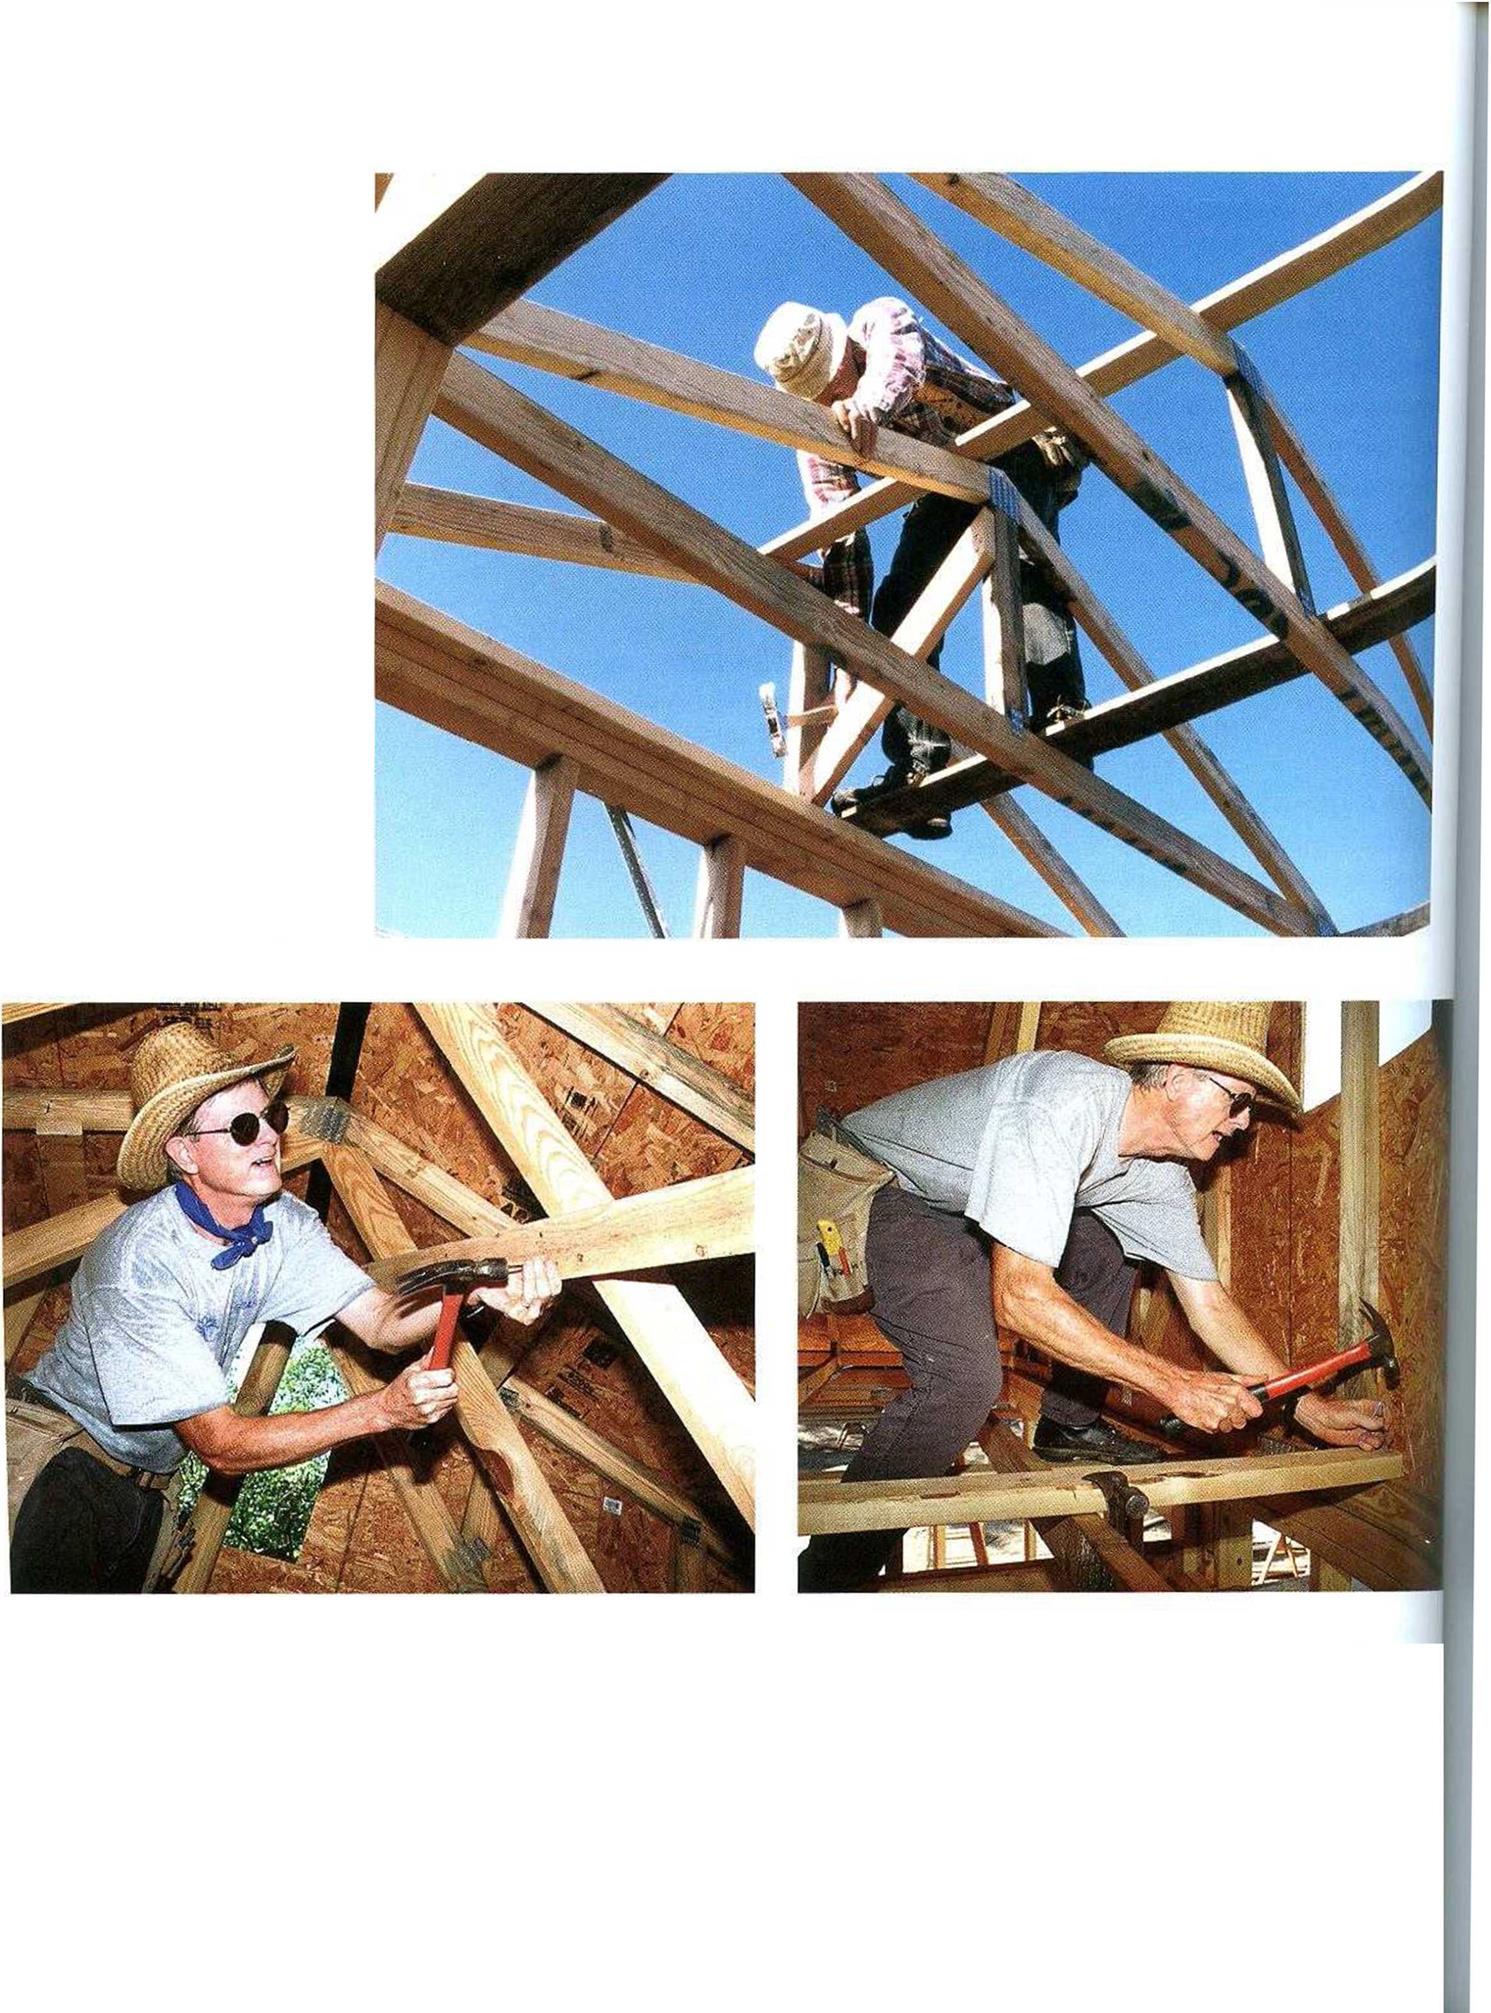
INSTALLING PERMANENT BRACING INSIDE. Shown in the top photo, a diagonal brace from the top of a truss down to a wall plate helps hold the trusses plumb. Install a 1×6 or 2×4 catwalk on top of the trusses’ bottom, or joist, chord. The brace should be nailed into every joist chord and into the end-wall top plates (photo at right, above). Nailing 2x bracing across the webbing provides the roof structure with additional rigidity (photo at left, above). [Top photo by Roe a. Osborn
 courtesy Fine Homebuihiinq magazine, The Taunton Press, Inc.]

![]()
![]()

If the gable-end rafter is plumb, the rafters tied to it at 24 in. o. c. should also be plumb. When all of the trusses have been installed, nail in a svvav brace at the other end of the roof. On longer roofs, use additional diagonal
swav braces near the center of the house to
і
further strengthen the roof.
The next step is to stabilize the joist chords by nailing a long board (a lx or 2x will do) on top of each joist chord near the center of the span. You can move this bracing to one side or the other if voи need to accommodate an opening for attic access (see p. 130). Nail this long brace to each chord with two 8d (for lx stock) or 16d (for 2x stock) nails (see the bottom right photo on the facing page). Addi tional 2×4 braces are often nailed at 45-degree angles across the underside of t ie rafter chords or webbing from the plate line to the ridge (seethe bottom left photo on the facing page). Nail these braces into each chord with two 16d nails. This provides lateral stability to the entire roof.


Leave a reply