Habitat Builds Barrier-Free Homes

SIMPLE, SINGLE-STORY HOUSES are
not only inexpensive to build but also lend themselves well to barrier-free (handicap-аccessible) eonstruction.
In addition to the obvious differences that relate to wheelchair accessibility—
4
wider hallways and doorways, a ramp instead of a stairway at the entrvwav—
/ 4 4
many other smaller details help make these homes easier for their owners to use and enjoy.
The key to building or retrofitting a house for wheelchair accessibility is recognizing the modified reach of a seated person. You can start by raising the position of electrical outlets and
lowering the height of light switches, closet poles, shelves, and countertops. These easily made alterations help make day-to-day life more convenient for someone in a wheelchair.
Bathrooms and kitchens require special attention. Plenty of strategically placed grab bars are important; place them around the toilet and in and around the tub/shower. Extra space in the bathroom—so a wheelchair can get in and maneuver around—is essential, too. In the kitchen, lowered stovetop, sink, and cabinets help make it possible for someone in a wheelchair to prepare and serve meals and clean up.
Recognizing the increasing need for barrier-free housing, the Knoxville, Tennessee, Habitat affiliate sponsored a contest to design an adaptable, inexpensive, barrier-free house. Two designs were selected as winners; both are available to any affiliate through Habitat for Humanity Inter-
О 4
national. With the leading edge of the baby-boom population already past 55, and modern medicine keeping us alive ever longer, more and more of us may come to appreciate housing that’s flexible enough to adapt to our needs as the years go by.
-Vincent Laurence
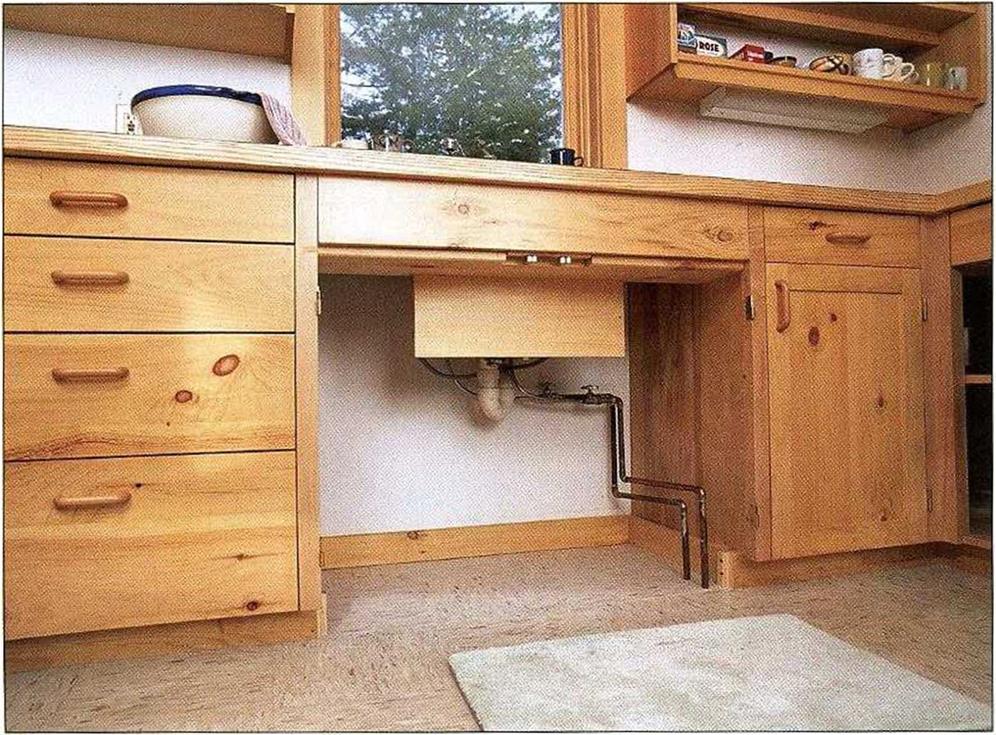
MODIFY CABINETS FOR WHEELCHAIR ACCESS.
Lower countertops and desk-type openings can make the kitchen much more accessible.
[Photo by Steve Culpepper, courtesy of Fine Homebuilding magazine The Taunton Press, Inc.|


SOMETIMES JOISTS MUST be cut to allow room for a stairway, a heater vent in the floor, or a tub trap in the bathroom. Such an opening is called a headout. As shown in the illustration at right, regular 2x joists (not I-joists) can be cut and supported by a header joist that is fastened to parallel joists. If the opening is larger than 4 ft., double both the side and the header joists. Attach the doubles with 16d nails spaced 16 in. o. c.
A common mistake made by carpenters framing a headout is not taking into account the thickness of the header joists. Remember to factor in these joists when determining the size of your floor opening. If, for example, you need a 2-ft.-Long floor opening, cut the joists at 2 ft. 3 in. to leave room for the single-header joist at each end. For double-header joists, cut the joists at 2 ft. 6 in.

Roll and nail the joists
Once the joists arc cut to length and in position, carpenters say that it’s time to “roll” them. This just means setting the joists on edge, aligning them with their layout, and nailing them in place. If you are working with 2x joists, it’s important to sight down each joist to see whether there’s a how or a crown, and then set the joist with the crown facing up.
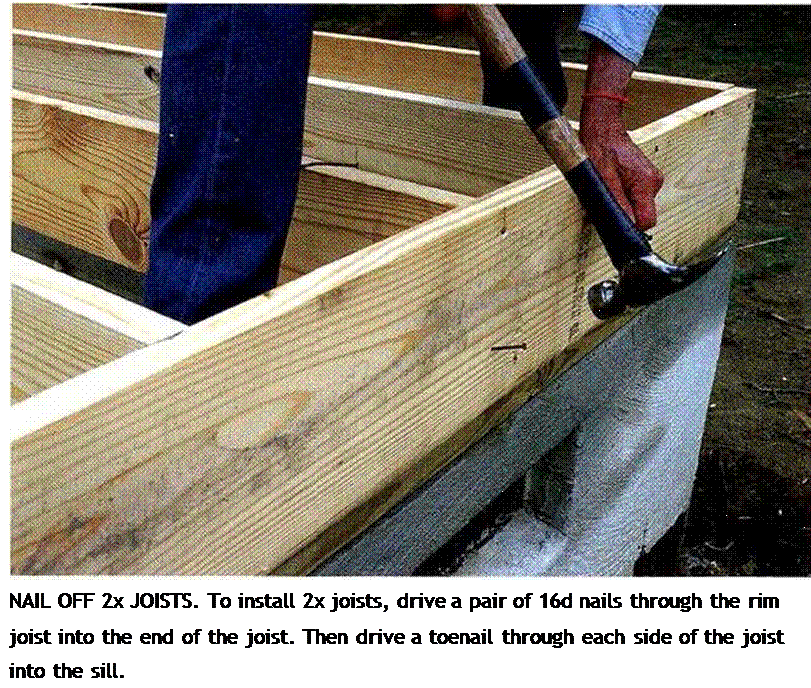
Drive two 16d nails through the rim joist directly into the end of the joist—one nail near the top and one near the bottom (see the photo at right). Most codes also require that joists be toenailed (one 16d on each side) to the sill plates and supporting girders. To nail off an 1-joist, drive a 16d nail through the rim joist and into each chord, then nail the chord to the sill on both sides of the web.


 Make sure that all the joists are nailec. securely. This is important for safety reasons, for quality workmanship, and for meeting the building inspection. Once all the joists are nailed upright, stop and check for symmetry— make sure the line of one joist is parallel with another. This is an easy way to spot layout mistakes. Take the time to check the framing against the details shown on the plans. Corrections are much easier to make now than after the floor sheathing is installed. Enjoy the moment. Joists on edge are beautiful in their own right, clearly and unmistakably showing the promise of a new building.
STEP7 Install Extra Joists and Blocking
Until recently, extra joists were often required under walls that ran parallel to the joists, because they helped support the roof structure. Most houses built these davs use roof
і
trusses, however, which are engineered to span from outside wall to outside wall without the need for interior support. There usually isn’t a need to install extra joists under walls, though some local codes still require them. Check with your town or city building department to make sure.
Similarly, wood or metal bridging is no longer required. Installed in crossed pairs between joists, bridging is often visible


Leave a reply