Fill holes and gaps
Once the trim has been installed, the next step is to set all the nails, then fill and sand the nail holes. Any nails that are above the surface of the wood must be driven below the surface with a nail set (see the photo at left on the facing page). If you plan to stain or polyurethane the trim, fill the holes with matching wood putty. For paint prep, you can use painter’s putty or ordinary Spackle™ applied with a small putty knife or your finger.
Sometimes the miter joints (where the door and window trim meet) are not tight so you need to fill the gaps. There also may be slight gaps between the wall and sections of door and window casing or baseboard trim.
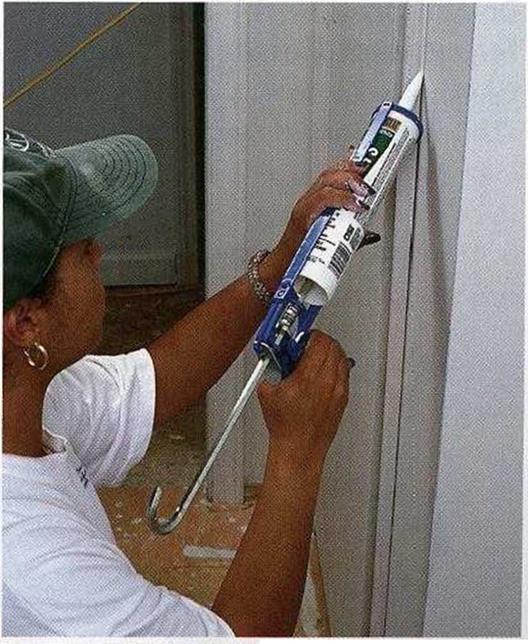
In addition, check for gaps between shelving and walls and around cabinets and other built-ins. All these gaps can be filled with latex caulk, which is paintable and has enough elasticity to move as wood trim expands and contracts with changes in temperature (see the photo at right on the facing page). Wipe off any excess caulk with a damp cloth.
Before painting any trim that has been nailed in place, take the time to remove all the doors and cover the cabinets with paper and painter’s masking tape. I like to use what is called painter’s tape, because it pulls off easily and doesn’t leave a glue residue. Cover finished floors with a paint-absorbing drop cloth. Unscrew the hinges from the door jambs and store them in a box or plastic bag.
Some people paint the trim with the same paint they use on the walls. In that case,


 STEP 8 Paint the Exterior Siding and Trim
On our Charlotte house, we didn’t have a lot of exterior painting to do. We installed vinyl siding, soffits, and windows and covered fascia and rake boards with aluminum cladding. But we still needed to do a bit of exterior painting (door casings and doors, for example). On houses with more exposed wood, you should know how to paint the exterior correctly. Here are some guidelines you can use to make sure your exterior finishing work will look good and hold up well.


Leave a reply