Fiber-Cement Siding
FIBER-CEMENT SIDING has been around a long time. The first house I worked on in the late 40s was covered with fiber-cement siding. It was a bit brittle and not too attractive but just about indestructible. It fell out of favor because it was hard to work with and full of asbestos, while high – quality wood siding was inexpensive and becoming widely available.
Times have changed. Today, wood siding is expensive and often lacking in quality. Modern fiber-cement siding, on the other hand, contains no asbestos and offers all of its old advantages and a few new ones, too. Like vinyl, it’s fairly easy to work with, thanks to the new cutting and nailing equipment available today. Unlike wood, it doesn’t cup, curl, rot, or attract termites. Unlike vinyl, it doesn’t burn, melt, expand, or contract.
Once you learn a few basic techniques, such as how to cut and nail it, fiber-cement siding is easy to install and goes on one plank at a time. The siding can be nailed directly to studs that have been covered with house – wrap. It can also be fastened to vertical furring strips or to exterior sheathing covered with housewrap. The manufacturers’ product and installation information is comprehensive and extremely useful (see Resources on p. 278).
Fiber-cement clapboard siding comes in various widths that are usually 12 ft. long and Xr, in. thick. Both smooth and wood-grain textures are available. For best results, order the siding pre-primed on both sides. After it has been delivered to the job site, keep it covered with a tarp whenever you’re not using it to minimize moisture absorption. Store the siding flat and level, too, so it doesn’t break or warp.
Cutting Tips
Fiber-cement siding can be cut with a regular circular saw and a convert-
|
|
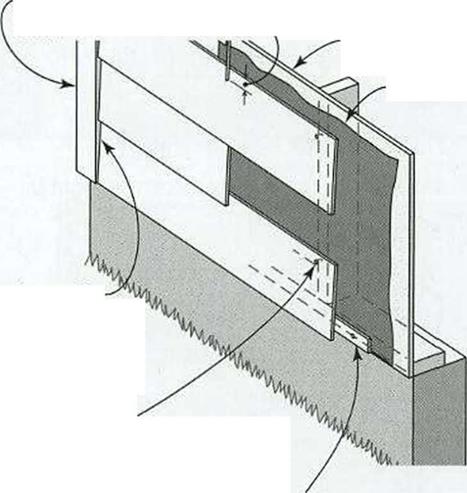
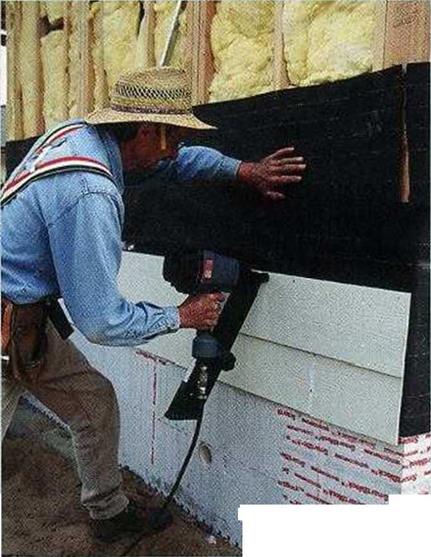
INSTALLING THE SIDING. Fiber-cement panels can be installed over exterior sheathing or nailed against house – wrap or felt fastened to the framing.
tional carbide blade, but a diamond- tipped masonry blade with four to six teeth works much better and is probably cheaper in the long run. The biggest problem with cutting fiber – cement with a power saw is that it creates a lot of dust. Be sure to wear a good dust mask and follow the manufacturer’s recommendations to avoid unnecessary exposure to silica, which can damage your lungs.
I prefer to use a set of electric fiber-cement siding shears, a power tool designed specifically for this job (see Resources on p. 278). The shears cut cleanly, don’t create any dust, and can be used for both straight and curved cuts. For small holes, such as those for exterior electrical outlets, use a jigsaw with a carbide-tipped blade. Cut round holes for pipes with a carbide-tipped hole saw mounted in a heavy-duty, two-handled drill.
Corrosion-Resistant Fasteners
Most companies guarantee their fiber-cement siding for 50 years. Therefore, it will last a long time – provided it’s properly attached with high-quality, corrosion-resistant nails. I generally use regular 2-in.-long, hot-dipped galvanized nails. If I’m working near the ocean or in another area with high humidity, I often use stainless-steel nails.


 |
![]()


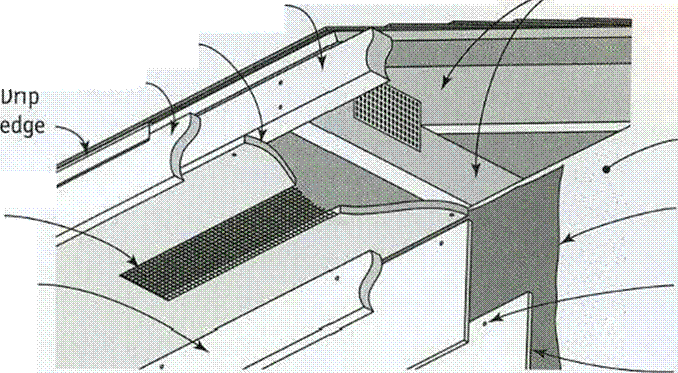



 For the most part, builders use pneumatic nailers to attach fiber- cement siding to walls. I’ve found that a regular pneumatic nailer works better than a roofing nailer (see Resources on p. 278). Make sure that the pressure is set correctly once you get started. Fiber-cement panels can be nailed by hand, but you may need to predrill the nail holes, especially near the ends of planks.
Trim Details
As with wood siding, trim for fiber- cement siding is usually installed first, and then the siding panels are butted against it. Fiber-cement trim is available for inside and outside corners, doors, and windows, as well as for covering fascia boards and soffits.
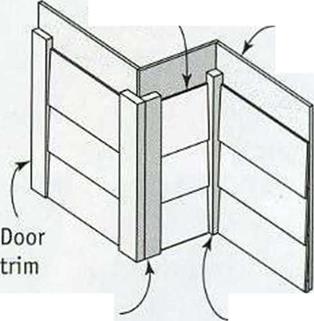
The illustrations at right show a few of the trim details available. These same details also work for wood clapboards and wood shingle siding. The trim should be fairly thick—either 5/4 (ЇЙ in. thick) or 2x—in order to stand proud and cover the ends of the siding.
At the outside corners, the siding can butt against the corner boards or be covered with aluminum corner pieces (called siding corners). These pieces have been used for many years as trim for wood siding and work just as well with fiber-cement siding. The siding is installed first and stopped exactly at the comer. After all the siding is in place, the siding corners can be slipped under each course. A flange at the bottom of the corner hooks a row of siding and a 6d or 8d
Screened
vent
Frieze board
STARTER COURSE, CORNER,
AND NAILING DETAILS
Apply caulk where the siding butts against the trim.
galvanized nail is driven through a hole in the top to hold it in place.
Installing Siding Panels
The installation details for fiber-cement siding are similar to those for wood clapboards. The bottom-most course of siding rests on а 5/б-іп.-thick, 1%-in.- wide starter strip cut from the siding or from pressure-treated wood. The bottom edge of the first course should lap about 1 in. below the top of the foundation. To install subsequent courses, follow the manufacturer’s recommendations for overlapping and nailing.
After you know the amount of reveal the siding will have, you can establish the height of each course. For example, a typical lap on 8!4-in.-wide siding is 1 / in., which leaves a 7-in. reveal. As you work your way up the wall, this reveal can be adjusted slightly (up to lA in.) to maintain a uniform distance between the top of the wall and the uppermost siding course. To make sure the last course of siding will be uniform in width, measure down from the top of the wall frequently (every other course or so) and fine – tune the reveal, if necessary.


Leave a reply