Chair rail adds character
Chair rail is another type of traditional trim that is installed horizontally and often used in kitchens, dining rooms, and sometimes hallways. In days past, chair rail protected the wall
from being marred by the backs of chairs. Today, it is mainly used to add character to a room. Chair rail is cut and installed just like baseboard (see the photo below). Join two pieces with a coped joint at inside corners and a mitered joint at outside corners. Nail the chair rail directly to the wall studs, with the top of the rail 36 in. from the floor.
Most closets in affordable houses get nothing more than a shelf and a pole. It’s my opinion that we can do much better without a lot of effort or expense. Very little extra material is needed to add shelves for socks and underwear, to make a place to hang belts and ties, and to make cubbyholes for shoes. Experience tells me that people like and use such storage. Even if you don’t want to build special storage bins, you can buy them. Many people now use the wire shelving available at home centers.
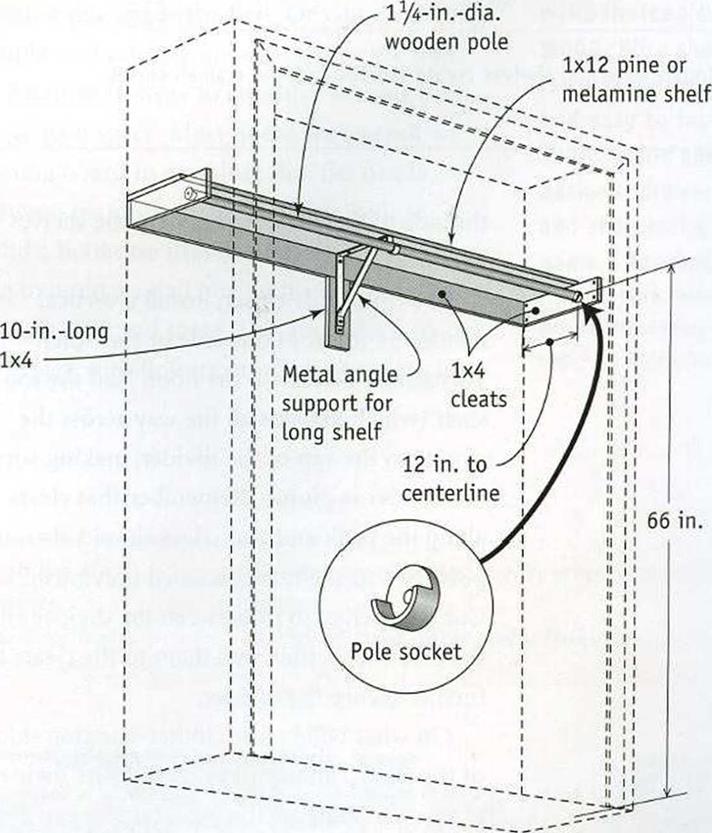
To install a basic shelf and a pole in a closet, measure 66 in. from the floor and mark the back and sides of the closet (see the illustration on the facing page). Then cut cleats (also called rails or ledgers) from 1×4 stock, and nail each cleat so its top edge is on a line. Drive two 8d finish nails through the lx rails and into each stud.
Cut the shelves from 1×12 pine or melamine (particleboard covered with white plastic laminate). A standard closet shelf extends from wall to wall. I like to secure the shelf with a couple of nails driven into the cleat. It’s a good idea to predrill the nail holes.
In a small closet, where the shelf and pole are just 3 ft. long or so, no mid-span support for the shelf or pole is necessary. Each end of the pole rests in a socket that is screwed to a side cleat.

![]()
![]()
![]()
![]()
![]()
![]()
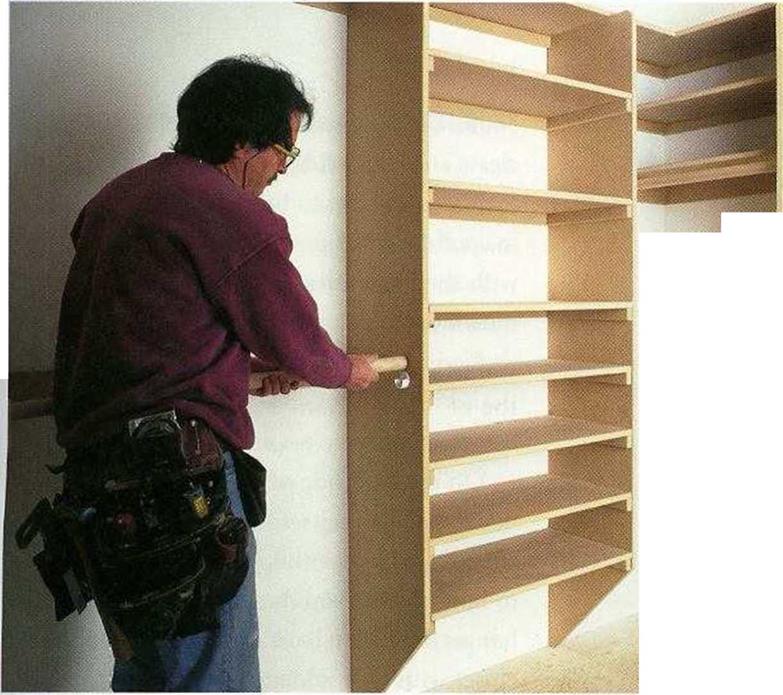 SHELVES CUSTOMIZE A CLOSET. Attaching shelves to a closet wall creates more storage space whi*le giving you more flexibility in locating the closet pole.
[Photo by Roe A. Osborn, courtesy Fine Homebuilding magazine, © The Taunton Press, Inc.]
In a larger closet, both the shelf and the pole need additional support from metal brackets. Place a bracket against a side cleat to determine the location of the pole sockets.
This ensures that the sockets and brackets will support the pole at the same level. Attach the top part of the bracket to the 1×4 horizontal cleat on the back wall, then nail a 10-in.-long piece of 1×4 perpendicular to the cleat and over a stud to support the bottom of the bracket (see the illustration at right).
Add smaller shelves to a closet
Rather than always running a shelf pole all the way across a closet, you can shorten the pole and add a column of shelves at one end, as I shown in the illustration on p. 266. With this design, you can make a typical 6-ft. closet much more useful for storing all kinds of clothes, including shoes. Cut the 1×12 divider 76 in. long, lay out the shelf locations, then attach 1×2 shelf-support cleats to the divider.

 I usually place the two lowest shelves 8 in. and 16 in. off the floor for shoes. For socks and underclothes, I place a shelf every 12 in. above the first two. Fasten corresponding cleats to
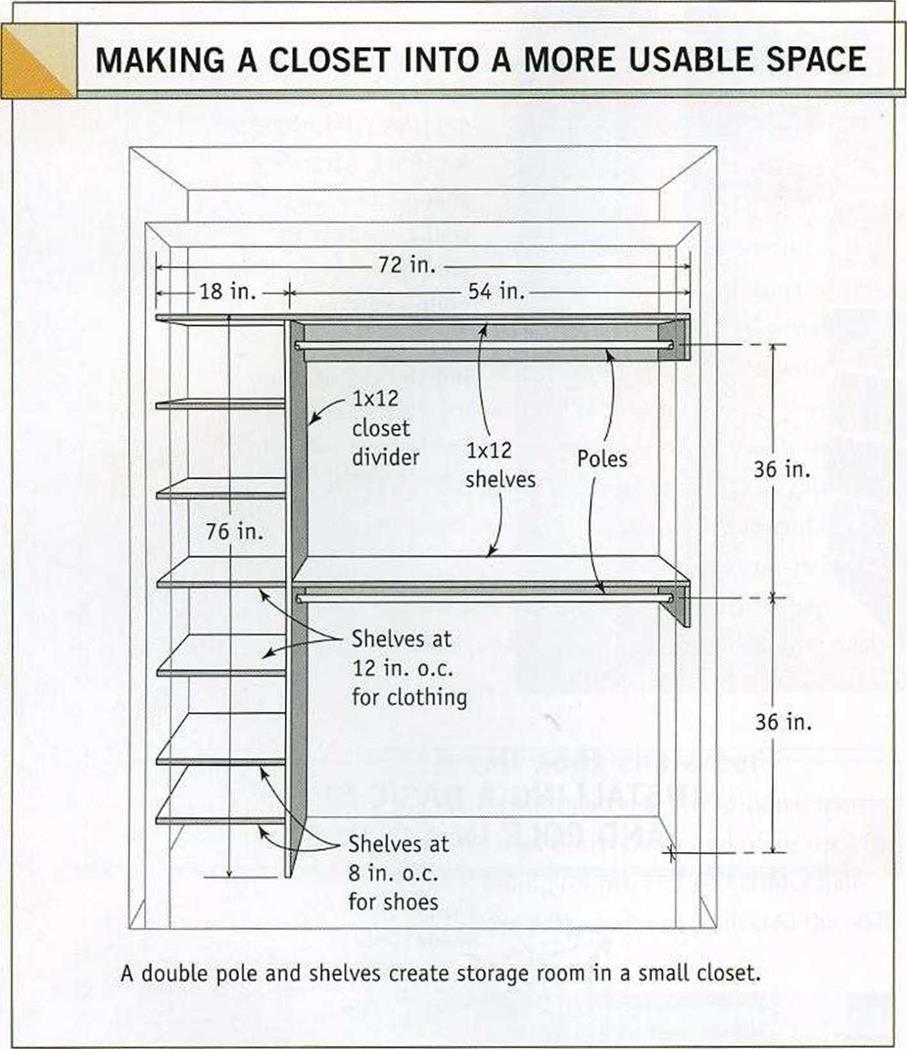
the side of the closet wall where the shelves will be installed.
In a 6-ft.-wide closet, install a vertical divider 54 in. from one side or the other. Toenail the divider to the floor. Nail the top shelf (which extends all the way across the closet) to the top of the divider, making sure the divider is plumb. Remember that cleats along the back and end edges should also support the top shelf, as discussed previously.
Cut the shelves to fit between the divider and the closet wall, then nail them to the cleats to further secure the divider.
On what will be the clothes-hanging side of the closet, attach a 1×4 cleat to the divider at 66 in. to support the pole. Or you can install two poles, one at 72 in. and one at
36 in. The pole sockets are attached to the cleats and the divider.
If you’d prefer to buy shelving rather than make it, you can find plastic-coated 1x12s with shelving holes already drilled in them at most home centers. The shelves sit on small shelf pins that fit into the holes drilled into the divider. This allows you to adjust the height of shelves, just as in a kitchen cabinet.
On the pole side of the divider, put a few hooks to hang belts. On the cleat holding the shelf on the other end, install a hook or two to hold clothes you don’t want to put on a hanger. Now you have a much more usable closet with little added expense or labor.
Trim out a closet with coated-wire shelving
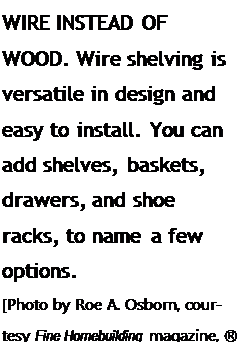
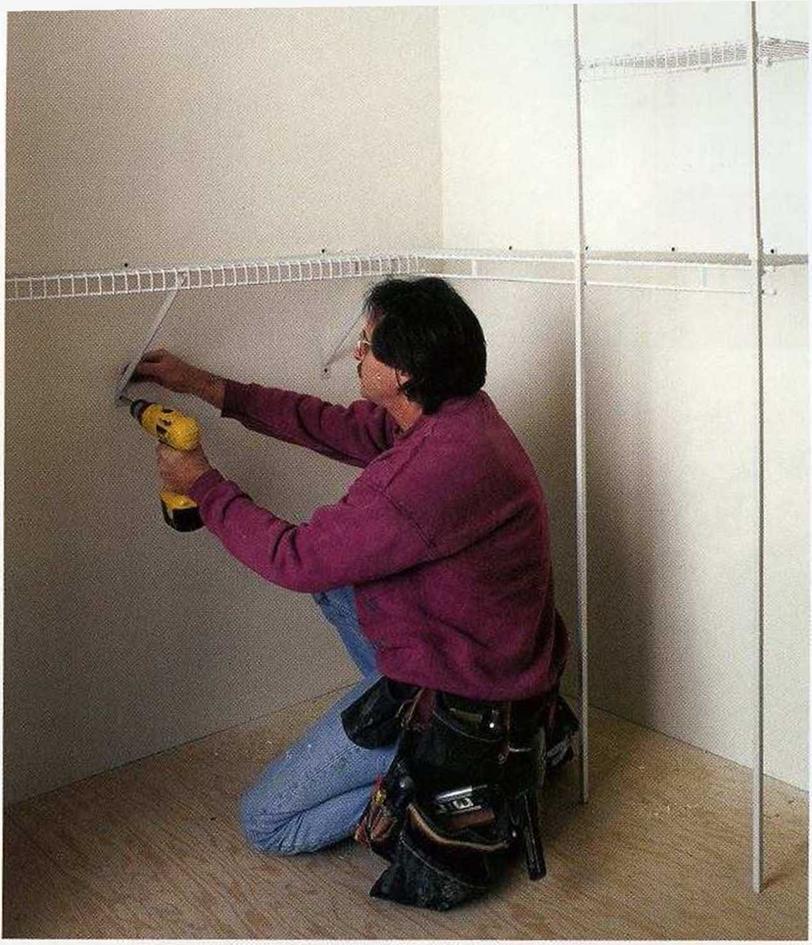
The rubberized wire shelving found at home centers offers many accessories to help organize a clothes closet. The wire frames are strong and open, and you don’t have to paint them (see the photo on the facing page). Besides the traditional shelf-and-pole setup, you can install baskets, drawers, and tie, belt, and shoe racks. The possibilities for arranging your closets with these components are really endless. The only drawback is that they’re more expensive than building simple storage spaces with wood.
1 haven’t installed a lot of this type of shelving, but it isn’t difficult. The instructions that come with the components are easy to follow. Just be sure to make accurate measurements so the shelving is installed straight and level. Some people put backing in the wall frame before drywall is installed so the hooks that hold the wire units can be screwed into solid wood. Otherwise, you can screw the hooks into studs and then use the drywall anchors that come with the shelving units in places where you need support but don’t have a stud.
![]() Install shelves in linen closets and the laundry room
Install shelves in linen closets and the laundry room
A complaint I hear from many homeowners is that they just don’t have enough places to store their belongings. Certainly, most of us could stand to reduce the clutter in our lives, but adequate storage space is in short supply in small, affordable houses. For that reason, it makes sense to get the most out of whatever storage space you do have.
Just as in a clothes closet, you can do a lot with a linen closet by building shelving like that shown in the illustration on the facing page. I like to install the first shelf at 18 in. to 20 in. off the floor, then place shelves every 12 in. to 16 in. up from there. Use 1×2 cleats on each side of the closet, and attach the shelving to the cleats.
Take advantage of all the space in a linen closet (usually around 24 in.) by using full – depth shelves. Melamine shelving is available in various standard widths up to 24 in., or you can buy 4-ft. by 8-А. sheets of the material and cut it to the desired width.
Laundry rooms are oAen just large enough to hold a washer and dryer. Few affordable houses have a large utility room with space for lots of shelves. In a small laundry room,
I install a couple of shelves over the washer and dryer for items such as soap and bleach.
I install the first shelf at 5 ft. off the floor and
|
|
another one above the first. Or you can buy a simple wall cabinet and attach it to the wall.
 |
 |
 |
Another strategy to consider is using built – ins to gain space. Most home centers sell an ironing board in a cabinet that fits neatly between two wall studs. You may want to build a bookcase that fits into the wall. I often like to build a small box with a shelf to place in walls here and there. This provides a place for a vase with flowers or other knickknacks.


Leave a reply