Begin with the posts
The most difficult part about building any railing is making sure the posts are well secured to the deck or stairs. Remember:
People will be leaning against the railings, so make them strong. A post that extends up to the roof framing will be solid and secure.
Short posts that support only the railing are more of a concern. Railing posts should be evenly spaced across a deck or porch and no more than 6 ft. apart. A good height for a railing is 36 in. to 42 in.
I like to notch railing posts to fit against the rim joist and on top of the decking (see the photo below). A notched post, installed with a couple of %-in. or l^-in.-dia. carriage bolts, makes for a strong and attractive installation. For a 4×4 post, make notches I/ in. deep and long enough so the notched post can cover the full width of the rim joist. If the top
of the railing posts won’t be covered by a 2×4 or a 2×6 cap, consider letting those posts run a few inches higher than the top rail and chamfering the top of each post. This technique, explained in the sidebar on the facing page, can enhance the appearance of any railing.
Posts for stair railings can be fastened to an
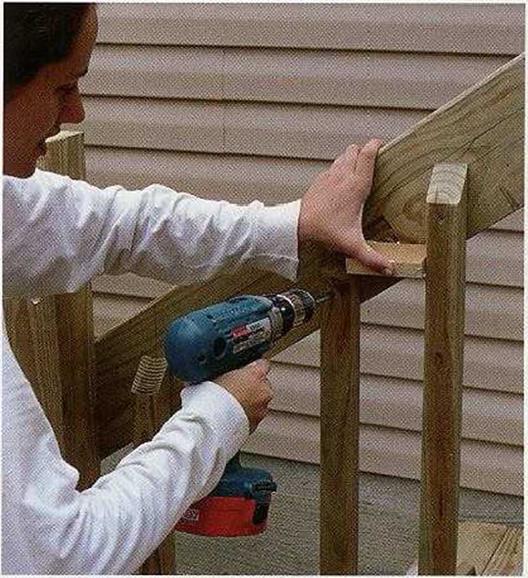
outer stair stringer. Use carriage bolts rather than screws for stronger connections. At the base of a long stairway, where extra strength is
required, the post can be anchored in concrete or to a steel post base embedded in concrete.
RAILS AND BALUSTERS. Once the posts are installed, cut and install the rails. I use PTor cedar 2×4 rails for most of my deck railings. They can be fastened to the outside or the inside of posts, depending on the overall design of the railing. Some builders even notch their posts to accept the rails. No matter which method you choose, secure each rail-to-post connection with two 3-in. deck screws. If your railing design calls for top and bottom rails, install the bottom rail ЗА in. from the deck.
If you like the look of the railing we installed on the Charlotte house, set up a chopsaw to cut balusters 31A in. long, with a 45-degree angle on the top to let water run off. Install the tops of the balusters 1 in. below the top of the top rail, and use 2H-in.-long deck screws to attach each baluster at both the top and the bottom. Using a gauge between balusters is helpful and speeds the process (see the bottom photo on the facing page). Just make sure you keep the balusters plumb as you attach them. Check every now and then with a 2-ft. level, and correct gradually, if necessary.
The handrail on a staircase should be about l A in. wide so that it can be grasped

![]()


CHAMFERING THE TOPS of railing posts or the ends of beams is a nice finishing touch you can add when building a deck or a porch. A plain, square – topped post looks clunky. But in a few minutes’ time, you can give the post a more distinguished appearance. All you need is a Speedsquare™ and a circular saw. For best results, use a sharp, finetoothed blade on your saw. If you haven’t tried this technique before, practice on a spare length of 4×4. Also, you may find it easier to make chamfer cuts "on the flat," with the 4×4 set on some sawhorses.
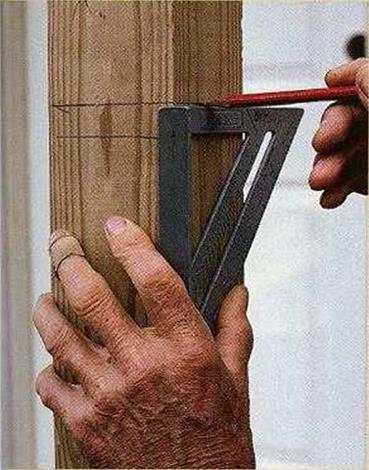
It takes a little more experience with a circular saw to chamfer a post that’s already installed vertically. Here’s how to chamfer a post in four simple steps: Lay out the chamfer lines. As shown in the photo at left, a pair of lines, spaced about 1 in. apart, should extend around all four sides of the post. The upper line represents the length of the finished post.
Cut the post to length. Make a square – end cut to sever the post along the upper layout line. Two cuts from opposite sides of the post should do it
Make the chamfer cuts. Loosen the angle adjustment knob or lever ц on your circular saw, and adjust the cutting angle to 45 degrees. An exact 45-degree angle isn’t necessary, but be sure to tighten the adjustment securely. Now make an angled cut along each side of the post, following the layout line. If you have trouble maintaining a straight cut, clamp a Speedsquare to the post to guide the base of your saw. Another trick for ensur ing a smooth cut is to retract the blade guard with your forward hand before you start to cut.
Sand the post smooth. Use some 120-grit sandpaper to smooth out any rough areas. You can also slightly soften sharp corners.


easily as people go up and down. A 2×6 on edge can be used for a top rail. Position it so the top edge is 32 in. to 36 in. Plumb from the front edge (nose) of the stair treads.
Balusters for the stairs must be individually measured for length on this stair handrail.
Keep the tops of the balusters 2 in. below the top of the handrail, as shown in the photo at right. Screw the bottom of each baluster to the stringer. The area under the stairs (and under the porch) can later be hidden with 4×8 vinyl or wooden lattice panels.
|


Leave a reply