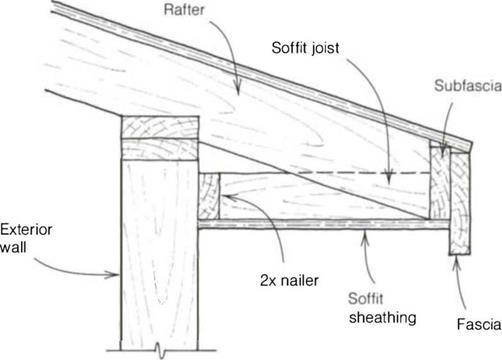
TWO WAYS TO FRAME A SOFFIT


plywood, or siding boards to the width of the overhang and nail it to the lookouts running up the gable end. Fit the stock tight to the barge rafter, but don’t worry if it fits loosely against the wall, because this joint can be covered by siding and trim. Use 6d galvanized nails or screws, because they won’t go through the sleepers and into the roof covering.
Trim makes a house look neat and inviting. It helps give a house its distinctive look. Use good, straight, kiln-dried stock and install it with care so that it will last a long time with little maintenance.
This book deals with just a few of the basic trim options. To begin, I often use 1x cedar or pine for corner boards,

around windows, and where the siding meets the frieze blocks. But thicker stock is available for trim. It’s common to see four-quarter (true 1 in.) material, five – quarter (1 Ул in.), or even 2x (1У2 in.) trim. Most types of siding—particularly lap siding (clapboards)—fit better against thicker trim stock. The thicker stock stands out farther from the building and hides the ends of the siding.
Houses seem to look better with corner boards, which define the house’s outlines and are easy to install. Starting at a gable-end corner, use a small rafter square to scribe the roof pitch (4-in-12, for example) on one end of a corner board and make the cut. Place this piece against the building, flush with the wall edge and butted up to the roof sheathing or soffit (see the photo above).
Corner boards extend down onto the foundation, V2 in. or so below the rim joist or sill plate. So mark at this point and cut the corner board to length.
Nail it flush with the corner of the building—or even У16 in. proud—with 8d hot-dipped galvanized nails. Other options for fastening exterior trim include noncorrosive aluminum nails, stainless-steel nails, or galvanized dry- wall screws. Try nailing a few scrap 1x cleats up the opposing wall to butt the corner board to, because the actual corner, once it is wrapped with building paper, is often hard to locate precisely.
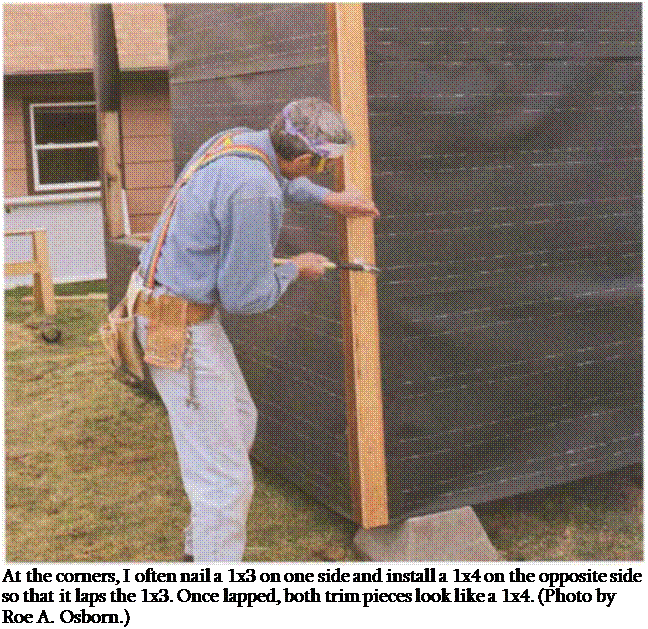
Pull the cleats off and you’re ready to start on the other side of the corner. This piece runs from beneath the end rafter, soffit, or frieze block to the same distance below the sill, and laps over the
 first corner board. To make the corner symmetrical, be sure to rip the thickness of the trim stock off the first board before nailing it into place. If you’re using 31/2-in.-wide by %-in.-thick stock, for example, rip 3Л in. off the first piece of trim (or 11Л in. off 4-in. by 1 Win. stock). When the second piece of trim is nailed over it at the corner, both pieces will be the same width. After marking it and cutting it to length, nail it to the wall and to the other corner board.
Some carpenters connect this joint with waterproof glue. Take care driving nails into the edge of the first board so that it doesn’t split out; angling the nails in toward the corner can help. Trim out the remaining outside corners the same way.
Inside corners trim out a bit differently.
I often use a piece of 2×2 (1У2 in. by 1У2 in.) and nail it directly into the corner from the rafter down, overlapping the foundation by У2 in. The siding can butt directly to this board from either direction, leaving a bit of corner trim showing.
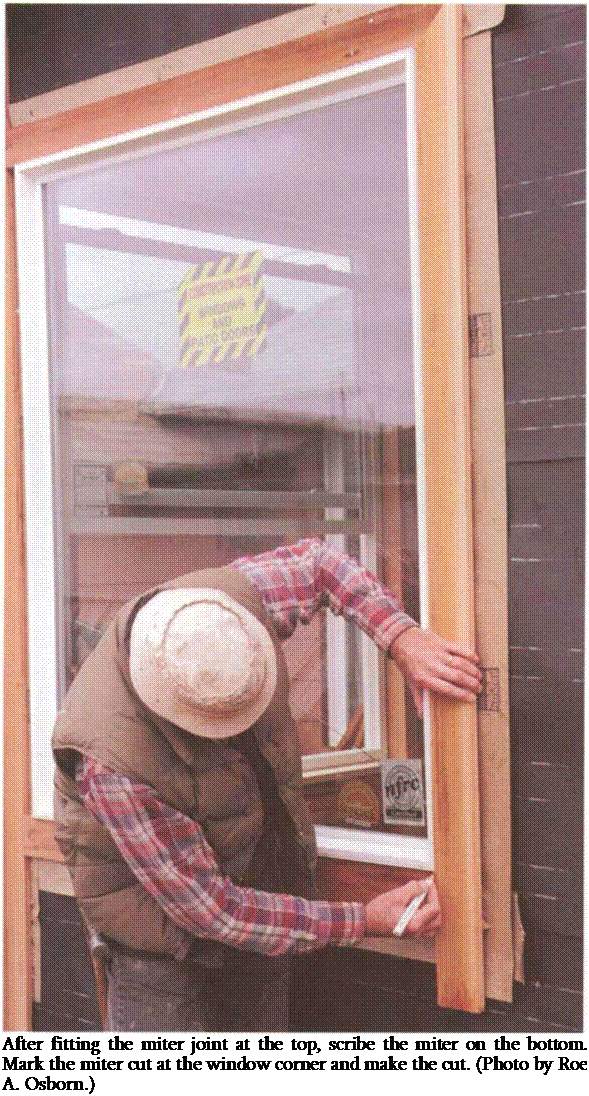
If the windows and doors aren’t already cased, now is the time. Clad windows often are trimmed picture-frame style (with mitered corners) using a type of trim known as brickmold. The trim boards are nailed snugly against the window frame to cover the flange. Framing a window is pretty straightforward: Cut one 45° miter on a piece of trim, place it in position, mark it for length, and then cut a 45° miter at the other end. I find it easier to hold a board up to the window and measure it in place rather than using a tape measure (see the photo at left). Repeat this process all the way around, nailing the trim in place with 8d galvanized finish nails staggered and spaced 16 in. o. c. Finish the process by nailing through the miters to close them up and hold them in place.
If the trim is to be painted, prime or paint the end grain of these miter joints to keep water from soaking into the trim. You can also put a bit of caulk or waterproof glue, such as Gorilla Glue (see Sources on p. 198) at this point before nailing the joint together.
Nailing trim over flanges can be a problem. The thickness of the flange can cause the trim to tip and open up the miter joint. Try slipping thin strips of wood behind the trim to bring the nailing surface up level with the flange. All of these tasks take time, but this is trim that will be seen by everyone. Taking the time to do it right shows you care about your work.
It’s a good idea to install either wood drip edge or aluminum flashing at the top of horizontal trim (for example, at the top of a window). Both are quick and easy to install and help divert water away from the wood underneath. A kerf, or groove, cut in the underside of wood sills and drip edge helps prevent water from creeping back into the wall.
If using a wider casing, try butting the joints instead of mitering. Wood has a tendency to move as it dries out and the house settles, which makes miter joints open up. Let the top and bottom pieces run past the opening and the side pieces butt up to them. I sometimes run a 1 Уг-іп.-thick piece at the top and bottom and 5/4 (1 ’A in. thick) stock between. This creates a reveal, which, unlike a flush surface, can dry out and move and still look good.


Leave a reply