Screwdrivers
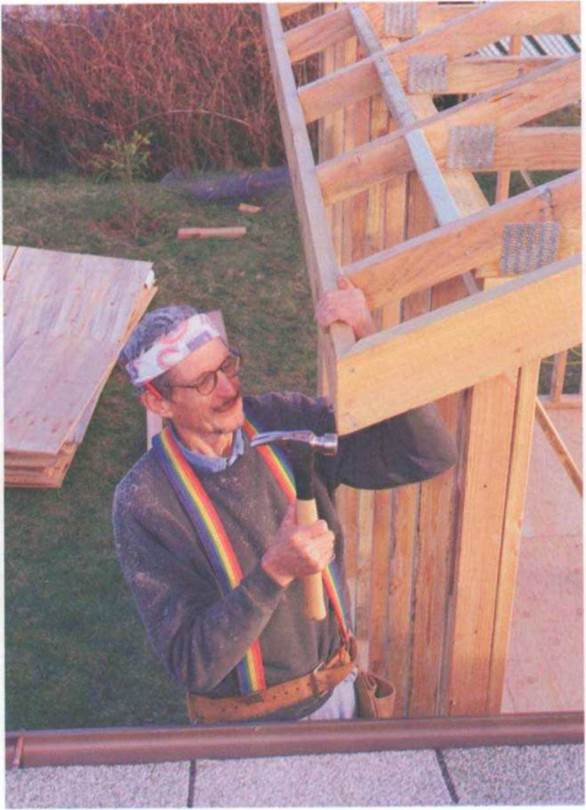
I’ve tried my hand at many jobs.
I worked for several years as a farmer. I was a spiker once, laying railroad track.
I taught Spanish and carpentry at night for years, and I even worked as a counselor for the deaf and for wounded Vietnam veterans. But I always came back to carpentry. It must have been the smell and feel of wood.
Not all of carpentry is easy. Moving and cutting lumber all day long can be hard work. Yet I hardly remember a time when I wasn’t doing carpentry work. I was born in a farming-ranching region of western Nebraska, and carpentry – like sleeping and eating—was something everyone did.
I helped build my first house before I was out of high school. I worked with a kindly old man, a craftsman who taught me "white-overall" carpentry, the way houses were built from Civil War times until about World War II. Hand tools were used to cut the wood and build the homes because few power tools existed.
I was deeply impressed by the beauty of the tools this old carpenter had and the skill with which he used them, and I’m thankful for the knowledge he passed along to me.
When I was still a teenager, the post – WWII housing boom was beginning, and I found myself in Albuquerque trying to

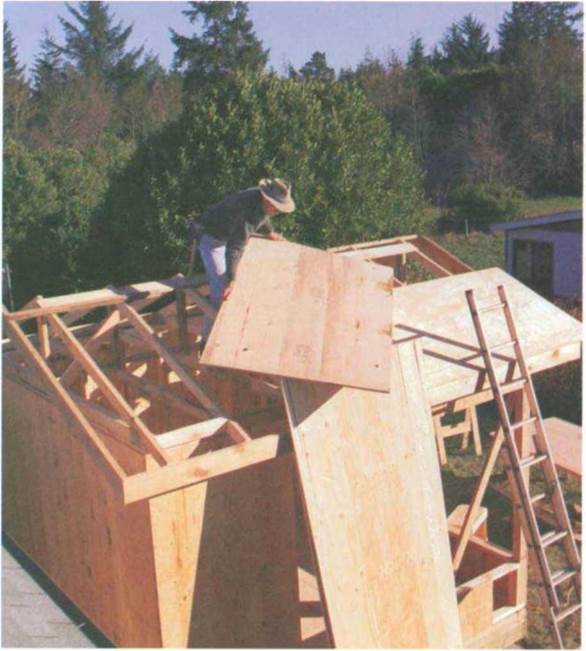 earn money to go to college by building houses with my older brother Jim. Because returning veterans were able to move into houses with nothing down and payments of $75 a month, the demand for housing was enormous. To meet that demand, we had to change the way we built. So, unlike Henry Ford, who took the automobile to the production line, we took the production line to the building site. We laid aside the white overalls and packed our pickups with tools built for speed. I set aside my handsaw and picked up a power saw that could cut wood to size in seconds, and I tossed my 16-oz. curved-claw hammer in favor of a 22-oz. straight – claw hammer that could drive a 16d nail with one lick.
In 1950, at age 19, I moved to Los Angeles to study at UCLA. I went to school three days a week and worked three days as a journeyman carpenter in the union. I got intellectual food for my mind and physical food for my body. On Sundays I rested.
By the mid-1950s, the building boom in Los Angeles was at its peak. Instead of building one house at a time, we were building 500 or even 5,000 at a time. Every person working in every trade was adapting. New tools, new procedures, and new materials were in evidence everywhere. It is a tribute to American ingenuity that we were able to build thousands of new homes without sacrificing quality for quantity. During these fast-paced days, I learned a lot about carpentry.
Nowadays I realize how fortunate I was to learn how to use hand tools from a traditional master builder when I was young. Today’s carpentry is different in that we have all kinds of power tools, nail guns, and hand-held computers that help us build. But carpentry still requires that some basic knowledge of hand
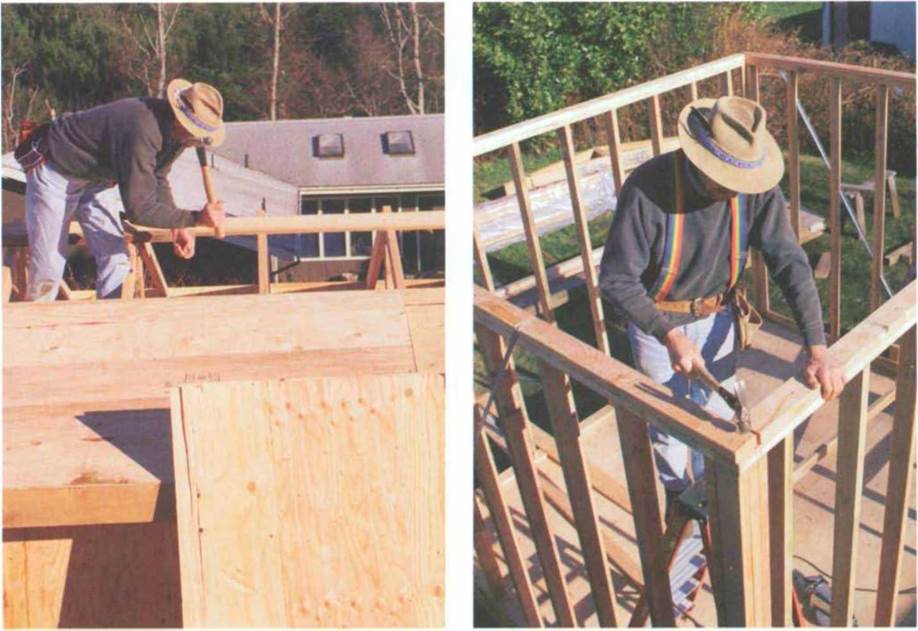 |
tools and layout skills be acquired so we can move on to become masters of our craft And this is my purpose in writing Homebuilding Basics: Carpentry. I want to share with others what I have learned from my teachers. Just as in my first book, The Very Efficient Carpenter, this second book continues the process of making information available to people about carpentry tools and the techniques for using them.
Homebuilding Basics: Carpentry is a step-by-step guide book to building. There is something in this book for anyone interested in carpentry or home improvement. In it, you will learn how to work safely and how to choose and use the basic hand and power tools for car
pentry. You will learn the vocabulary of carpentry so that you can read plans and order building materials. You’ll learn the basic steps of how to put together an entire house. And you’ll see when precision counts and when it doesn’t.
I no longer make my living as a full-time carpenter. Instead, among other things,
I now spend a lot of my time writing and teaching the trade. But that doesn’t mean I have stopped building. I help family and friends who need a willing hand. And my younger brother Joe and I work with Habitat for Humanity, building houses where we live in Oregon. Doing this physical work makes me feel good. It must be the smell and feel of wood.
"Take your time"
"Use the right tools for the job"
"Keep them sharp and clean"
In the end, I think,
there are really only a few simple rules.
—Phillip Rosenberg, A Few Simple Rules
When I started building houses, hand tools were the norm. Cutting wood, drilling holes, and driving nails all were done with hand tools. Even though today these tasks are often done with power tools, hand tools are still a part of every carpenter’s tool collection.
When you’re starting out as a carpenter, knowing which tools you’ll need can be difficult. I’ve been in the trades for years, and choosing a tool is still not easy for me. Each time I walk into a tool center or receive a tool catalog in the mail,
I am amazed by the dizzying array of carpentry tools offered for sale. Even buying something as basic as a hammer can be frustrating when there are 50 different models.
In this chapter I will introduce you to the basic hand tools every carpenter needs: fastening tools, cutting tools, shaping tools, gripping tools, bars, squares, tape measures, marking tools, and tools for checking level and plumb. I’ll also show you a few ways to tote your tools from job to job.
FASTENING TOOLS
Hammers, screwdrivers, and staplers are useful to any carpenter. These are the beginning core of a hand-tool collection and can easily be kept close by—either on a toolbelt or in a toolbucket.
The first hammer I owned as a 7-year – old had curved claws with a wooden handle. It was a 16-oz. model made of iron, and it wasn’t much of a hammer. One claw was broken off, so it wasn’t good for pulling nails, but I learned to drive nails with it. I can still remember the fun I had on warm days, using my hammer to build playhouses, forts, and boxes.
I have been in the trades for more than 50 years, and over that time I have collected and lost a good number of hammers of varying sizes. Depending on the kind of work you will be doing,
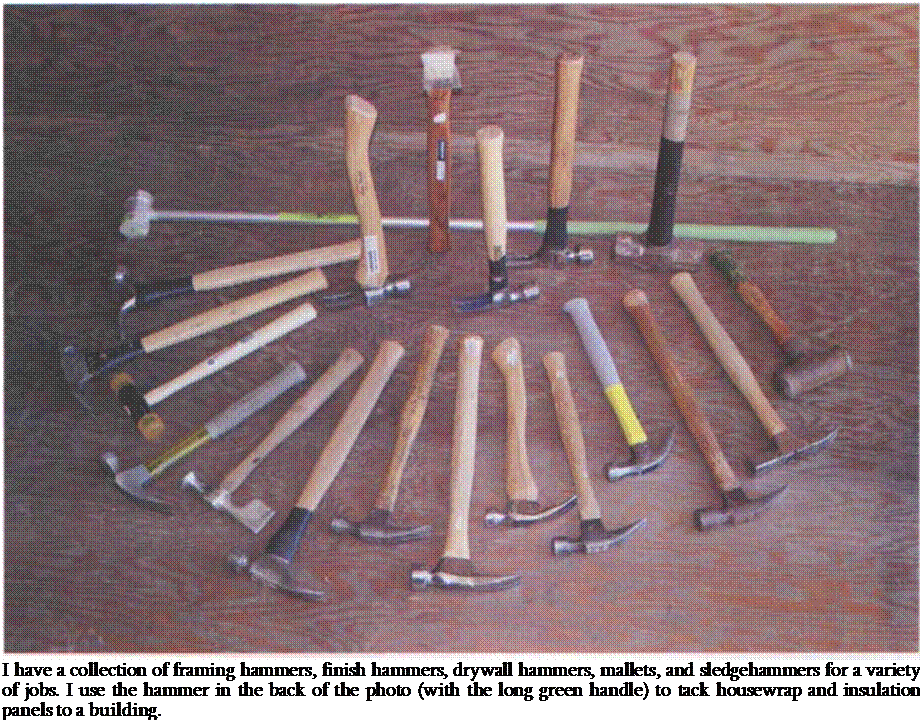
you’ll more than likely build a collection of your own. But before you do that, take time to learn the parts of a hammer, the types of hammers, how to choose a hammer, and how to drive and pull nails with one.
Parts of a hammer The two basic parts of a hammer are the handle and the head. Most handles are made of wood, fiberglass, or steel. A wood handle absorbs some of the shock when hammering, but a fiberglass or steel handle
is so hard that it’s virtually unbreakable.
In most cases, I prefer wood handles, except when I do demolition work. For this job, I prefer to use a framing hammer with a fiberglass handle.
The head of a hammer includes the eye (where the handle enters the head), the cheek (the side of the head), the face (the striking end), and the claws. The face is either serrated or smooth (see the photo on p. 9). A serrated face won’t become slick and slip off the nail head
Safety is a serious issue. On the job site, safe work practices should be followed at all times. Every day construction workers get hurt. Some are temporarily disabled by these accidents. Others are permanently disabled. Even worse, workers often die from job – related injuries.
Working safely is more than just protecting yourself physically with devices such as safety glasses. It’s more than using tools correctly and making sure that blades are sharp. Humans simply cannot be plugged in like power saws and run all day long. Besides a body, you have a heart and a mind that also need protection. The first and most important safety rule I can mention is that you must have your mind on your work, especially when using power tools.
Most of my on-the-job injuries have occurred when I went to work with a battered heart. It can happen to any of us. A death in the family, a divorce, a car accident, or a sick child can make anyone lose concentration on what he is doing, resulting in a mistake. Unfortunately, a mistake on the building site can get someone hurt.
In the ’50s, I built roofs with a partner. He was going through rough times at home with his family. Every morning his body was on the job at 7 a. m., but his mind didn’t get there until around 1 0 a. m. During this three-hour period, he was basically unsafe at any speed. Twice he dropped a 2x rafter on my foot and injured me. One day he cut a huge gash in his forearm with a circular saw. This was before 9-1-1 existed, so I had to stop the bleeding, get him off the roof, take him to the hospital, and find another partner.
So, how can you keep your mind in focus even when times are hard? One thing that has worked well for me is to set aside a time every day for a period of meditation. I use this quiet time to bring my body and mind together. It helps me understand how I feel. Meditation takes some effort and practice, but after 50 years of pounding nails and running saws, I am here with all my body parts intact.
It is also important to admit when you are not mentally right. If you are having trouble focusing on your work, don’t try to tough it out by yourself. It’s okay to confide in the crew leader or a coworker and tell him you are having problems. It’s okay to ask for help to get through the day.
Aside from staying mentally focused, what else can you do to be sure you are working safely? Throughout this book I have included specific safety guidelines for certain jobs and for using certain tools.
during hammering. The drawback of a serrated face is that it leaves a distinct checkerboard pattern on the wood after a missed blow. A smooth face, on the other hand, won’t leave a checkerboard pattern when you miss. Unfortunately, a smooth face makes it easier for the face to slip off the nail head. To help a smooth face "catch" a nail head, you can rough it up a bit by using sandpaper or by rubbing it on concrete a few times. In general, a serrated face is used for rough framing, and a smooth face is used for finish work.
Most hammers, except for mallets, sledgehammers, and drywall hammers, have straight or curved claws that are used to pull nails. I prefer straight claws because they can also be used to move lumber around or to pry boards apart.
Types of hammers f knew a couple of brothers years ago who were framers around Palm Springs. They each had a 40-oz. hammer with a face about the size of a silver dollar. When framing 2×4 walls, they could roll out two 16d nails between thumb and forefinger, start both with one tap, and drive both home with one lick. My framing hammer is
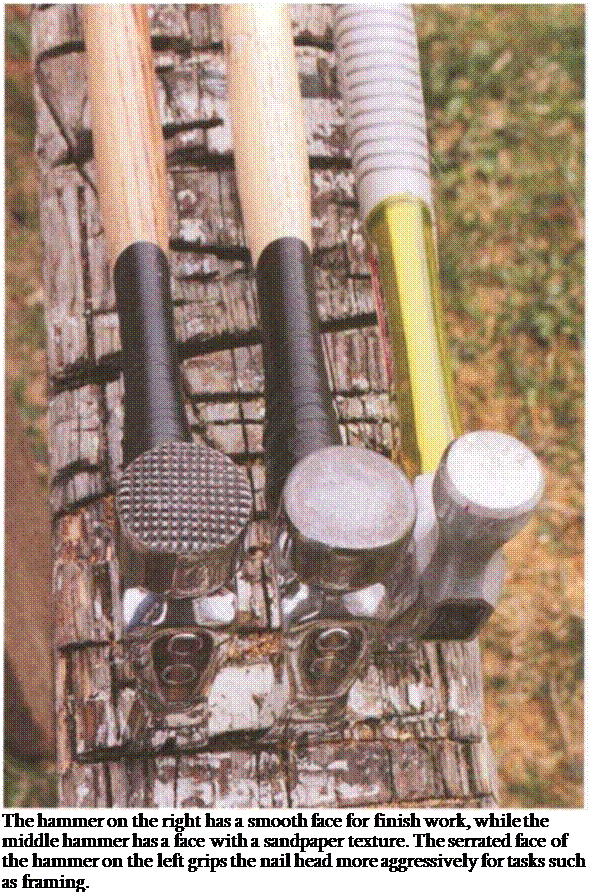
smaller, with a 21-oz. head, an 18-in. oval-shape handle, straight claws, and a serrated face. I like the oval shape of the handle because it fits well in my hand and gives me more control when nailing together rough framing lumber. Other framing hammers have 20-oz. to 28-oz. heads and shorter handles.
A finish hammer is used to nail on items like door trim, siding, and windowsills. I have two finish hammers—16 oz. and 20 oz. Both have straight claws and smooth faces, but the 16-oz. hammer has a 1 б-in. handle that works well for driving small nails. My 20-oz. hammer has an 18-in. handle, and I use it to drive larger nails through siding or exterior trim. My favorite finish hammer is made by Dalluge (see Sources on p. 198). It has a milled face like 120-grit sandpaper, is well balanced, and drives a finish nail without slipping off.
You don’t need a power screwdriver to attach drywall to ceilings and walls. You can still get the job done with drywall nails and a drywall hammer. My drywall hammer weighs 16 oz., has a 15-in. wood handle, a rounded (convex) face, and a blade like a hatchet. The rounded face leaves a slight dimple (which is later filled with joint compound to hide the nail) in the drywall, and the hatchet blade is handy for prying or lifting sheets of drywall.
A mallet is a soft-faced hammer made of plastic, rawhide, rubber, or wood. It is often used to tap a wood chisel because it won’t damage the chisel handle. Mallets come in different weights, ranging from 1Vi oz. to 2 lb., with different handle lengths. The one I use weighs 10 oz. and has a 14-in. handle.
When driving stakes into very hard ground or doing heavy demolition work, you may need a 12-lb. sledgehammer with a 36-in. handle. This tool is also
used to nudge framed walls into position. Sledgehammers come in various weights, ranging from 4 lb. to 12 lb., with different handle lengths. I carry a 6-lb. sledgehammer with a 20-in. handle in my pickup.
Nailing with a hammer
Choosing a hammer A carpenter uses his hammer every day, so it’s important to pick the right one for the job. A hammer will become an extension of your arm, so buy one that feels good to you.
Regardless of which type of hammer you need, whether it’s for framing, finishing, drywalling, or demolition, always buy quality. A cheap hammer made of iron rather than hardened steel will most likely chip or break, like the one I had as a child.
Another consideration is the weight and length of the hammer. The best advice I can give regarding these two considerations is to buy a hammer that feels
comfortable in your hands. Take a swing or two and see how it feels. If it’s too heavy, try a lighter one. If it’s top-heavy, try a shorter or longer handle. It’s all a matter of fitting the hammer to your physical strength and comfort.
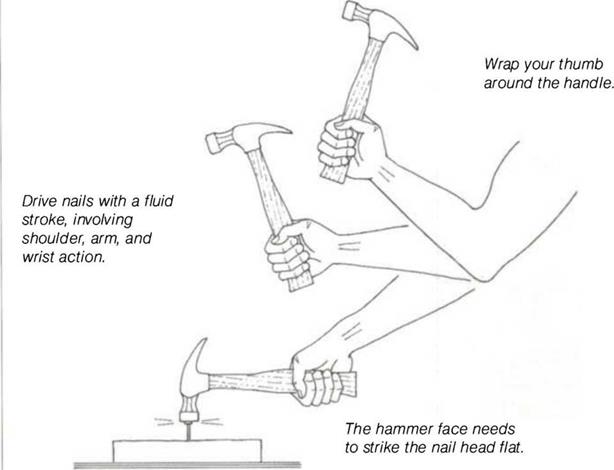
Driving nails Driving nails with a hammer has more to do with rhythm and coordination than it does with power and force. A long swing using shoulder, elbow, and forearm movement, with a decisive snap of the wrist at the end, is important for driving large nails (see the drawing above). Small nails can be driven mainly with simple wrist action. The key to nailing is to hit the nail head flat with the face of the hammer.
Otherwise, the nail will bend or pop out or the hammer will slide off and leave a mark on the wood.
Becoming a good nailer, like becoming a good typist, takes practice. I have heard old-time carpenters tell apprentices to sharpen their nailing skills and to stop leaving "Charlie Olsens" (the C – and 0- shaped indentations left in the wood by the hammer face after missed hammer blows). To practice nailing, I suggest you get a box of 8d or 16d framing nails, find a hunk of wood or scrap 2x, and start hammering nails (see the photo above). Your grip on the handle is critical. There’s no need for a tiring,
white-knuckle hold. Rather, grab the handle near the end with an easy, firm grip and make sure your thumb is wrapped around the handle. Hold the nail on the wood with one hand, start it with a tap, remove your hand from the nail, and drive the nail home. Keep driving until you develop a good rhythm. When driving nails through hard wood, try using softer, direct blows to keep the nail from bending.
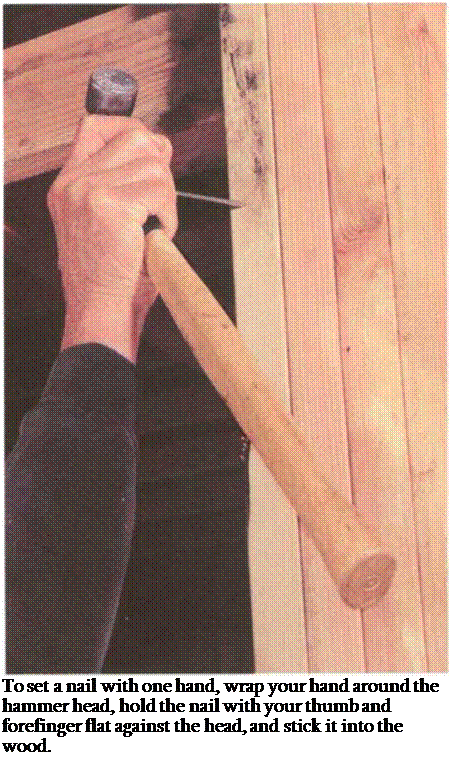
There are times when you need to set (or start) a nail in a hard-to-reach or high-up place. Practice setting this nail with one hand. Wrap your hand around the hammer head, hold the nail with
Like most carpenters, I can tell tales of steel and nails sent flying from a hammer blow. Unfortunately, many of these tales don’t have happy endings. Because the hammer is a striking tool, it can be dangerous, so protect yourself by following a couple of simple safety rules.
First, don’t strike hard steel against hard steel, hammer face against hammer face, for whatever reason. Doing so can break off small pieces of steel (I call it job shrapnel), sending them flying—sometimes into unsuspecting bodies. I have carried a small piece of hammer steel lodged near the knuckle of my right index finger for 40 years.
Second, always wear safety glasses when you’re hammering—no exceptions. Flying steel and nails can be crippling if they hit you in the eye. I know. It happened to me.
In the early ’50s, I was framing walls on a very hot afternoon. Rather than stopping work to wipe the sweat off my glasses, I laid them aside.
I set a nail in a top plate and hit it with my hammer. Unfortunately, the blow barely caught the edge of the nail head, and the nail flew up and struck me in the right eye. It hurt some, but the pain was not intolerable. It felt like someone had poked me in the eye with their finger.
It took a few minutes before I realized that my vision was getting blurry.
The job site was near a hospital, so I drove my car to the emergency room. It took the doctor about 30 seconds to call for an eye specialist. The news was not great. The nail had hit me point-first and had punctured my eyeball, causing the fluid in my eye to leak out.
I was rolled into an operating room and was given a local anesthetic, so I got to watch as they stitched up my eyeball. I could sort of see a curved needle coming down to my eye as the doctor plugged the hole. I was sure wishing I had taken time to wipe the sweat off my glasses. After surgery, I was wheeled to a hospital bed with my head wrapped like a mummy.
After 10 days of wondering, waiting to find out if I would see again out of my right eye, the doctor took off the bandages. Good news. I still had to keep my eyes wrapped for another three weeks, but my vision was going to be more or less okay.
The effects of the accident still linger. Since then, I have had to wear dark glasses in bright sunlight because the eye is very sensitive to light, and stop lights look like amoebas. But I do consider myself lucky. I can see. Learn from my mistake and don’t take chances with your eyes.
your thumb and forefinger flat against the head, and set the nail (see the left photo on the facing page). Some hammers are designed with a magnetic slot to hold a nail for setting in tight spots (Ted Hammers; see Sources on p. 198).
Once you have mastered the art of driving framing nails, practice with finish nails. The two methods differ. When driving finish nails, you need to be more accurate, because a missed hammer blow could destroy an expensive piece of molding or other piece of finish work To get more control, hold the hammer closer to the head. Practice the same way with finish nails as you did with the framing nails. Hold the nail, set it, and drive it.
Pulling nails Pulling nails with a hammer is easy. If you have one with a fiberglass or steel handle, simply hook the nail head with the claws and pull on
 |
 |
the handle. To protect the wood from being marred and to gain better leverage, put a block of wood under the hammer (see the right photo above).
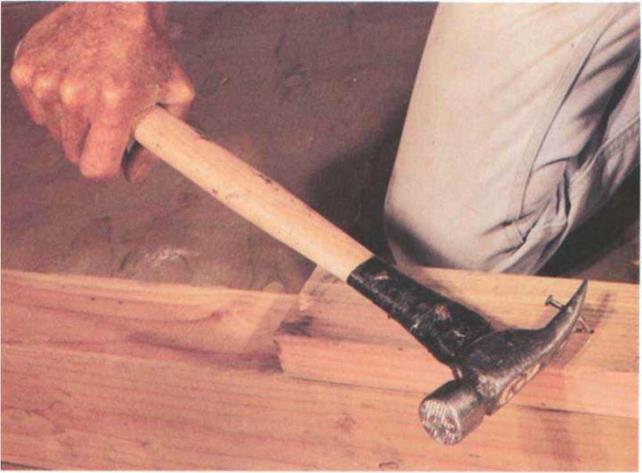
If you have a hammer with a wood handle, you have to be extra careful when pulling a nail to avoid breaking the handle. Slip the long part of the nail (called the shank) between the claws. Hook the shank by the inside ridge of the claws and push the hammer over to
one side (see the top photo on p. 14). Release, hook the nail again, and push the hammer to the opposite side. This should remove the nail or loosen it sufficiently for you to pull it out.
It’s not always practical to grab a power drill to drive screws, especially if you only have one or two to set. So a couple of screwdrivers are still commonly found in a carpenter’s toolbucket. There are two
|
|
When pulling nails using a hammer with a wood handle, hook the nail and push the hammer to one side. Then release and repeat on the other side until the nail is loose.
|
|
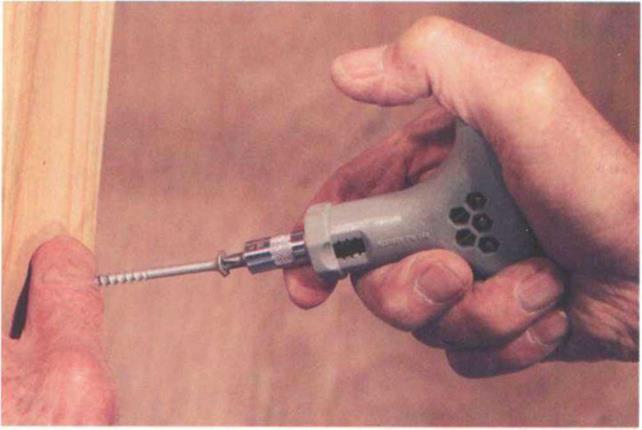
A T-shaped screwdriver with interchangeable bits is compact and holds several bits in the handle, so it’s easy to carry. Its design also allows you to apply a lot of force to driving a screw.
common types of screwdrivers: standard and Phillips. The standard screwdriver has a flat tip shaped to fit a slotted screw. The Phillips has a tip shaped like a cross to fit a screw with a cross-shaped hole. Other types of screwdrivers include square and star-shaped tips.
All screwdrivers come in different lengths with different size tips and blade thicknesses. It’s a good idea to buy a set of screwdrivers with a variety of tip types and sizes. Another option is to buy a screwdriver with interchangeable heads. This type will take up less room in your toolbelt or toolbox. I own a compact, T-shaped screwdriver (Judson Enterprises; see Sources on p. 198) that I carry in my toolbucket (see the bottom photo on the facing page). It’s small but powerful, has a reversible ratchet, and the handle holds the extra bits. In general, I prefer to use Phillips-head screws and screwdrivers because the screwdriver is less likely to slip out of the slot in the screw.
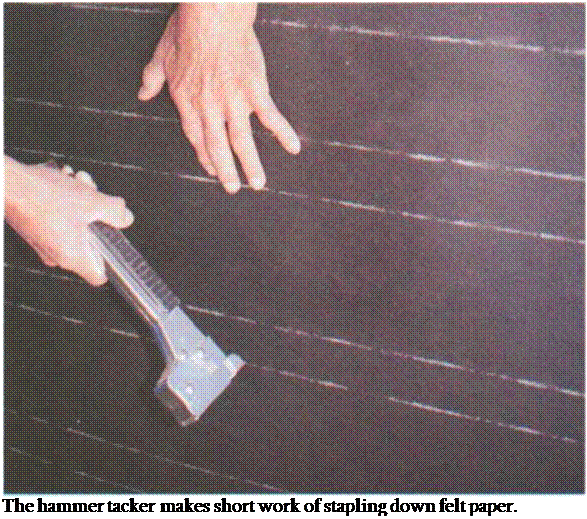
A stapler is a handy tool to keep around. Two types are commonly found on the job site: the hammer tacker and the staple gun. Most carpenters prefer the hammer tacker because it’s fast and easy to use. The hammer tacker is about 1 ft. long and can be loaded with strips of staples. It got its name because you swing it like a hammer (see the photo above). When the tool hits a solid surface, it drives a staple. A hammer tacker usually accepts staples from! Л in. to Vi in. long. It’s most commonly used to tack down building paper, housewrap, plastic vapor barriers, the kraft-paper flanges on fiberglass insulation, and carpet underlayment. On remodeling jobs,
I use a hammer tacker to staple plastic over doors so that dust won’t drift into other rooms.
A staple gun allows you to place staples more accurately. Most models drive staples from ]A in. to 9/i6 in. long. I use a staple gun for installing acoustical tile or for tacking down phone wires. The problem with a staple gun is that squeezing the trigger handle repeatedly can be tiring on the hand and wrist. If you have lots of staples to drive, you may want to buy a small electric stapler.


Leave a reply