Raising the walls
Like barn raisings of old, it often takes a few warm bodies to raise a framed, unsheathed wall. For raising sheathed walls, it takes even more people or a wall jack. For your safety, don’t try either job solo. And, as always, start with a clear deck.
With the first wall assembled, align the bottom plate with the chalkline on the floor if it hasn’t already been toenailed in position. To keep the wall from slipping over the outside edge while it’s being raised, nail pieces of 2x stock to the rim joist so that they stick up above the floor a few inches to catch and hold the bottom plate (see the photo at right). On a slab, bolts hold the bottom plate in place; otherwise, the bottom plate is toenailed to the deck.
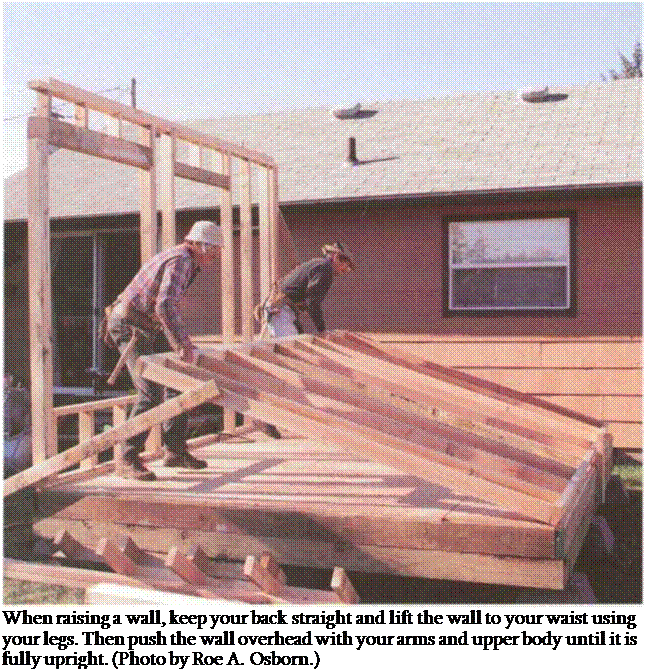
To lift up an unsheathed wall, stick the claws of your hammer into the double top plate, lever the wall up a bit, and kick a 2x block beneath a member. Keeping your back straight, lift the wall to your waist using your legs, then overhead with your arms and upper body (see the photo on p. 120). Then, by pushing on the studs, continue to raise the wall until it is fully upright. Losing a newly raised wall is a common fear of beginning carpenters, but once the wall is upright, it is easy to hold in this position unless a Wyoming wind is blowing.
With the wall in position, nail a temporary 2x brace to each end, extending diagonally from about б ft. up on the corner stud down to the rim joist (I like to attach the brace to the wall before I raise it). Drive a 16d nail in each end of the brace. On long walls, nail other braces in the middle. Make sure that temporary wall braces are secure, especially if you have to leave them over-
 |
night. I’ve returned to a job site to find walls blown over because temporary braces weren’t securely nailed.
If the wall needs to be moved end for end or aligned with the chalkline, tap the bottom plate into place with a sledgehammer. Once the wall is where it belongs, nail it to the floor, using one 16d nail between every stud and beside every king stud. Once again, drive those nails close to the studs to leave room for plumbers and electricians to drill through without hitting a nail. Don’t nail in doorways because you’ll be cutting out the plate when you set the door frame later.
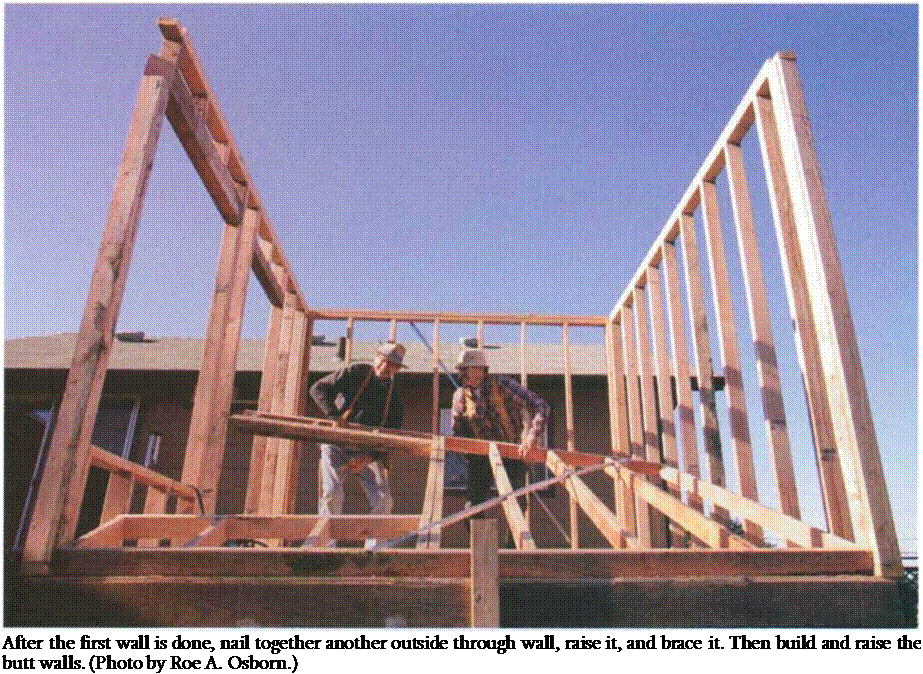
After the first wall is done, nail together another outside through wall, raise it, and brace it. Then build and raise the butt walls (see the photo on the facing page). Remember to cut the double top plate for a 2×4 wall about ЗУ2 in. longer at each end of the butt wall so it can lap over and tie into the through walls. Because of the top-plate overhang, the butt walls may have to be raised one end at a time. Pick up one end to clear the through wall and sort of roll the other end up into position. Remove the temporary brace on the through wall and pull the two walls together. Make sure that the plates of both walls are flat on the floor and not held up by debris,
 |
then nail the end stud of the butt wall into each corner or channel with three evenly spaced 16d nails, just as you did on the three-stud corners. After you’ve nailed together and raised the remaining walls, stand back and enjoy the impressive sight of a framed-in building.
Almost like magic, it’s starting to look like a house.


Leave a reply