Portable sanders
Any carpenter who builds something that will be exposed to view probably has some type of portable sander. I own three: a belt sander, a pad sander (see the photo on p. 57), and a random – orbit sander.
A belt sander is useful for heavy, rough jobs like sanding down a cutting board that needs to be refinished. It can remove a lot of stock rapidly, so use this tool with care. Common belt sizes range from 3 in. by 18 in. to 4 in. by 24 in.
(The small number refers to the width of the belt, while the large number indicates the length of the loop.)
My pad sander (also called a finish sander) has a base pad to which the sandpaper is attached and is powerful
 |
 |
enough to remove substantial stock when fitted with coarse-grit sandpaper. However, I use it mostly for finish work, including prepping trimwork for paint. I
Sanders create a lot of dust, so choose one with a dust bag and an efficient dust-collection system to help reduce the amount of sawdust that gets airborne. Whether your sander has a dust bag or not, it’s also a good idea to always wear a dust mask or respirator when using a sander to help keep fine dust from getting into your lungs.
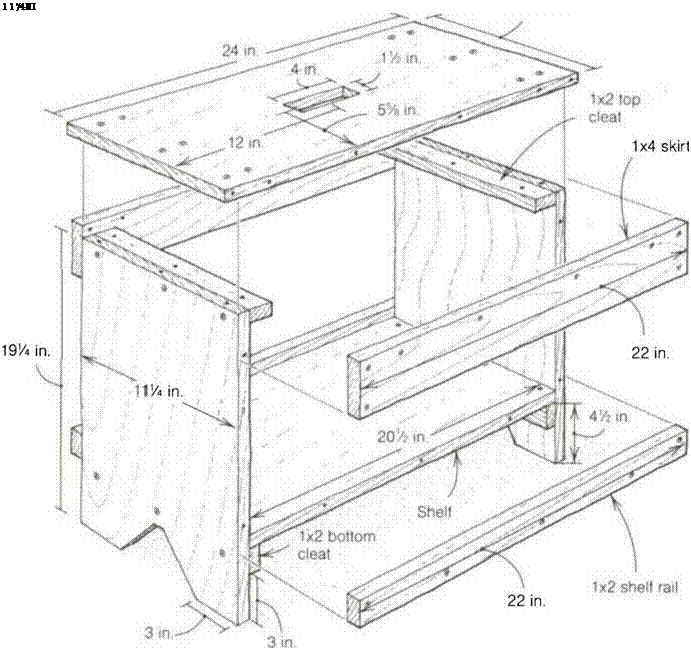
A workbench is a handy item to have on the job site. Here are plans and instructions for building a sturdy 2-ft.-long by 20-in.-high workbench that can be used to carry tools, to support wood that needs cutting, and even to stand on when working overhead.
CUTTING THE PARTS
Begin by cutting the top, the shelf, and the ends.
Lay the 8-ft. 1×12 on the floor over a piece of 2x so the cutoff end can fall free, then measure down 24 in. for the bench top. Using a square, mark a line
across the wood at this point. Cut just beside the mark so that the top will be a full 24 in. long. Carpenters sometimes call this “leaving the line.” Don’t worry if the cut isn’t quite perfect.
Now measure 201/2 in. down the 1×12 for the shelf and draw a cut line across it using the square. Make the cut, but remember to leave the line. Lay the shelf and top aside and cut the two end pieces to a length of 191/4 in. from the remaining 1×12.
Tools
 Nail apron Hammer Tape measure Pencil
Small square Drill with 3A-in. spade bit, Уіб-іп. twist bit, and Phillips-head bit Reciprocating saw Circular saw
Materials
8-ft 1×12[5]
8-ft. 1×2*
4-ft. 1×4*
About 20, 1 Win.
drywall screws
About 40, 11/2-in.
drywall screws
Ten 6d box nails
80-grit sandpaper

|
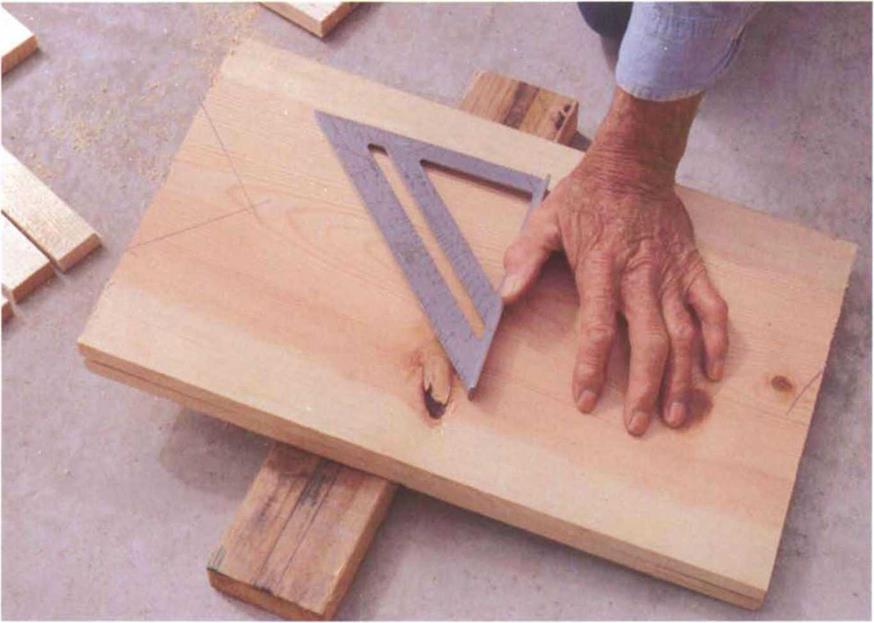
Lay out the “feet” on the end pieces next. To make the feet identical on both end pieces, place one on top of the other. Measure in 3 in. from the end, hold the small square to this point, and mark a 45° line to the center, creating a V (see the photo above). The top of the V should be about 3 in. from the bottom of each piece. Cut out this V section.
Next, cut two 22-in. skirts from the 4-ft. 1×4. The skirts will help strengthen the bench top. Now grab the 8-ft. 1×2 and cut two 22-in. shelf rails and four 111/4-in. cleats.
ASSEMBLING THE WORKBENCH
Start the assembly by attaching the cleats to the end pieces. The top cleats help tie the ends and top together. The bottom cleats help support and tie the shelf to the end pieces.
Lay one of the end pieces on top of the other, but place them on some 2xs so you don’t drill into the floor. From the top, measure down 3/e in., draw a square line across, and drill three 3/ie-in. holes across the line, spaced evenly. From the bottom, measure up 33A in., draw a square line across, and drill three more holes.
 |
 |
Place a cleat on edge on the floor and place an end piece on the cleat flush with the top. Join the two with three 11/2-in. drywall screws. Drive the screws slowly and with care using a Phillips-head screwdriver. If you drive them too fast or too deep, you could strip the screws. If you make a mistake, drill another hole through the side and try again. Repeat for the other side.
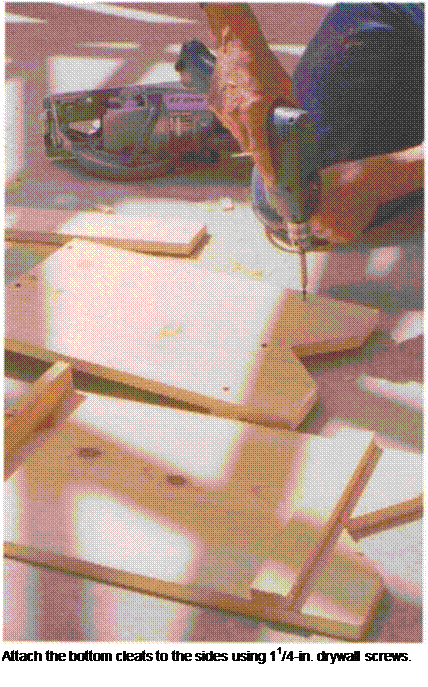
Now attach the bottom cleats. To help ensure that the cleats will be level and straight, use a square to draw a line across the side just on top of the V (3 in. from the bottom). The bottom of the cleat should sit flat on that line. Now drive three 11A-in. drywall screws through the holes in the side and into the cleat (see the left photo above). Repeat for the other side.

Next comes the top, which overhangs the end pieces 1 in. on both sides. On the underside of the top, draw a line 1 in. from each end to mark the outside edge of the end pieces. Hold an end piece to the 1-in. line. Drill three 3/ie-in. holes through the top and drive three 11А-іп. drywall screws or three 6d nails through the top and into each cleat. Repeat for the other side. Now stand the workbench up. Take a look to see if everything is in proportion.
Trust your eye; if it looks good, it is good.
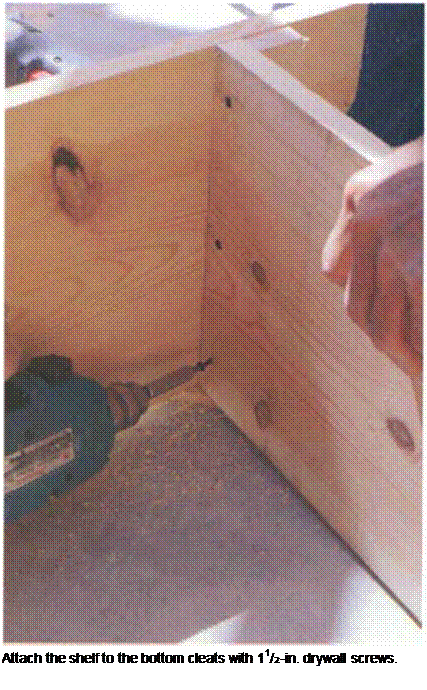
The shelf comes next. Measure in 3/s in. from one end of the shelf, draw a line across with the help of a square, and drill three 3/ie-in. holes along the line, one about 1 in. from each end and one in the center. Repeat on the other end. Set the shelf between the ends and rest it on the bottom cleats. Attach it to the cleats with three 1Уг-іп. drywall screws on each end (see the right photo on the facing page).
Next come the 1×4 skirts. Drill two 3/ie-in. holes 3/e in. from each end of a skirt. Then drill four 3/ie-in. holes along the length about 3/e in. from the edge. Repeat for the other skirt. Attach the skirts flush with the top of the bench using 1 Уг-іп. drywall screws.
Now grab a 1×2 shelf rail and drill one 3/ie-in. hole 3/e in. from each end and three more along the length 3/s in. from the edge. Repeat for the other rail. Attach the bottom of each rail flush to the bottom of the shelf using 1 Уг-іп. drywall screws.
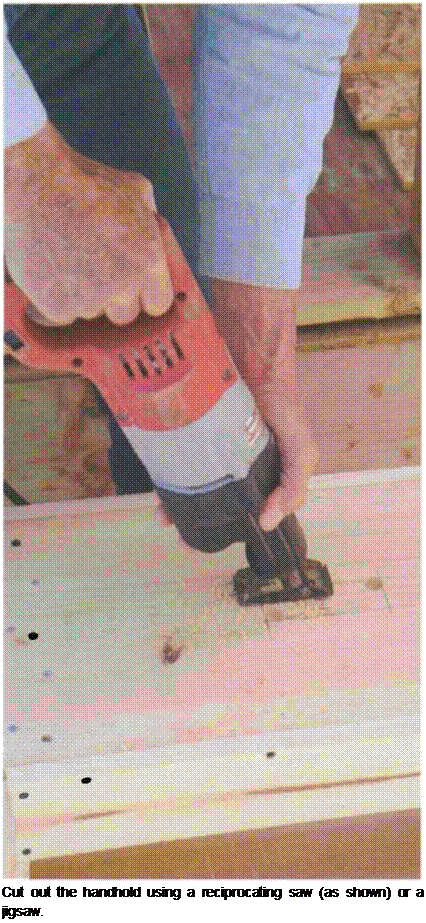 It’s nice to have a handhold in the top so that you can move the bench around. In the center of the top, lay out a handhold so that it’s 1 V2 in. wide and 4 in. long. Drill a 3A-in. hole in opposite corners using a spade bit. Use a reciprocating saw or jigsaw to cut out the wood between the holes (see the photo at right). Sand the edges of the hole with 80-grit sandpaper. Then round the corners of the top with sandpaper. Now you’re ready to go to work.


Leave a reply