ON THE JOB SITE
There’s more to carpentry than the ability to drive a nail with a hammer.
A big part of being a good carpenter is knowing not only the names of tools and how to use them but also the parts and materials that make up a house. Whether it’s a 6d finish nail or a frieze board, you need to know what your coworkers are talking about.
In this chapter, I’ll discuss briefly the parts of a typical house and how they go together. Then I’ll talk about the various materials (lumber, fasteners, hardware) that make up a house. Knowing the parts and how they go together will help you read plans and learn howto estimate and order the amount of materials needed.
THE HOUSE STRUCTURE
When I was a child, I thought that houses just were. They existed like the hills, the trees, and the wind. It was only when I saw houses actually being built that I realized they are put together board by board and nail by nail. The construction starts at ground level, with the foundation.
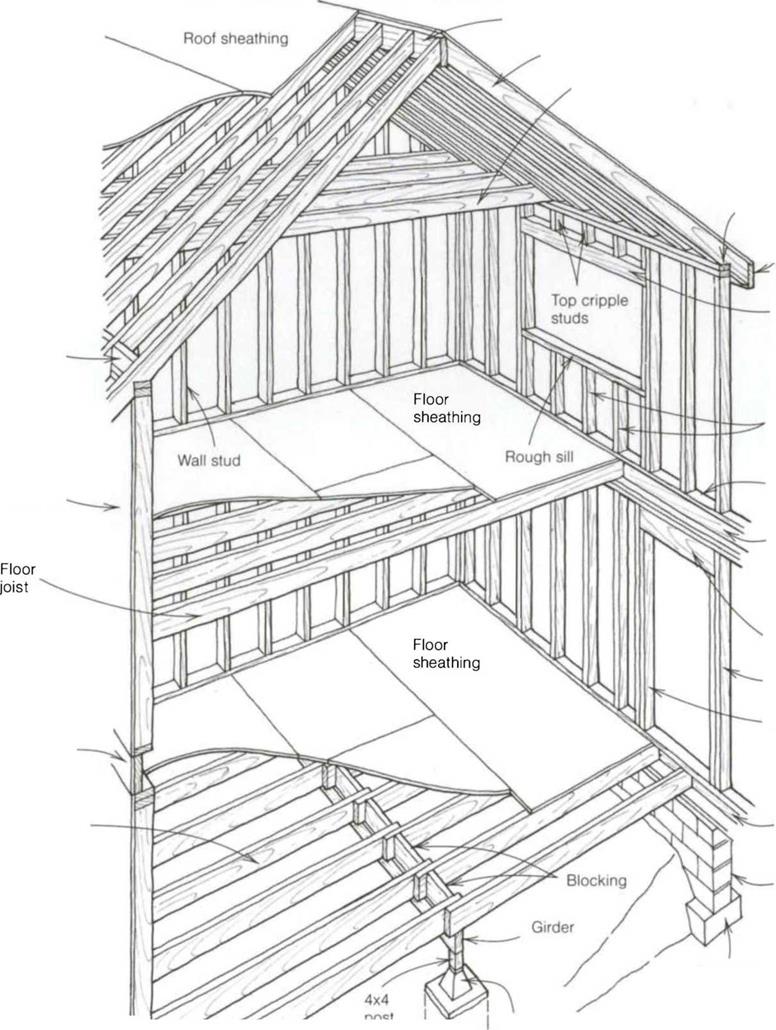
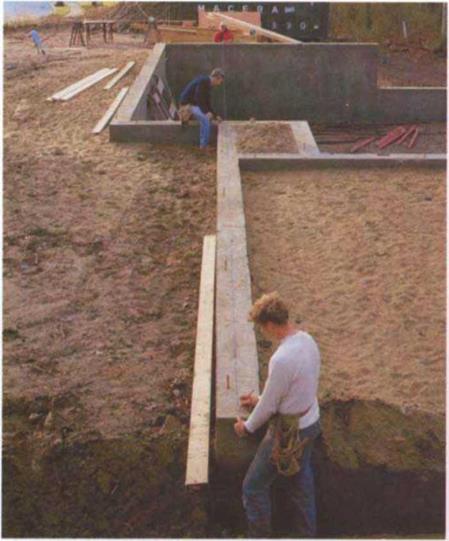
The foundation of a house can be a full concrete basement, concrete stemwalls (short walls) with a crawl space under the house (see the left photo on p. 66), a concrete slab, concrete piers on footings, or pressure-treated wood on solid ground. Local codes and soil conditions generally dictate the type of foundation that a house will have.
Pressure-treated mudsills installed on the top of foundation walls help tie the floor system to the foundation and support the floor joists. Pressure-treated wood is impregnated with a preservative that inhibits dry rot (a fungus that can destroy wood) and helps repel termites, which can otherwise make a meal of your house and cause a lot of damage.
Pressure-treated wood is usually easily identified by its greenish color, and, because of the chemicals used in it, you should handle it and cut it with care.
I wear gloves and a long-sleeve shirt when working with it to keep the chemicals off my body; I also wear a mask to help avoid breathing the dust.
Girders are often needed to support floor joists with long spans. The size of the girders will vary, depending on the load they carry. The house plans will indicate the size, based on local codes.
|
|
|
|
|
|
|
|
|
|
|
|
|
|
|
|
|
|
|
|
|
|
|
|
|
|
|
|
|
|
|
|
|
|

|
|
|
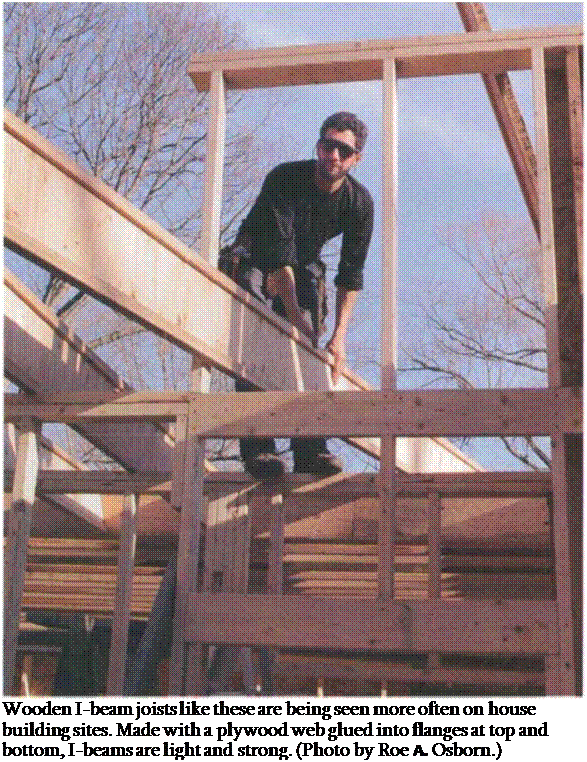
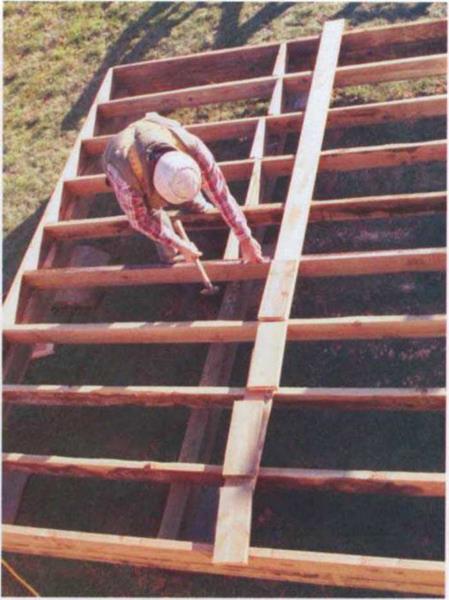
Floor joists are placed horizontally over and perpendicular to the girders and form the platform, or floor, of a house (see the right photo above). Joists are usually spaced 16 in. or 24 in. on center (o. c.). Today, many builders use manufactured joists (such as Trus-Joists) rather than regular 2x lumber because these joists are straight, can span long distances, and don’t shrink much (see the photo on the facing page).
Floor sheathing—generally 4×8 sheets of 5/s-in. or 3A-in. tongue-and-groove plywood or oriented strand board (OSB)—comes next. To help eliminate floor squeaks, the sheathing should be glued to the joists with construction adhesive and then nailed in place.
Wall plates are the horizontal members that hold together the pieces in a wall. Each wall has three plates—one on the bottom and two on top (called a top plate and a double top plate, respectively). The plates are usually made from long, straight 2x stock. The width of the plate stock depends on the width of the walls. Exterior walls often are built with 2x6sto accommodate the extra insulation required by many building codes. Interior walls (both studs and plates) are typically built from 2x4s. If you are framing on a concrete slab, the bottom plate needs to be pressure-treated wood to resist rot and insect damage.
Studs are the vertical wall members nailed to the wall plates. Typical spacing is either 16 in. o. c. or 24 in. o. c. The
 studs are the same width as the plates.
If you are building a house with 8-ft. ceilings, you can save time and avoid waste by purchasing studs precut to 921A in. This length, plus the three horizontal 2x plates—which are actually 11/2 in. thick (for more on lumber dimensions, see the sidebar on p. 68)—gives you a wall height of 963A in. After putting Уг-іп. drywall on the ceiling, you’ll have a ceiling height of roughly 8 ft.
Where there are openings in walls, whether for doors or windows, the load (or weight) from the upper stories or roof must be transferred around the opening and down to the foundation. Otherwise, the weight from above may not allow a door or window to open and close properly and could cause other, more serious, structural problems like a sagging roof. This load transfer is accomplished with a header and a pair of wall studs. A header is a horizontal member that is sized according to the width of the opening and the load bearing on it. For example, a garage-door header has to be much larger than a standard window header because the garage opening is larger.
Wall studs are nailed into the header on each end. The header is supported by a trimmer stud (the same width as the wall studs) placed underneath on both ends. A trimmer stud runs from the bottom plate to the header on a door and from the rough sill to the header on a window. The space between the header and the double top plate or the windowsill and the bottom plate is filled with cripple studs (also called jack studs).
After all the walls have been framed straight and plumb, the ceiling is covered with joists, just like the floor, and the roof is built. The traditional method of building a roof is to connect a series of rafters to a ridge beam that runs the length of the building. These days, how
ever, many houses are built with roof trusses delivered fully assembled to the job site. Trusses consist of a rafter chord, a joist chord, and posts and webbing between the chords to give them structural strength (see the photo on p. 69). Trusses are strong, make building a roof fast and easy, and are available just about everywhere in the country.
Once all the walls and roof have been framed, the house can be sheathed (though sometimes walls are sheathed

before being raised). Exterior walls are most often sheathed with 4×8 sheets of Уг-іп. plywood or OSB. Roofs are usually sheathed with Уг-іп. to 5/s-in. plywood or OSB (depending on the span between rafters).
Once the house has been sheathed and roofed, windows and doors are installed, the house is sided, and the interior is fin
ished and trimmed out. That’s the basics. I’ll explain the process in detail in Chapters 4 through 8.
LUMBER
Now that we’ve covered the basic parts of a house, let’s look at the specific materials that go into it. Lumber is graded for both strength and appearance. Construction-grade lumber used in


Leave a reply