Installing the gable-end truss
|
|
||
|
|||
|
|||
|
|||
|

the pile, and with the ridge point behind them, walk along the plates to the other end of the house frame. There, they flip the truss over with the ridge pointed out lying flat across the walls. Subsequent trusses lie on top of the first about every 2 ft like fallen dominoes.
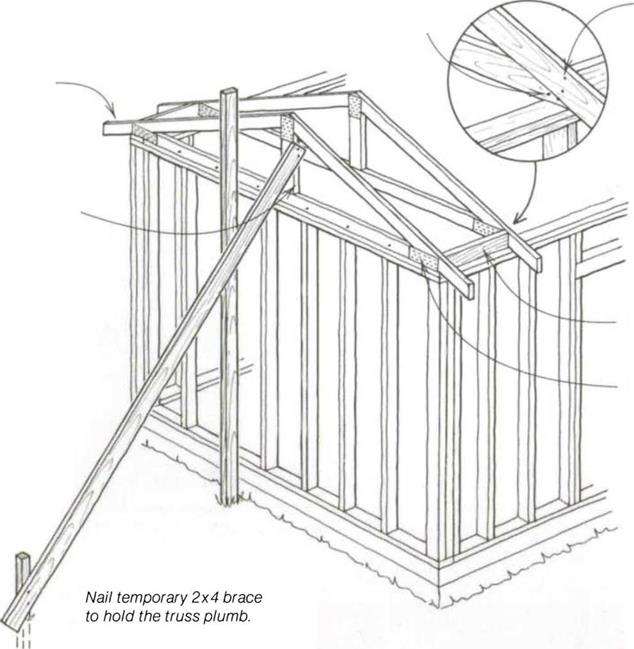
Before raising the first truss upright, nail a 2x on edge against the outside wall frame near the center of the building. The gable-end truss will be nailed to this 2x, which will help hold the truss plumb (see the drawing above). At this point, you can raise a gable-end truss upright
and move it out flush with the outside of the end wall. Make sure you have the proper roof overhang on each side of the building and toenail the truss down through the joist chord into the double top plate with 16d nails spaced 16 in. o. c. Drive a temporary nail through the rafter chord into the upright 2x brace to hold the truss plumb. Brace this truss with a long 2x reaching to the floor or to a good stake driven in the ground.
Now come the frieze blocks, which are the blocks between rafters. When a house is to be covered with stucco,
 |
blocks are often nailed vertically, directly on the top plate, flush with the outside. When the wall is covered with siding, blocks can be nailed just outside the wall and square with the truss, with the back side of the block touching the wall.
Frieze blocks serve as stops for the siding, eliminating the need to cut the siding around the rafters. If the rafter tails are to have a soffit (enclosed eaves and overhangs), nail the blocks directly over the walls. Remember, about every third block often contains a vent.
Nail the first frieze blocks into the gable truss at both outside walls with two 16d nails through the truss and into the block. Bring the next truss into position and set it with the rafter tails hanging over the same amount as the first.
It’s important that every truss overhangs the same amount so the rafter tails and ridge will be straight. Some carpenters go to great lengths—pulling lines, checking each rafter with a spacer—to ensure absolute straightness. I think it’s easier to set each truss close to right. When the entire roof structure is in place, snap a chalkline across the rafter tails and cut them to exact length. Now the fascia, which covers the ends of rafters and can be seen by the entire world, will be straight.
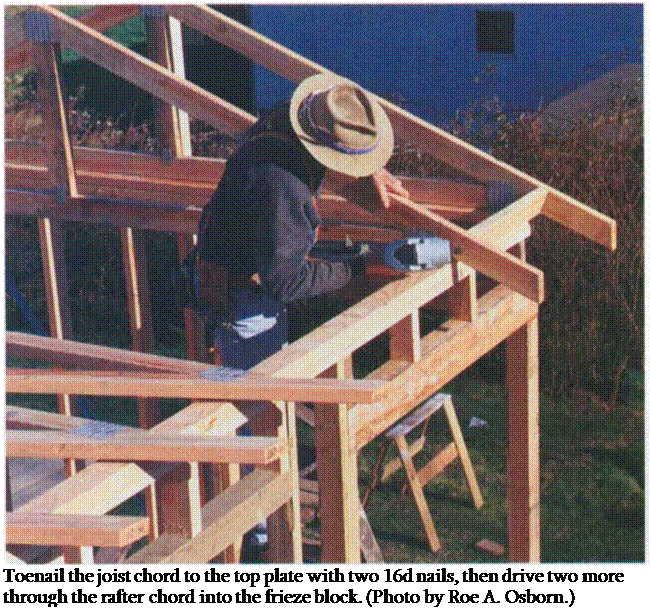
Toenail each truss to the top plate through the joist chord with two 16d nails on one side and one 16d nail on the other side. Then nail it to the frieze block (see the photo above). Once you set the second truss, measure to see if the block length is correct to give you

24-in.-o. c. spacing. Keep checking this as you set subsequent trusses. When you reach the other end of the building, make sure the second gable-end truss is nailed flush with the outside wall just like the first.


Leave a reply