FRAMING THE WALLS
Once the plates are marked up and detailed, you can begin to assemble the walls. When I first started framing walls, carpenters used to toenail a stud in each corner, string the top plate across from stud to stud, and then work off a ladder to nail in the remaining studs. Each wall took a long time to build because we had to nail in one stud, move the ladder, and nail in another. And the fact that we were working on ladders made the work unnecessarily dangerous. It wasn’t long before we learned to frame walls flat on the floor, then raise them into position.
If you’ve done a good job marking the plates, framing walls should be easy. Simply follow the marks, nailing in studs where needed. But first, clean the floor. There’s no need to have extra wood or tools around that might trip you up.
Now the puzzle goes together. Begin by nailing on the top and bottom cripples over and under all rough openings. Cripples are nailed on each end of every header and rough sill and at every layout mark in between. When I set out cripples, I also like to scatter 921А-іп. king studs at both ends of each window and door along with their trimmers.
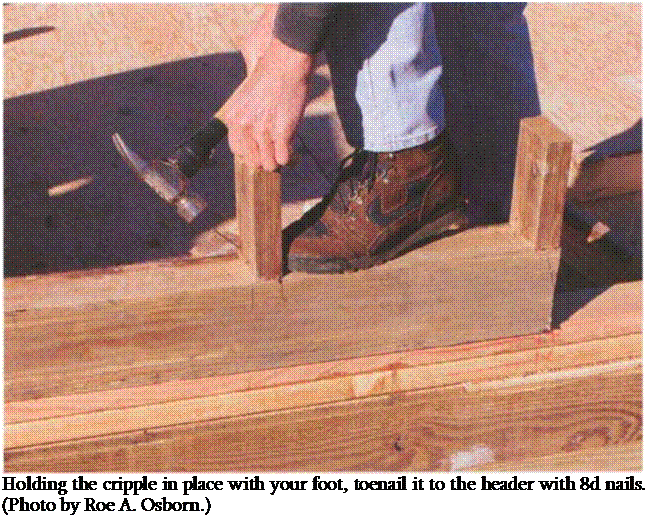
To nail a cripple in place on a header, back it with your foot before starting your first two 8d toenails (see the photo above). Make sure the 2x cripple is flush with the sides of the header, then drive the nails home through the cripple and into the header. This process will become easier as you become more skilled. At first you may find that your toenail angle is too high (in which case the nail won’t have enough holding power in the cripple) or too low (in
which case you’ll drive the 2×4 toward your foot). I’ve driven toenails through a cripple and into the sole of my shoe. It’s rather embarrassing to take a step dragging a cripple behind.
The nails should drive easily if you started them at the proper angle, at about 60°. After nailing off one side, toenail two more 8d nails into the other side, repeating the process until all the top cripples have been nailed to their headers.
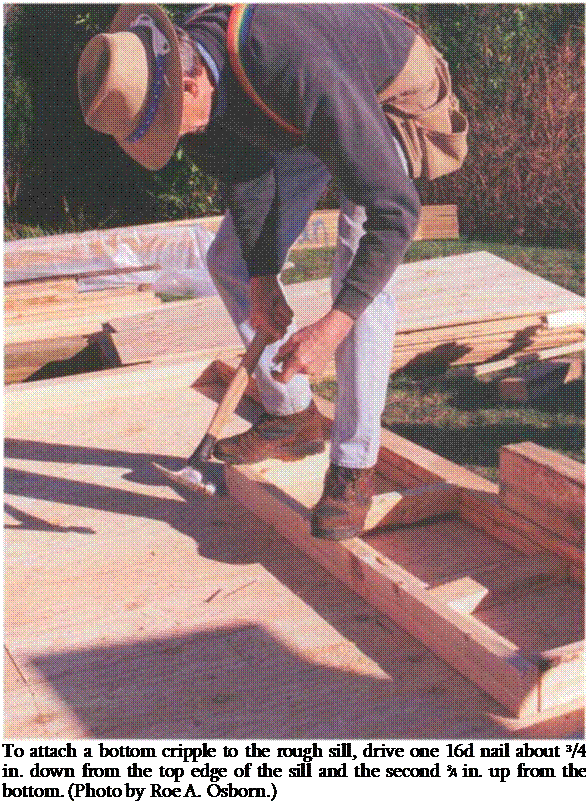
Attaching the bottom cripples to their rough sills is easier, because it involves no toenailing. Move the rough sill to the upper ends of the cripples placed against the plates (see the photo on p. 114). Nail a cripple at both ends of the sill and at every layout mark. Drive two 16d nails in each cripple about 3Л in. from either edge of the sill.
 Nailing king studs and trimmers
It’s best to nail king studs to the door and window headers and to the rough sills while nailing on the cripples. Assemble the studs in place, exactly as they go in the wall, but flat on the floor. First nail the king studs flush with the top of the upper cripples into the ends of the headers, driving three 16d nails through the king stud into small headers and four 16ds into larger headers.
For window openings, hold the end cripple on the rough sill flush with the bottom of the king stud and drive two 16d nails through the king stud into the end of the rough sill. Then insert a trimmer under each end of each door and window header, driving just one 16d nail through the center of every trimmer into the king stud. You’ll drive in additional nails later as you prepare to set the door and window frames.
As you nail, keep all the members tight together. Take time to nail the frame together properly. Gaps left between cripples and headers, for example, can mean cracks in the drywall later on as lumber shrinks and the building settles. As you nail, keep both window and door assemblies square with themselves and with the building.


Leave a reply