FRAMING FLOORS
When a carpenter first arrives at the job site, the foundation is often poured and ready for sill plates, joists, and floor sheathing. Just make sure you’re building on the right foundation. I once started building on the wrong lot in a tract of houses. My crew was well under way when the owner of the property arrived and said he appreciated our efforts but wasn’t intending to build just yet
CHECKING THE FOUNDATION
Like most things in life—from cooking to marriage—if you get started right, things just seem to go better the whole way. This is certainly true in construction. So before attaching the wooden sill plates to the foundation, you must be sure that the foundation itself is accurate. Problems get worse by the day unless you get started square, plumb, and level.
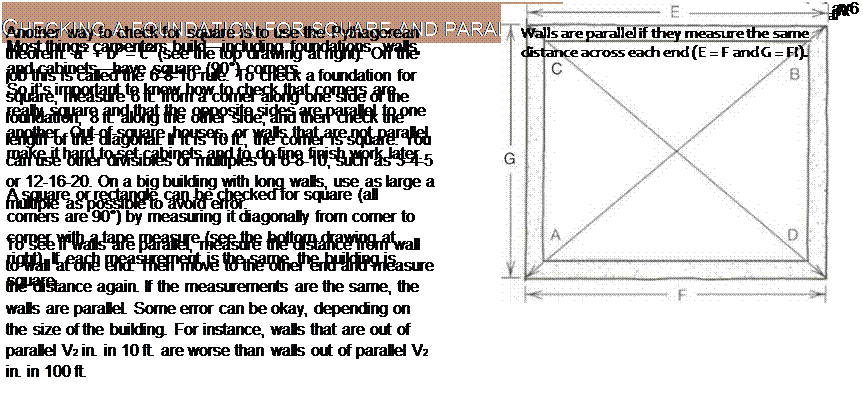
Begin with a visual on-site check. Get down and sight along the foundation. The concrete wall should sight straight and true, with no dips or waves. Next, use your tape measure and level to check for foundation accuracy (see the sidebar on the facing page).
Walls that are out of parallel can be corrected by adjusting the sill-plate chalklines. Say, for example, that the
|
|
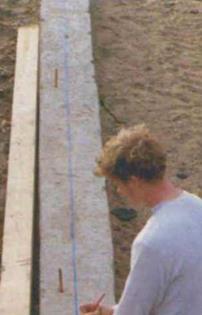
Chalklines on top of the concrete foundation indicate the position of the sill plates. (Photo by Roe A. Osborn.)
walls are out of parallel V2 in. and the sill plates are SV2 in. wide. Go to the narrow end of the foundation and measure in from the outside 35/s in. on each corner. Then go to the wide end and measure in 33/s in. at each corner. By making a small, Vs-in. change at each corner, you
 |
gain У2 in. overall, and the walls are now parallel. Pressure-treated shims can be put under the sill plates to bring everything up to level.
Once you know the condition of the foundation, take the time to sweep any debris from the concrete walls and to straighten the anchor bolts. Bolts can be
straightened by placing a З-ft. length of Унп. pipe over a tipped bolt and bending it upright. The next step is to snap chalklines on the concrete to mark where the sill plates will be bolted (see the photo on the facing page). Be sure to use straight pressure-treated stock for the sill plates. Set the crooked ones aside to cut up for short walls later.


Leave a reply