Floor system
support has been determined by tests and incorporated into building codes.
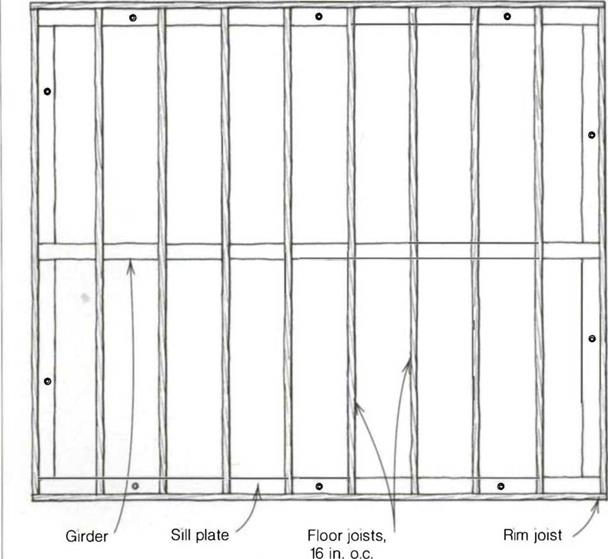
All you need to do is check your plans to see what type and size of joists you’ll use.
Joist size is usually determined by the distance they have to span. So the larger the span, the larger the joist. When you are joisting over a basement with a single center support, you often use 2x12s. If you are joisting over a crawl space with girders every б ft. or so, you can usually use 2x6s. Now with I-joists, you can span from sill plate to sill plate without any support in the middle. Floor joists on the first floor may be a different size than those used on the second floor.
Whatever size or type of joist you use, nailing them in place is more or less the same for big or little.
Once the sill plates are securely in place, the next step in joisting a floor is to lay out locations where joists are actually nailed in place. I like to do my layout on the rim joists (also called band joists). Rim joists are nailed into the sill plates around the perimeter of the building and help hold the floor joists upright.
I nail the rim joists onto the outer edge of the sill plate with 16d sinkers toe – nailed every 16 in. o. c. Use galvanized or stainless-steel nails in wet climates or near the ocean.
Once the rim joists have been toenailed in place, lay out the floor-joist locations on them. Joists are most often spaced 16 in. o. c. so that they can be efficiently sheathed with 4×8 sheets of plywood or oriented strand board (OSB), but check the plans to make sure. Manufactured joists are sometimes spaced at 19.2 in. This layout also fits a piece of 8-ft. sheathing. Hook a long tape measure on the end of the rim joist and make a mark on top of the rim every 1 б in.
(16 in., 32 in., 48 in., etc.), down its entire length. Put an X or straight line alongside each mark to show on which side of the line the joist will be nailed (see the drawing at right).
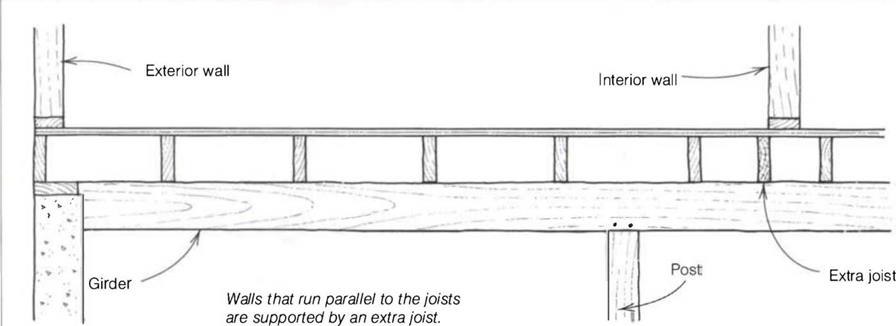
If the joists span from rim joist to rim joist, the layout will be the same on each rim joist. If the joists lap over a girder or wall, the opposing rim joists need to be laid out differently. On one rim joist, mark the 16-in. o. c. locations with an X to the right; on the opposite wall, lay out the joists with an X to the left. This will allow the joists to lap and nail at a girder, where they will be stabilized with nailed-on blocks.
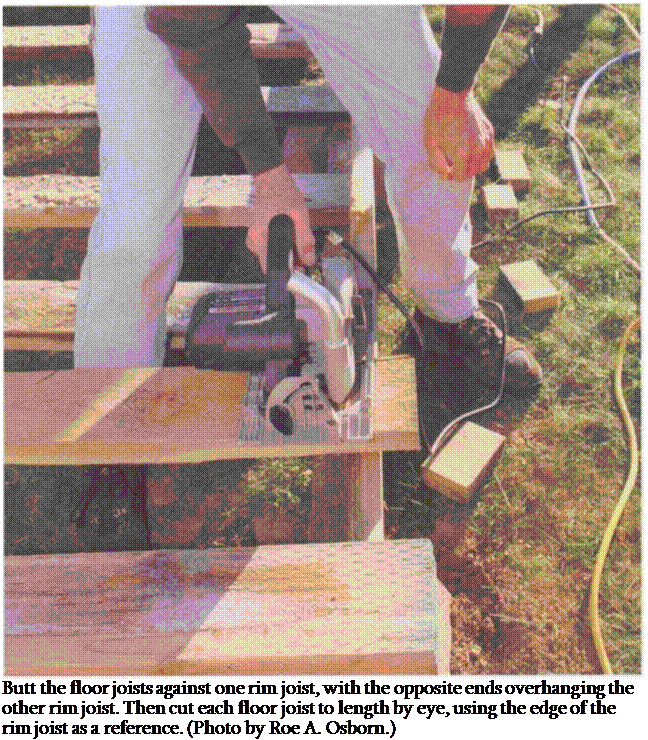
Once the layout is complete, lay all of the floor joists flat across the sill plates and girders on every layout mark. Keep your eye open for joists that are badly bowed or twisted or those with large knots. These should be replaced with better stock and set aside to be cut up for blocks later. If joists need to be cut, cut them in place rather than measure each one individually (see the photo on p. 94). Just remember not to notch or cut I-joists in midspan, which compromises their structural integrity.
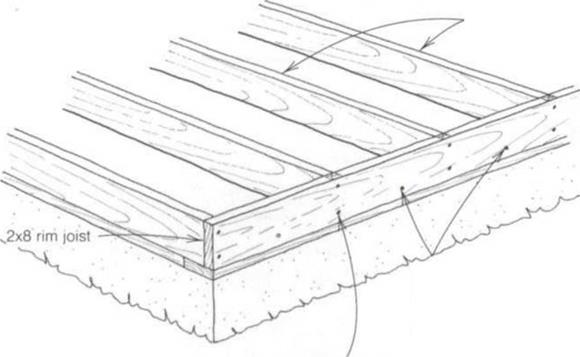
 Once the joists are cut to length, it’s time to "roll" them. Rolling means to set floor joists on edge and nail them in place with their crown (the slight bow along the bearing edge) up. Line up each joist with the layout marks on the
top of each rim joist, making sure the floor joist is snug against the rim. Then drive two 16d nails through the rim joist directly into the end of each floor joist— one nail at the top and one at the bottom (see the drawing on the facing page).
Make sure you nail all joists and blocks securely as they are installed. Someone stepping on an unnailed 2x could slip and fall. Also, don’t leave nails half – driven, and don’t drive nails where you might have to make a saw cut later on. Take time to do good, clean work. If
using a pneumatic nailer, drive the bottom nail first, then remove the hand holding the joist and drive the top nail. I can promise that if you drive the top nail first, sooner or later you will miss the wood and fire a nail into your hand.
Each floor joist also needs to be toe – nailed to the sill plates and supporting girders. Try walking one way, driving a 16d toenail through each joist into the sill plate or girder. When you reach the end, turn around and repeat the process on the other side of each joist.
|
|
|
|
|
|
|
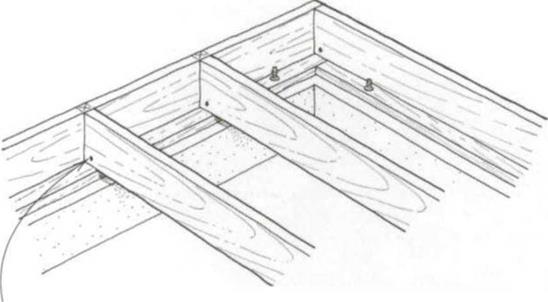
After nailing in the floor joists, I like to stop and look at my work. Joists on edge portray a certain symmetry and beauty. They clearly show the outline of the building.
Blocking helps stabilize a building and keeps joists from falling like dominoes under stress, such as might happen dur
ing an earthquake or high wind storm.
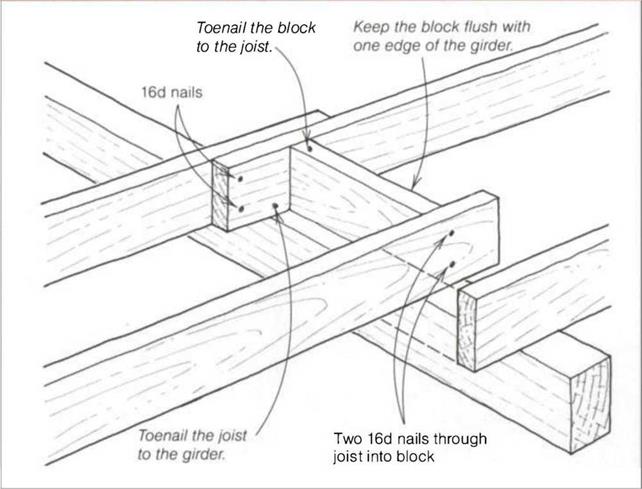
If floor joists are spaced 1 б in. o. c., cut blocks 141/2 in. long. If you are blocking lapped joists, cut them 13 in. long (see the drawing on p. 96). I find that blocks need to be cut just a bit under their actual size (cut а 14Уг-in. block at 147/i6 in.). I think this is because 2x lumber is frequently wet and measures just a bit more than 1 Vi in.
|
|
|
|
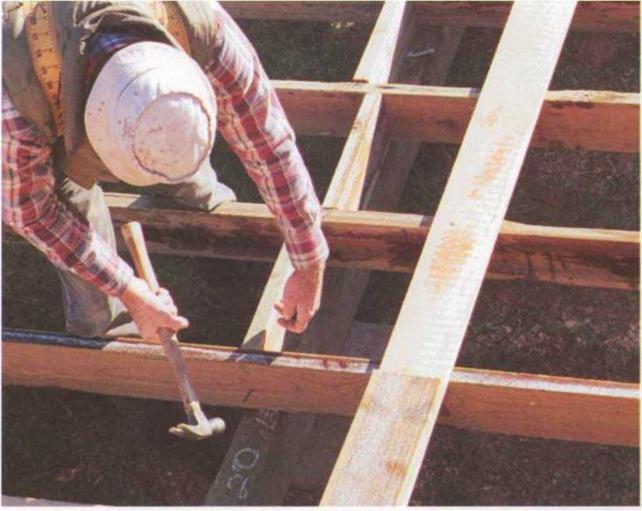
When installing blocks between floor joists, set each one on edge and drive two 16d nails through the joists into the block. Offset each block to one side of the previous block. (Photo by Roe A. Osborn.)

Be careful to start correctly. Begin by setting a block on edge between the rim joist and the first floor joist over a girder or bearing wall. Nail it in place with two 16d nails through the rim joist into the block and with one 16d nail through the floor joist into the block. Next, angle a 16d toenail through both sides of the joist into the center girder. Grab another block, offset it to one side of the previous block, and repeat the nailing process (see the photo on the facing page).
Once you have a few blocks nailed in place, use your tape measure to check for accuracy. The floor joists will be straight if they maintain the same on – center layout (16 in., 32 in., 48 in.) over the girder as they do at the rim joist. If the blocks are too long or too short, the floor joists will be curved rather than straight.


Leave a reply