EXTERIOR BEVEL SIDING
Unlike framing, where you can leave a small gap now and then, siding needs to fit properly everywhere. If the horizontal boards are running out of level or don’t fit well at the corners, doors, and windows, it’s noticeable from the next county. Not only do gaps in siding look bad, but they also might allow water and cold air to enter the building.
While there are many different types of siding styles and materials available, in this section I’ll talk about how to apply bevel (or clapboard) siding. Years ago, clear redwood, cedar, and spruce siding were widely available. These were easy to work, free of knots, looked good, and stayed flat. Unfortunately, such quality siding isn’t readily available these days. Most of what we have to work with comes from second-, third-, or fourth – growth trees, often curls in the sun, and is spendy(aswe say in Oregon). Because of this, many builders use a wood or cement-base composite siding made of OSB. This manufactured siding is preprimed and 7/ie in. thick with no taper. It ranges from б in. to 12 in. wide and is available in lengths of 16 ft. and longer. If using composite siding, read and follow the manufacturer’s recommendations for specific application instructions.
Siding should be nailed into studs whenever possible, rather than relying on Уг-іп. plywood or OSB sheathing to hold the nail. So the first thing to do is mark stud locations on the housewrap. The best way to do this is to mark the stud layout at the top and bottom of the wall, then snap vertical chalklines at these marks.
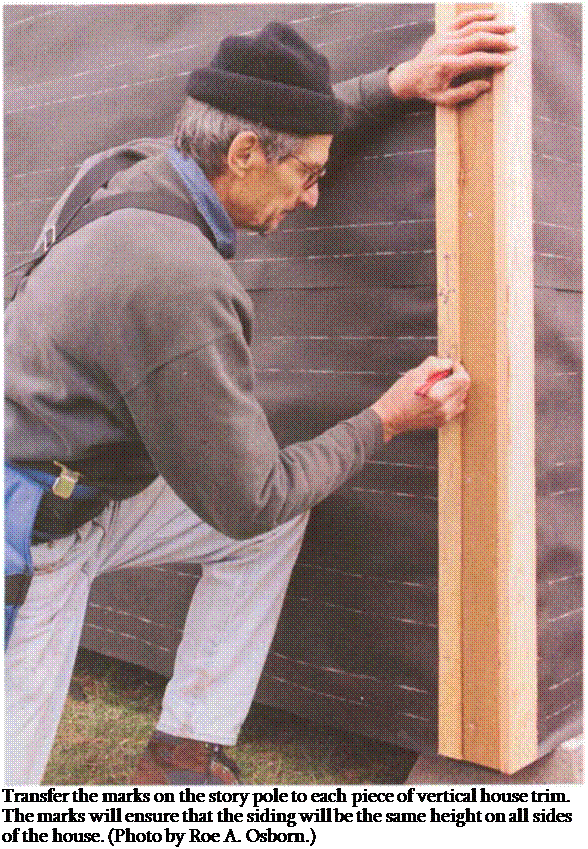
To ensure that each course (or row) of siding is the same height, make a story pole from a straight length of 1×2. Cut it to the same length as the corner trim that runs from the frieze blocks to У2 in. down onto the foundation. If you’re using 8-in.-wide lap siding, for example, each successive course of siding will overlap the previous course by at least
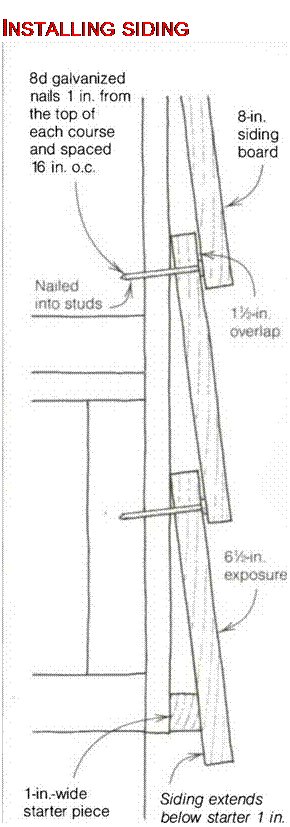
1У2 in., leaving а 6У2-ІП. exposure. This ensures that moisture won’t wick up behind the siding. So on the story pole, measure up 6У2 in. and mark across the 1×2. Then make a mark at every 6У2-ІП. point from there at 13 in., 1 9У2 in.,
26 in., and so on. These marks indicate the bottom of every course.
There is another consideration when laying out siding. Frequently you can adjust the courses a bit so that the bottom of one course of siding fits directly on top of the window. Another course can be adjusted so that it lines up with the bottom of the window. This looks better to the eye and reduces the amount of cutting you have to do. So instead of a 1 У2-ІП. lap, you may need to lap a few of the bottom courses 1% in. Then you may need to change the lap to 13/s in. to come even with the top of the window. The story pole is a handy place to mark these adjustments. Make course changes gradually. The eyes rarely notice а У4-ІП. change in exposure from one course to the next.
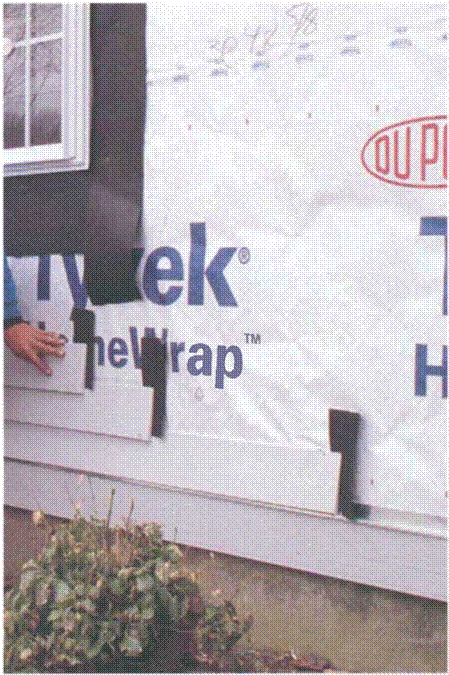
With the layout on the story pole complete, transfer the marks on it to each piece of vertical house trim. Take it to the corner, hold it flush with the bottom of the trim, and transfer the marks (see the photo at left). Do the same at the side trim around doors and windows.
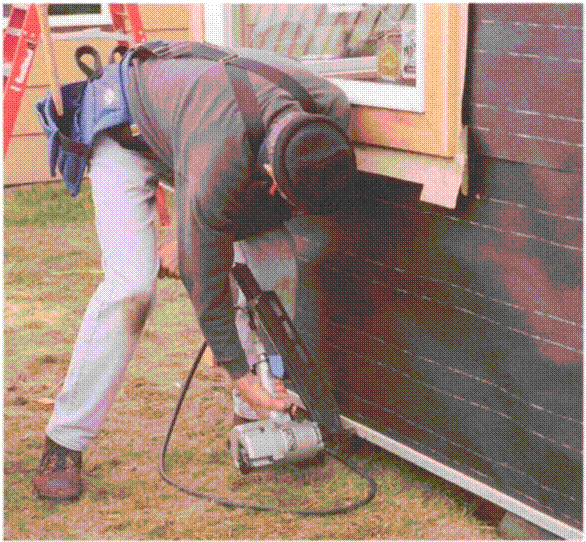
Composite siding has a single row of nails driven about 1 in. from the top, hidden by the second row. Other types of lap siding nail near the bottom of the course, about 1 in. from the butt. You have to be careful when using a pneumatic nailer for this job. If the pressure is too high, the nail could be driven too deep, breaking the surface of the siding, compromising the nail’s holding power and leaving a place where water can enter. When installing siding with a hammer, use hot-dipped galvanized nails or stainless-steel, ring-
 |
nail flush with the bottom sill plate and tip the first course of siding out so that it will match successive rows (see the drawing at left). Rip these strips from siding boards. They don’t have to be ripped perfectly because they will be hidden by the first course of siding. It’s a good idea to keep a paint bucket handy and cover all raw edges to protect them from moisture.
shanked nails. Other, thinner types of beveled wood siding can be nailed on with 4d or 5d nails.
Regardless of whether you use an air nailer or a hammer, the first step is the same. Install 7/iб-іn.-thick by 1-in.-wide strips along the bottom of the walls (see the photo above). These starter pieces
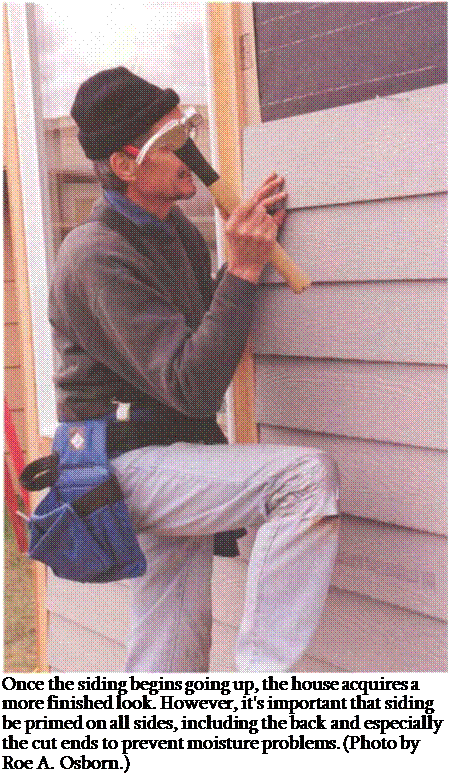
Actually cutting and nailing up the siding is a process I always find exciting. The house is finally being closed in against the weather and begins to take on a finished look (see the left photo on p. 190). Composite-siding manufacturers recommend that both ends of the siding be held back 3/ie in. from the trim to allow for expansion and waterproof-
 |
 |
ing. This is a big gap for finish work, but it leaves enough room for a good bead of caulk to help keep water out.
A smooth bead of paintable, latex – silicone caulk will be hard to notice once it is painted.
In my experience, the expansion and contraction of composite siding in most parts of the country is minimal. You may be able to put a bead of caulk underneath the siding and fit it tight to the
trim, which is what I sometimes do when installing wood bevel siding. In cases like this, take time to talk to builders and carpenters in your area and see whatthey recommend for the particular type of siding that you are using.
Start on a side of the building where you can begin with full-length pieces. As a general rule (and this applies to studs, rafters, headers, siding, or any work that a carpenter does), always start with the
 |
longest pieces first, because the cutoff ends can normally be used elsewhere.
If you cut the short pieces first, you may not have enough long stock left to complete the job. Remember to cut the siding so that the ends fall over studs for secure nailing.
Because these cuts need to be made accurately and cleanly, this is a good place to use a sliding compound miter saw. If you use a circular saw, cut from the back side to prevent tearout on the front side. Use a small rafter square as a guide for your circular saw to help make a square and accurate cut.
On sections longer than 16 ft., snap horizontal chalklines to keep the courses straight. While composite siding is quite uniform, wood siding can have crowns and twists that can be straightened by nailing them to a chalkline. In areas that get a lot of wind and rain, many builders
cut 4-in. by 12-in. strips of felt paper and slip one behind every joint where two pieces of siding abut (see the right photo on the facing page).
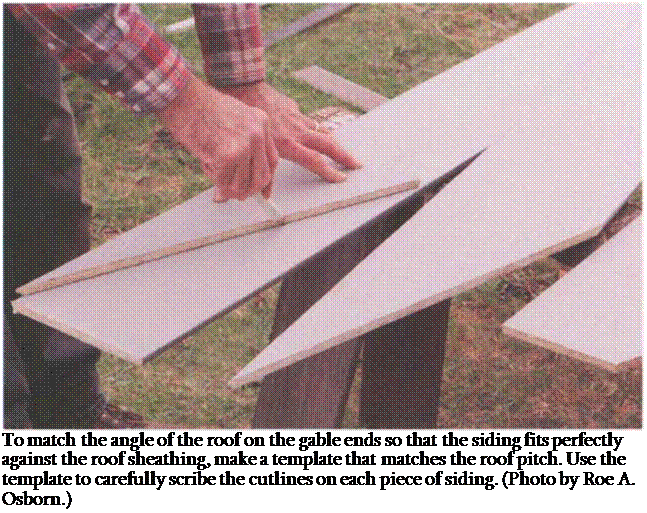
Cutting siding to fit the gable ends is a bit more difficult than sidewalls, because the cuts are no longer square. To mark these cuts, which are the same pitch as the roof, make a simple pattern from a piece of siding that’s cut to the roof pitch (see the photo above). Use a small trim sawfor making these cuts and clean them up with a block plane.
Working up the gable end, measure down 11/2 in. (the amount composite siding laps) from the top of the last installed board at each end. A measurement with the tape held along these marks will give you the long point of the next board. An easier way to do this is to mark the lap on each board before it is nailed in place. Lay the next board on
 |
these lines and mark it to length, which eliminates the need to drag out your measuring tape. Nowyou can place the template on these points, scribe cut marks on the siding, make the cuts, and nail the piece in place. If you can’t get a perfect fit between siding and roof or eave soffit, you can cover this gap later with trim, which can be as simple as a 1×2 or 1×3 nailed on top of the siding.
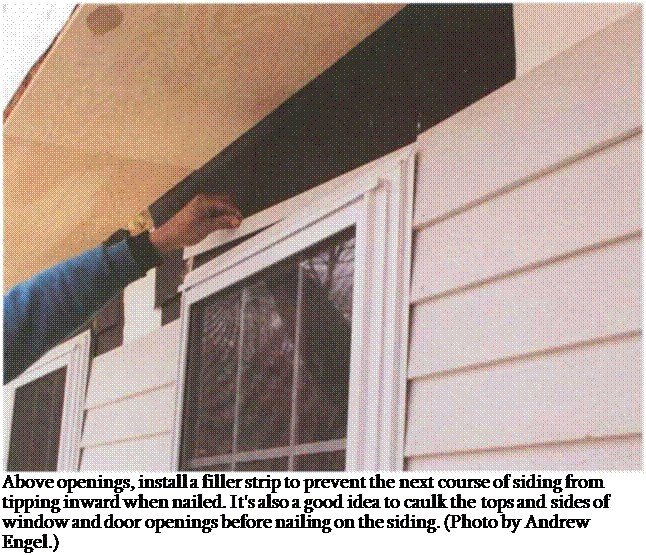
Cutting around doors, windows, and gable-end vents needs to be done neatly and carefully. At the top of openings, install a filler strip to tip the lap siding out (see the photo above). And remember to caulk joints around window and door openings. Caulk, unlike diamonds, is not forever, but it does help repel water. Caulk carefully at the tops and sides of windows and doors before nailing on siding.


Leave a reply