CUTTING, MARKING, AND DRILLING SILL PLATES
Just as you must follow rules when playing sports, there are rules—or building codes—to follow when building a house. Most codes require that every sill plate have a bolt about 1 ft. from each end and every 4 ft to б ft. between to connect the house frame securely to the foundation. So the edges of the foundation and the location of the bolts let you know where cuts in the sill plates should be made.
These cuts can be made by eye if you’re feeling confident in your ability to make a square cut with a power saw.
Remember, sill plates must be placed on the foundation accurately, not perfectly. This is frame carpentry, not finish work.
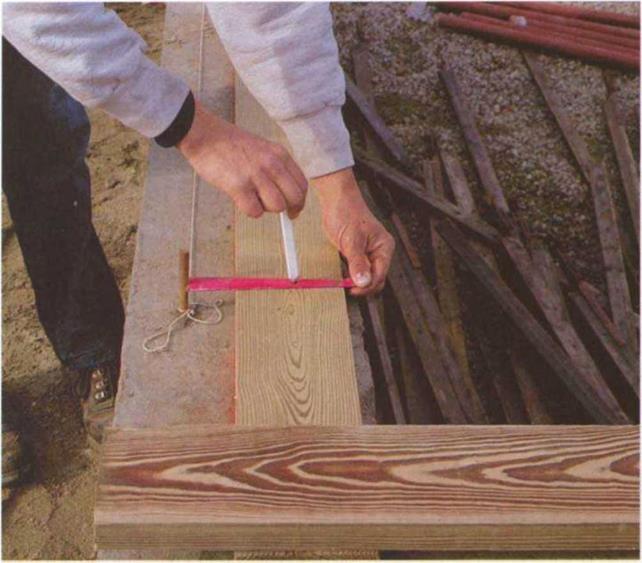
Sill plates normally are bolted flush to the outside of the foundation. Place the plate directly on the inside of the chalkline and use a tape measure or a bolt marker to locate where the bolt holes are to be drilled (see the photo below). You can make a simple measuring device to mark bolt holes or buy one from Pairis Enterprises (see Sources on p. 198).
As you become more experienced, try placing the sill plate on top of the bolts and eyeball the edge of the sill flush

|

with the chalkline or the outside of the building. Hit the sill with a hammer right over each bolt to leave a mark for drilling.
Many tasks you do in carpentry can be done by trusting the eye. Marking bolt holes in a sill plate is an example of this. Carpenters call this "eyeball carpentry." Basically, all it takes to train the eye to see accurately is practice.
With the bolt locations marked, set the sill plates on a block of wood and drill the holes. Use a 5/s-in. or n/i6-in. bit with a power drill to make holes for Уг-іп. bolts. Place the sill plates over the bolts, using your hammer to drive boards onto tight-fitting bolts. Put a washer and a nut on each bolt. Now is the time, if needed, to put pressure-treated shims under the sill plates to make sure they are level. Finish by tightening the nuts with a crescent wrench.
In colder parts of the country, you may want to lay down a thin layer of insulation between the sill plates and the foundation. This helps prevent air leaks.


Leave a reply