Cutting cripples and trimmers
Keep your mind focused when measuring and cutting cripples and trimmers.
A mistake here can cause you big headaches and lots of extra work later on. I recall cutting all the top window cripples 1 in. too long for the first floor of an apartment house we were building. I didn’t catch the mistake until after the walls were framed and raised. Every window and door header had to be removed and the cripples shortened. Not a good way to start your week.
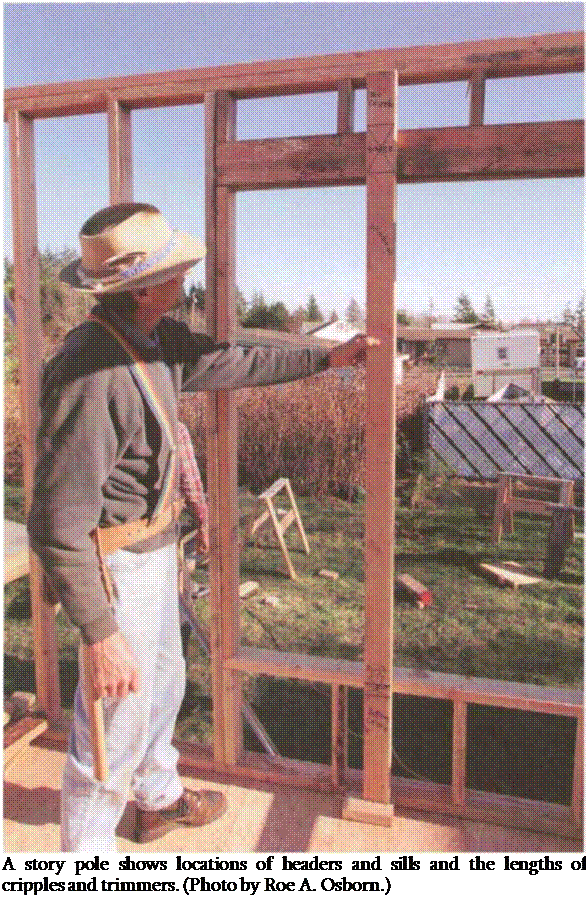
To make the job of cutting cripples and trimmers easier, I usually make a story pole. As the name suggests, this is a pole—actually a 2×4—that tells a story, and it’s used to mark multiple measurements or to transfer measurements from one place to another. A story pole can be used to show the locations of headers and sills or the lengths of cripples and trimmers (see the photo at right) or to locate the height of rows of siding (see Chapter 8).
 To make a story pole for а 9б3Л-іп. wall, take a 921/4-in.-long 2×4 and tack a short piece of 2×4 to one end to act as the bottom plate. Since the height of both the door and window headers from the floor is generally б ft. 10 in., measure up this distance from the bottom of the bottom plate and mark the location of the bottom of the headers. Then measure up from this mark another ЗУ2 in. for a 4×4 header and 5У2 in. for a 4×6 header. Measure up 1У2 in. for a single flat header, or 3 in. for a double flat header.

Left over on the pole are the lengths of the top cripples: 6У4 in. for the 4×6 header, 8У1 in. for the 4×4 header,
ЮУ4 in. for the 2x flat header, and 83/4 in. for a double flat header. Cut enough top cripples to nail one on each end of every header and one every 1 б in. on center (o. c.) between.
To determine the length of the door trimmers, measure down from the bottom of the header to the top of the bottom plate. This distance is б ft.
8У2 in. To make the trimmers fit snug, add about У16 in. to this length, which you usually can do by leaving the line when you cut.
Window trimmers for aluminum – or vinyl-clad frames are the rough-opening size of the window. If you have a window that is 5/0 high, the trimmer will be 60 in. For wood-frame windows, add 3 in. to make room for the wood sill.
To find the lengths of the cripples under a 5/0 window, measure down 60 in. and make a mark. Measure down another 11/2 in. for a single 2x rough sill. The amount left over on the stud—19 in.—is the length of the bottom cripples.
MARKING THE PLATES
Once all the parts have been cut, you have to figure out where to nail them. When I first began as a carpenter, I used to plate, lay out, and build one wall at a time. Now I start by laying out (detailing) where every piece nails into every wall plate. I indicate on the plates the locations of corners, doors, windows, and
every stud. It’s best to keep these detail marks on wall plates simple. Extra marks tend to be confusing.
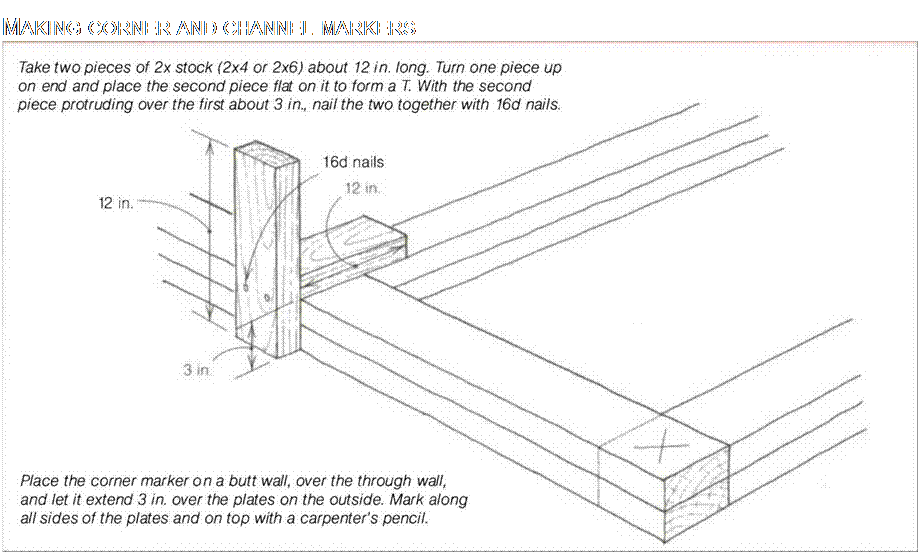
Start by marking the corners and channels (the T-intersection where one wall meets another). Corners and channels require extra studs so that walls can be properly nailed together once they are raised. These extra studs also provide backing so that the drywall can be nailed on the inside and siding on the outside. Mark the locations of these corners accurately on the plate so that raised walls will be nailed in the right place.

A bit of sloppiness is allowed in frame carpentry. Wall plates, for example, can be Vs in. short or long without causing major problems. But inaccuracies tend to accumulate. A small mistake made several times can add up to a headache.
 So a skilled craftsperson is one who learns to work quickly and, most important, with precision.
One quick and accurate way to mark corners is with a corner marker (see the drawing on the facing page). Use the corner marker as shown in the drawing to scribe layout lines for corners and channels, which will show exactly where to nail in the extra studs needed at these points. It also marks where to cut the second plate (double top plate) that is nailed to the first top plate as the walls are being framed.
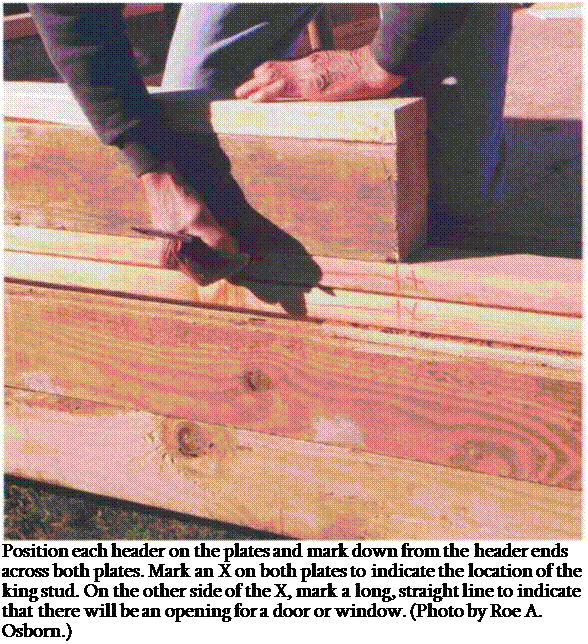
Now, following the plan, find the location of each window and door. Position each header on the plates and mark down from the header ends with a piece of blue or black keel across both plates. Next to this line, mark an X on both plates on the side away from the header to indicate the location of the king stud that nails alongside the header. On the other side of the line awayfrom the X, make a longer, straight line along both plates. This line indicates that there will be an opening for a door or window at this location (see the photo at right).
Wall studs are usually 1 б in. o. c. or 24 in. o. c., but you never know what to expect on a remodel job. I worked on an old house once in which the studs were about 5 in. o. c. Both the outside and inside were sheathed with 1x pine.
Good construction, but it would be rather expensive these days. At least it was no problem to hang a picture on the wall. [8]
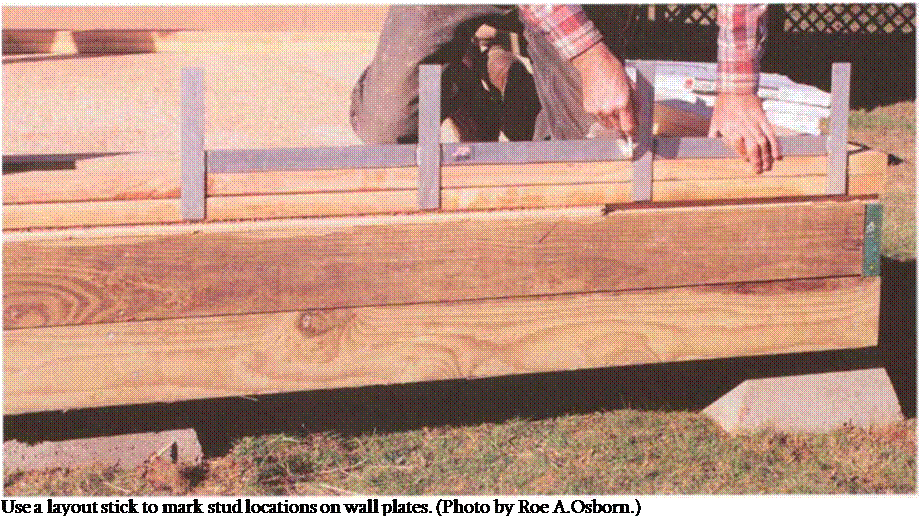
from Pairis Enterprises (see Sources on p. 198). Laying out with this stick is certainly faster than using the 6-ft. folding rule I started with as a beginner. Most metal tape measures are clearly marked on 16-in. and 24-in. centers and can also be used for layout.
Every carpenter needs to become familiar with specialty tools like the layout stick. I seldom use a tape measure to lay out studs or plates simply because it’s faster and just as accurate to use a layout stick.
Exterior walls often are sheathed with plywood or oriented strand board (OSB), materials that come in 4-ft. by 8-ft. sheets. So wall studs need to be spaced

to fit the 4-ft. module of the sheathing. Otherwise, every piece of sheathing has to be cut to fit, a wasteful, time – consuming process. Start the stud layout at one end of the first exterior wall, being sure to detail stud layout on the same side of the plate as the door and window layout. If you are using a layout stick, set it with the legs down over both plates and scribe along both sides of the second, third, and fourth legs at the 16-in., 32-in., and 48-in. marks (as shown in the photo above). Then move the stick and scribe another set of studs until you come to the end of each wall.
If you’re using a tape measure, hook it over the end of the plate and pull it as far as it will extend, marking on every 16-in. or 24-in. layout mark. When you come to a window or door, transfer layout marks onto headers and rough sills to indicate where the cripples will be nailed.


Leave a reply