Building outside corners and channels

|


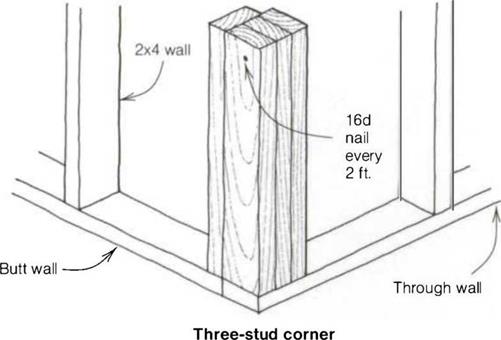
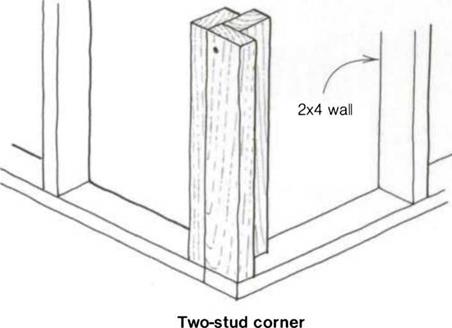
stud is nailed in flush with the end of the plate. The second stud is nailed in flat alongside the first so that when the intersecting wall is raised, it can be nailed into the flat stud.
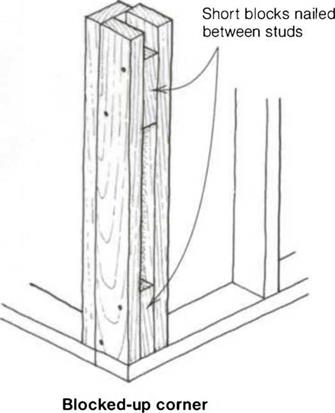
A blocked-up corner can be built by nailing three equally spaced blocks in place of the full-length center stud used in
the three-stud corner. Whichever type you choose, the corner should provide adequate nailing not only for the intersecting wall but also for interior and exterior wall finishes and trim. I personally prefer the solid, three-stud corner or channel. I try to use two straight studs for the side pieces and a bowed or knotted stud for the center piece.
 Use 1 6d nails to fasten the studs at the corner to the plate. Hold the nails apart, one high and one low, just as you nailed the rough sills to the bottom cripples, and take care that the sides of the stud are flush with the sides of the plate. After the wall has been raised, you’ll nail the intersecting wall to these studs.
At channels, a stud is nailed in flat between two regular studs (see the top right drawing on the facing page). Tie channel studs together by driving three 16d nails into each side, one 2 ft. up from the bottom, one in the center, and one 2 ft. down from the top. This solidly built channel will provide adequate backing for an interior partition wall.
Once the outside corners and channels are nailed together and to the top plate, continue to nail the studs into the top plate, on the layout marks, with two 16d nails each. This is repetitive work, but you still need to pay attention.
Watch the layout marks so that everything gets nailed in properly, and when you come to a door or window opening, be especially careful that you nail the king stud on the X beside the mark showing the header location. It’s easy to nail the king stud on the wrong side of the layout mark, so be watchful.
When all the wall, king, and top cripple studs are nailed to the top plate, pull up the bottom plate and begin nailing it in place. Afterward, drive three 16d nails into both sides of the corner studs, 24 in. o. c., just like you did on the channel.
Nailing off the double top plate
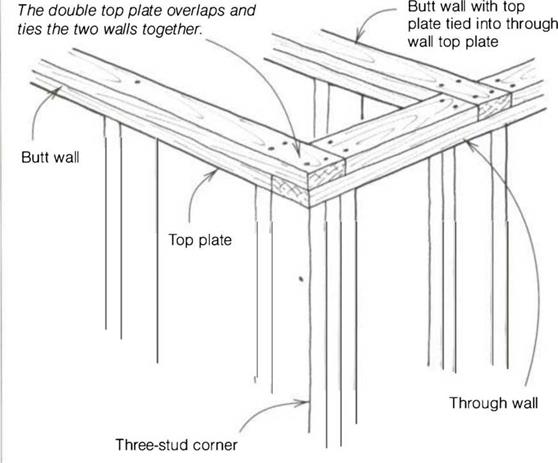
While the wall is still flat on the floor, cut and fasten the double top plate. Structurally, the top plate is an important piece of wood because it ties the entire frame together. Without it, a building under earthquake or high wind stress can easily come apart at the joints in the single top plate. Although I still


Leave a reply