BARS
Bars are solid-steel leverage tools. Depending on the size, a bar can be used for pulling nails, for prying open windows, or for demolition work. A carpenter uses several types of bars, such as the cat’s paw, the flat bar, and the wrecking bar.
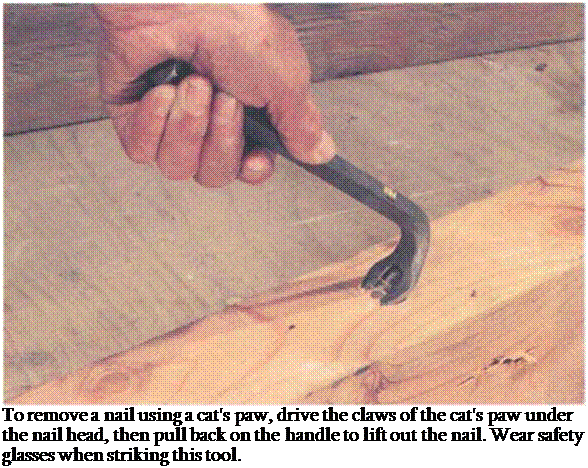
After the hammer, the nail puller most often used is the cat’s paw. The cat’s paw has a nail slot between two sharp claws, which are designed to dig into the wood around a flush-driven nail.
To pull a nail with the cat’s paw, place the claws on the wood in front of the nail head. If you need to, drive the claws straight in for a couple of licks to get them below the head. Once the claws are under the head, pull back on the handle to lift out the nail (see the photo at right). The striking face of a cat’s paw is soft steel, so it’s okay to hit it with a hammer. But wear safety glasses.
The flat bar is simply a flat piece of steel with a right-angle bend at one end. It comes in various lengths, but most fit easily in a toolbucket. The one I use is
13/4 in. wide and 1 ft. long.
 Each end of a flat bar is sharpened and has a nail-pulling slot. I often use a flat bar to pry boards apart (see the photo below), to lift cabinet sections during
|
installation, and to scrape away old caulk. It is also handy for prying open windows that have been painted shut.
Don’t leave a flat bar lying around with the right-angle bend facing up.
Someone can step on it and get a hard rap on the shins.
The wrecking bar, which looks like a large cat’s paw, is the tool I reach for when I’m doing demolition work. Wrecking bars are made of hardened steel, and most types have nail slots in both the flattened end and the curved end. Wrecking bars come in various sizes and styles. In general, the longer the bar, the more leverage you gain. The one I use is 3 ft. long. I keep it in my pickup with my sledgehammer and use it to remove flooring, siding, or roof
sheathing, to pull large nails, to jack up heavy objects, and to pull apart concrete formwork.
SQUARES
Most things a carpenter builds are either square or rectangular. So having a square or two around is just as important as having a hammer. The question is, which square among the many do you need? I have five types of squares that I find helpful: a small rafter square, a framing square, a combination square, a T-bevel square, and a drywaller’s square.
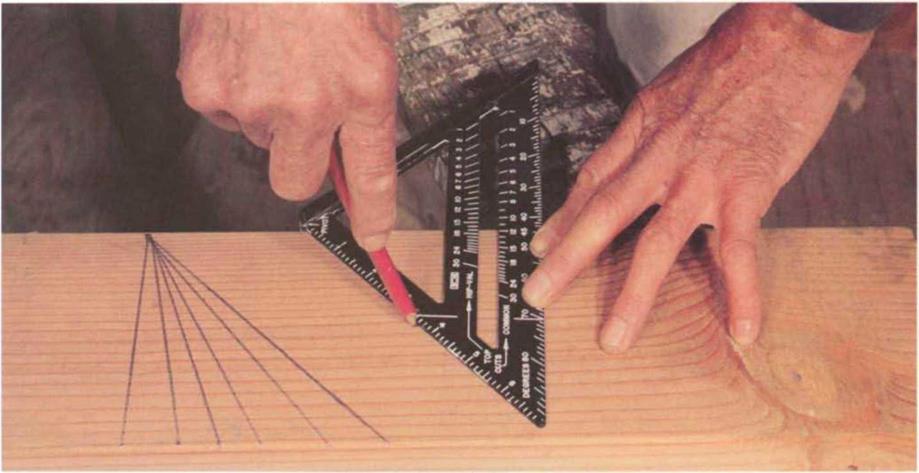
The small rafter square is a triangular square—90° on one side, 45° on the other—used to mark both square and angled cuts. It is available in two sizes: The small one measures 7 in. along a
|
side, and the larger one measures 12 in. While I own both sizes, I prefer the smaller one because it is easy to carry in a toolbelt or toolbucket. You’ll also have a choice between metal or plastic. I prefer the metal small rafter square because it is almost indestructible; mine is still legible and accurate even after years of use.
A small rafter square is very easy to use. On one side of the square is a scale in inches. Adjacent to this scale is a pivot point, and opposite the pivot point on the base of the square is a degree scale. To find any angle, say 20°, place the pivot point against the straight edge of a board and pivot the square until the 20° mark aligns with the edge. Then simply scribe a line along the inch-scale side, and the line will be 20° to the edge (see the photo on the facing page).


Leave a reply