WORKING WITH FIBERGLASS INSULATION
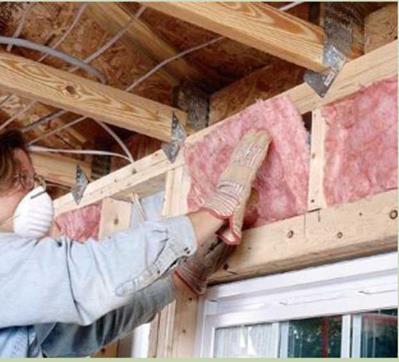
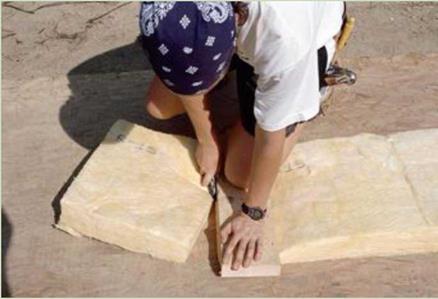
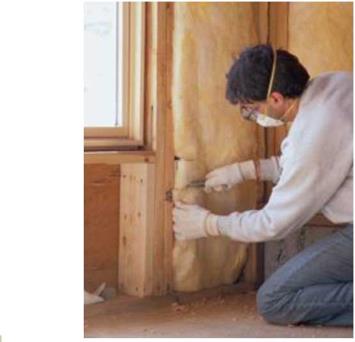
Glass fibers can irritate your skin and damage your eyes and lungs, so safety precautions are very important when working with fiberglass insulation. Cover your body with a loose-fitting, long-sleeved shirt and long trousers, and wear gloves and a hat, especially while insulating a ceiling (see the photo below). It’s best to wear a pair of quality goggles, too, because eyeglasses alone don’t keep fiberglass particles out of your eyes. Make sure the goggles fit properly; goggles that fit well don’t fog over. Wear a good-quality dust mask or, better yet, get yourself a respirator. Don’t scratch your skin while you’re working (you’ll just embed glass fibers), and be sure to wash up well when you are finished. CUTTING BATTS. Cutting fiberglass batts to size is straightforward. The best tool for the job is a sharp utility knife. Note that I said “sharp." A dull blade will tear paperfaced batts, and torn paper doesn’t work as a vapor barrier. A sheet of plywood or OSB makes a good cutting table. Place the insulation batt on the worktable, with the paper side down if you’re using faced batts. Measure where the batt should be cut and add at least V2 in. (it’s better for a
batt to be a bit snug than to have a gap at the edge or the end). Compress it with a straight board, then run the knife along the board, as shown in the photo above. Be careful with the utility knife. If it’s sharp, you don’t have to exert a lot of pressure. Keep the hand that is holding the board out of the blade’s path.
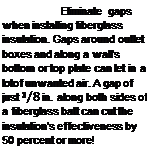
When fitting batts around a window, you’ll need to cut pieces to fit above and below the window. To speed the process of insulating walls, I measure both spaces, mark their lengths on the cutting table, and cut as many pieces as I need. Don’t be sloppy with your cuts. Even small holes or gaps in fiberglass insulation can dramatically reduce its effectiveness.
INSTALLING BATTS. Batts faced with kraft paper have a foldout tab that should be stapled to the face of the studs or ceiling joists. The most common method of attaching faced batts to wood is with a hammer-type stapler and 1/4-in.-long staples. Make sure the staples go in all the way, so that you won’t have problems hanging drywall later. Unfaced batts are held by friction between studs or joists until the vapor barrier or drywall is in place.
 |
 |
 |

![]()
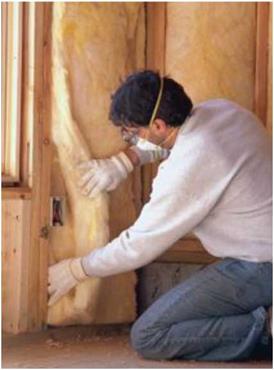
Insulate around electrical boxes. First, divide the batt into two layers instead of compressing it. Slide the back layer behind the outlet box (see the photo above), then cut out the front layer to fit around the box (see the photo below). This technique also works for installing fiberglass batts around electrical wires and plumbing pipes. [Photos
by Steve Culpepper, courtesy Fine Homebuilding magazine © The Taunton Press, Inc.]
uninsulated space around them. Don’t use these fixtures. It’s much better to choose models that require no insulation gap. You can insulate right up to and on top of those fixtures. Some states require that fixtures be airtight, too, so check with your building inspector.
Insulating between floor joists in crawl spaces
Floor insulation is important in a house with a crawl-space foundation. Often, it is not enough

![]()
![]()


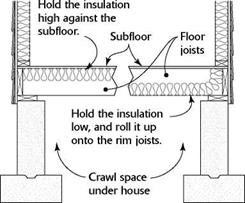
To keep cold air from entering on top of the floor insulation, ensure that insulation is right up against the subfloor (above, left) or roll the insulation up the inside of the rim joist to the subfloor (above, right). Either of these techniques will help prevent a cold floor.
SUPPORTING INSULATION BETWEEN FLOOR JOISTS
just to put insulation under the floor, because cold can pass through the rim joist. Unless batts fill the entire joist space, cold air can seep in through the rim joist and over the top of the batts, making the floor uncomfortably chilly.
To prevent this, you can either hold the insulation high or roll it up to cover the rim joist (see the top left illustration). Better yet, use a thicker batt with a higher R-value to fill the entire joist space and butt up against the rim joist.
When insulating between I-joists, make sure the insulation is wide enough to extend all the way from web to web. If you live in a cold part of the country and you’re using kraft paper-faced insulation, the paper should face toward the floor. This may seem backward, but the paper acts as a vapor barrier (more on that later) and must face the heat, so to speak. If you live in an area where cooling (air-conditioning) is an issue for a majority of the year, staple the kraft paper to the underside of the joists.
It can be a pain to install batts of insulation under a floor, because there is often not much space between the ground and the joists. It’s not a lot of fun to lie on your back and install fiberglass batts! Sometimes, especially in dry climates, it’s possible to insulate the floor before you sheathe. The drawback with this technique is that subcontractors (plumbing and heating, especially) may not treat your work with TLC. In rainy Oregon, we wait to insulate until after the shingles are on and the house is closed in. Either way, take your time, and make sure that underfloor insulation batts are installed properly and securely around all pipes and conduits.
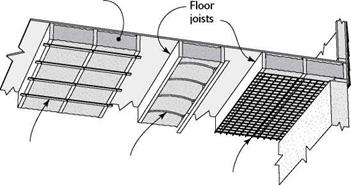
There are a number of ways to hold underfloor batts in place (see the bottom left illustration). In Oregon, it’s common to nail strips of lath every 12 in. to 16 in. o. c. across the bottom of the joists once the insulation is installed. It’s a lot of work, but it holds the batts securely without compressing them. Another way is to staple polypropylene (not cotton) twine or

mesh to the bottom edges of the joists. I’ve also seen people staple chicken wire or hardware cloth across the joists. Still another option is to use wire supports designed specifically for the job. These wire supports, called lightning rods or tiger teeth, clip between joists and bow up against the batts, holding them in place. Installed about every 12 in. or so, they do a good job of keeping the batts in place for years to come. Just take care not to compress the batts when installing the rods.
STEP 3 INSTALL VAPOR BARRIERS (IF NECESSARY)
Unlike housewrap, a properly installed vapor barrier is supposed to be impermeable. Vapor should not pass through it. Different materials are used as vapor barriers. The kraft-paper facing on fiberglass batt insulation is designed to function as a vapor barrier. To form a continuous barrier, the paper flanges must overlap on the stud face, where they are stapled in place.
|
|


Leave a reply