STEP 6 RAISE THE WALLS

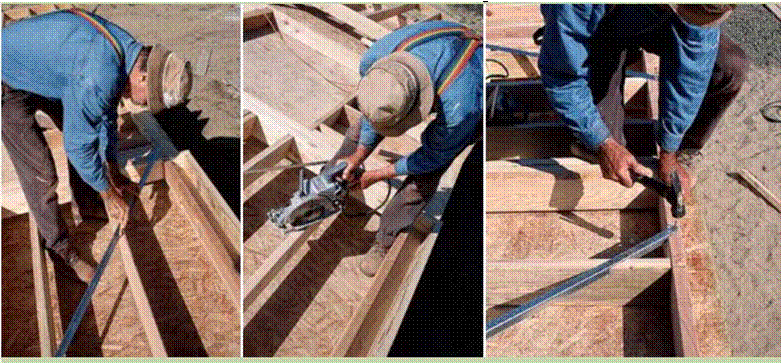
![STEP 6 RAISE THE WALLS Подпись: 1. To mark the cut line, position the brace diagonally across the wall section from the bottom plate to the double top plate, and then pencil a line along one edge of every framing member the brace crosses. [Photo © Larry Haun]](/img/1312/image329_0.gif) |
 |
As with barn raisings of yore, it takes a few warm bodies to raise framed walls. Let one person be the team leader and encourage everyone
![STEP 6 RAISE THE WALLS Подпись: The first wall goes up! Make sure you have enough help when you're ready to raise the walls. Have one person take charge, and get everyone to lift in unison. [Photo by HFHI/Will Crocker]](/img/1312/image331_0.gif) When you remove the temporary blocks nailed to the rim joist, be sure to pull the nails or bend them over so that no one gets a nail in the foot!
When you remove the temporary blocks nailed to the rim joist, be sure to pull the nails or bend them over so that no one gets a nail in the foot!


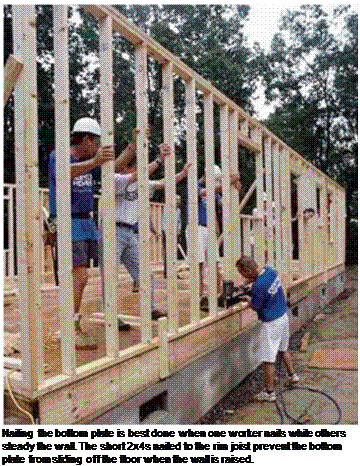
to work together (see the photo above). Remind people to lift with their legs, not with their backs. In many areas, builders put a heavy bead of caulk or a roll of foam (polystyrene) on the floor or slab under the bottom plate before raising a wall. This helps keep out cold air as well as any bugs that may want to migrate inside. To ensure that the wall won’t slip over the outside edge of the building as it’s being raised, nail pieces of 2x stock to the rim joist so they stick up a few inches above the floor to catch and hold the bottom plate (see the photo at right). On a slab, bolts hold the bottom plate in place.


Leave a reply