STEP 4 SECURE THE BUILDING PERMITS
It’s not uncommon for builders or owner – builders to view the local building department as enemy turf. Let me suggest that your building experience will be immeasurably more positive, productive, and efficient if you view the building department as a resource and think of the building inspector as someone who can help you. Certainly there are exceptions, as there are in any field, but, by and large, building departments and building inspectors exist to protect prospective homeowners from unscrupulous or incompetent builders and owner-builders from themselves. The building inspector knows the building codes, which have been developed over the years to ensure that safe, durable houses are built. Your building inspector has the same
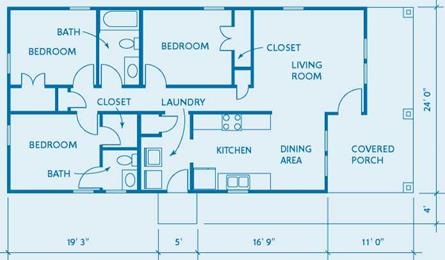 |
This is the floor plan for a simple three bedroom house. With it you can see the size of the building, the arrangement of the living spaces, and the location of doors and windows.
FOUNDATION PLAN: CRAWL SPACE PLOT OR SITE PLAN
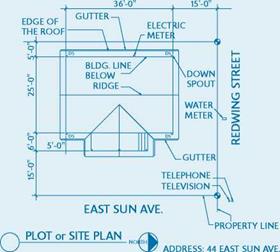
![]() A plot plan lets you see, from above, the size of the lot and where your house will be placed on the land. It also shows where utilities like water and electricity are located.
A plot plan lets you see, from above, the size of the lot and where your house will be placed on the land. It also shows where utilities like water and electricity are located.
|
|
|
|
|
|
|
|
|
|
|
|
|
|
|
|
|
|
goals that you do. He or she wants a house that doesn’t leak, isn’t a fire hazard, complies with zoning requirements, and can stand up to everyday use and all but the most severe natural disasters. Building inspectors really are on your side.
Taking the plans to a building department to request permits need not be a big affair. I have often submitted basic plans on 11-in. by 14-in. sheets of paper. Plans do need to be drawn to scale, and the most common scale is ‘/4 in. =
1 ft.; this means that 1 in. on a plan equals 4 ft. in the actual house. Using graph paper can help with preliminary designing, but an inexpensive computer-aided design (CAD) program makes professional-looking plans that are simple to draw and easy to change. For a simple house, most building departments need the basic types of drawings shown on pp. 14, 16, and 17:
• Plot or site plan to give an overall view from above, showing the shape and dimensions of the property and the size and location of the building.
• Foundation plan to show the location and size of the concrete footings, walls, and piers that will support the floor frame.
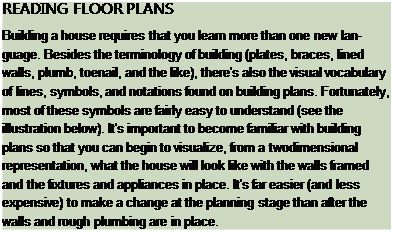
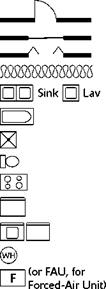
• Floor plan to provide a bird’s-eye view of the size and arrangement of living spaces. The floor plan shows the location and size of doors and windows and often the location of electrical, plumbing, and heating system components (see the symbols explained in the sidebar at right). Even the location, spacing, and direction of the roof trusses can be found here.
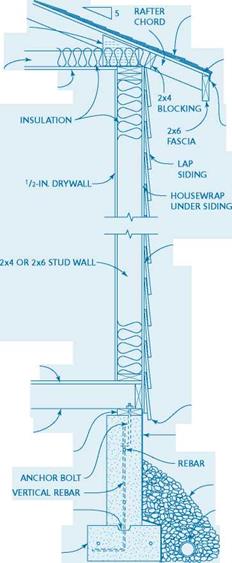
• Wall sections to show the “guts” of the floors, walls, or ceilings. Think of a wall section drawing as an apple that’s been sliced in half to reveal its core (see the drawing on p. 16). Both section and detail plans (see p. 17) are sometimes drawn at a larger scale to better identify the details that wouldn’t show up as clearly in a smaller scale.
• 
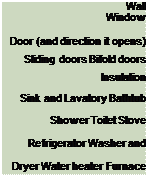
 Elevation plan to show how each side of the house will look. Elevation drawings show the foundation, wall height, siding and trim, roof

![]()
![]()
![]()
![]()

![]()

![]()
![]()
![]()

![]()
![]()

![]()

![]()
 style and pitch, and roof overhang at the eaves.
• Detail plans to provide close-up views of small sections of the house. These are useful for providing clarification or additional detail that isn’t shown in the other drawings.
If you can draw it, you can build it
If you’re drawing your own plans, the process— though slow and often frustrating—will give you a clearer understanding of your house than many builders ever have. It can save you from making costly mistakes and will likely contribute to building a better house.
A good way to test your ability to visualize a house design based on plans is to visit some building sites where you can examine both the plans and the actual construction details as the house goes up. If you’ve bought stock plans, they may seem bewildering initially; as you work with them, they’ll become much easier to read and understand. The ability to both draw and read plans gets easier with experience.
Building a house is a process that consists of a seemingly endless number of steps. Knowing which step follows which—for example, when to call the electrical company to install a temporary power pole, when to call the plumber to install drains and vents in the joist system—is key to organizing tasks and materials so that work isn’t held up. This knowledge comes primarily from experience, but for the firsttime builder I’ve listed most of the steps in the process (see pp. 18—23).
When my brothers and I were building houses, we spent many hours planning and organizing so that we always knew what to do next, who would do it, and when and how it would be done. Organizing time and materials is an essential skill for any builder, whether that builder is working with professionals, friends, family, or Habitat volunteers. Staying organized and on top of the situation is
especially important when working with volunteers and unskilled helpers. Careful planning, good organization, and effective communication will ensure that less-experienced workers are able to contribute meaningfully and feel good about the work they are doing.
Display patience, understanding, and openness
![STEP 4 SECURE THE BUILDING PERMITS Подпись: Many hands, one goal. Working together gets the job done. [Photo by HFHI/Gregg Pachkowski]](/img/1312/image045_1.gif)

fjftr Habitat
"111 for Humanity
A guide for the first-time builder
The checklist on the following pages contains most of the major steps involved in building a small house. Naturally, there will always be unforeseen or site-specific steps, but this list should serve as a fairly thorough guide to building a house, from raw idea to move-in day.
• Look for land and determine whether you can build on it.
• Acquire a piece of land.
• Survey your land to confirm the boundaries.
• Buy or draw up plans or acquire plans through Habitat (see Resources on p. 279).
• Obtain permits from the building department and other departments, if necessary.
It is important to have a decent place to live. Most of us don’t want to live in a mansion. We only want a clean, safe place where we can live and raise our children. A decent house uplifts our spirits and provides dignity and hope for the future.
It is hard for many people to realize what it’s like to live in a moldy, leaky house with rat holes in the wall and plumbing that’s inadequate or nonexistent. Yet that is the condition of millions of people living around the world today. Poor housing is not just somewhere else. Every city in this country has its share.
Habitat for Humanity has a goal of eliminating poor housing by working with families who need a hand up. There is no magic wand to wave that will produce a new home. Decent housing is built because people like you and me roll up our sleeves, pick up our hammers, and start building. What we may not be able to do alone can be accomplished when we work together. Lots of sweat, a little skill, and a shared vision get the job done.
During this process of working together, we build much more than houses. We meet all kinds of interesting people and develop close friendships as we work side by side, take breaks together, and share stories.
• Consider an environmental site assessment.
• Contact subcontractors for the foundation, plumbing, electrical, heating, lumber, and material companies. Get bids on work and materials. Select subcontractors and suppliers. Schedule work and deliveries.
• Take out liability insurance.
• Contact the gas, electric, and telephone companies to locate on-site utilities.
• Prepare the site.
• Bring in temporary electrical power.
• Trench and prepare for concrete footings and a foundation or slab.
• Before pouring concrete, lay down a gravel bed and install a plastic moisture barrier, if necessary.
• Call the building department to schedule an inspection of the concrete foundation footing and reinforcing steel.
• Have the footings and then the foundation or slab poured.
• Have the floor framing and sheathing materials delivered.
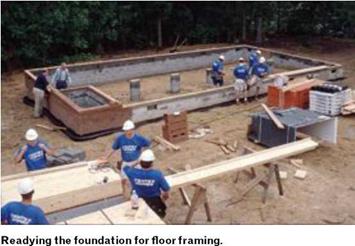
• Frame the subfloor.
• Install the rough plumbing (water, gas, and waste lines) and heating pipes.
• Call the building department for the floor joist framing, rough plumbing, and heating inspections.
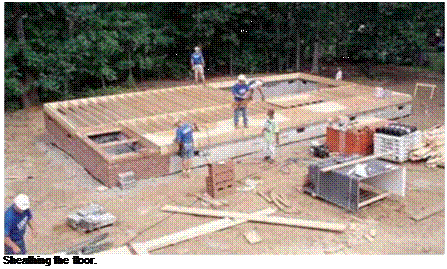
• Sheathe the floor.
• Have the wall framing and wall sheathing materials delivered.
• Place chalklines on the floor to show the wall locations.
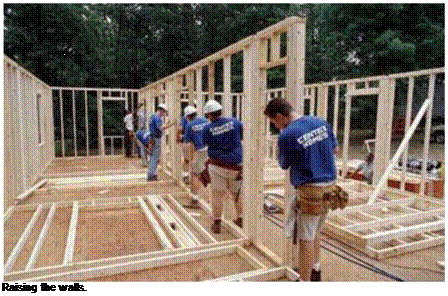
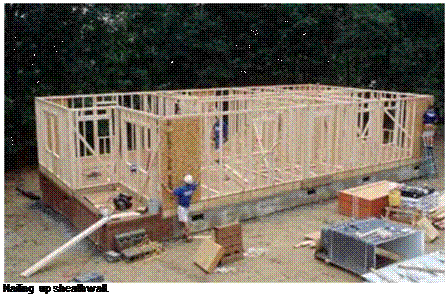
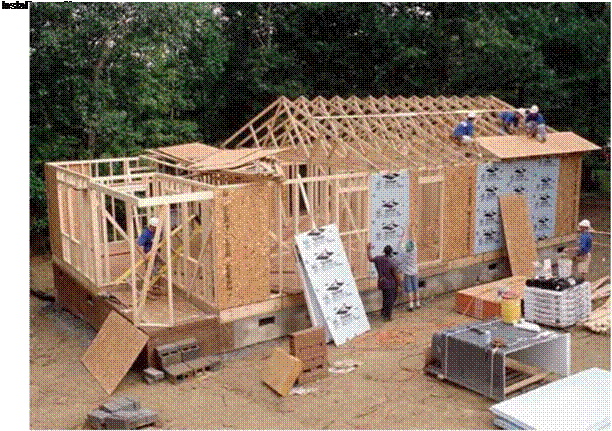
• Plate the walls, then cut and locate the headers. Frame and erect the walls.
• Brace the walls straight and plumb.
• Place the shower-tub units in the bathrooms; cover them to protect the fiberglass.
• Sheathe the walls, if necessary.
• Have materials delivered for the exterior porch, deck, and stairs. Build the porch, deck, and stairs. After they’re built, cover the deck and stairs with scraps of OSB to protect them until the job is finished.
• Order the roof trusses at least two weeks in advance of your anticipated need.
• Have the roof sheathing, fascia, and trusses delivered and set on framed walls.
• Install the trusses.
• Install the fascia or gutter board and the barge rafters.
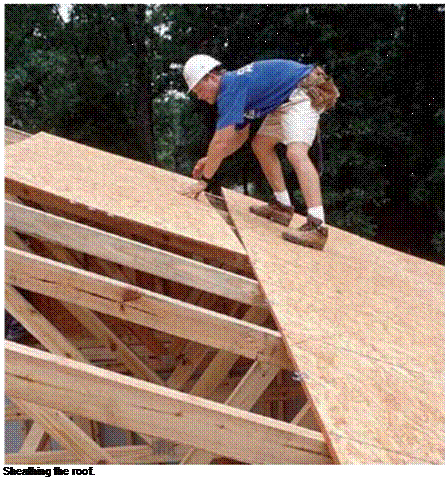
• Install the roof sheathing on the trusses and the felt underlay on the sheathing.
• If required, have the roof sheathing inspected.
• Call the plumber to put vent and exhaust pipes through the roof.
• Shingle the roof. Install the ridge vent.
Doors, windows, siding, and paint
• Order the windows and exterior doors two to three weeks before your anticipated need.
• Install the housewrap and exterior vapor barrier where needed.
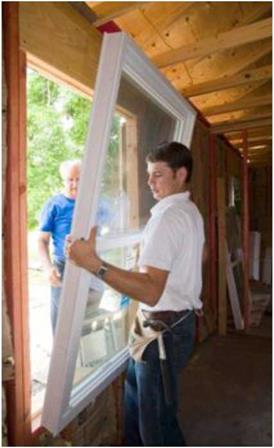
• Plumb the trimmers and install the windows and doors.
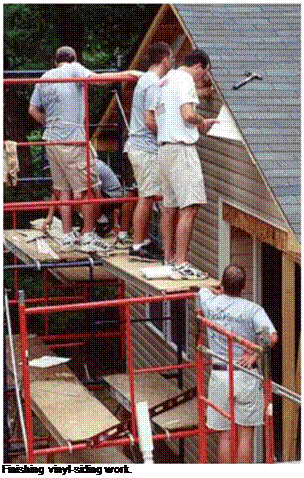
• Have the siding and trim delivered; cover them with plastic for protection. Prime both sides of the wood siding and trim. Install the siding.
• Paint the exterior.
• Install the gutters.
• Install the rough electrical, heating and/or cooling ductwork, and gas lines.
• Install the cables for the telephone, television, and doorbell.
• 
 Schedule and have inspections for the rough framing and the electrical, plumbing, and heating systems.
|
Installing a window. [Photo courtesy HFHI] |
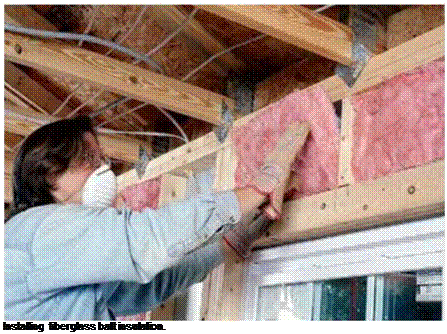
• Insulate the walls, ceilings, and floors.
• Install the interior vapor barrier where needed.
• Schedule the insulation and vapor barrier inspections.
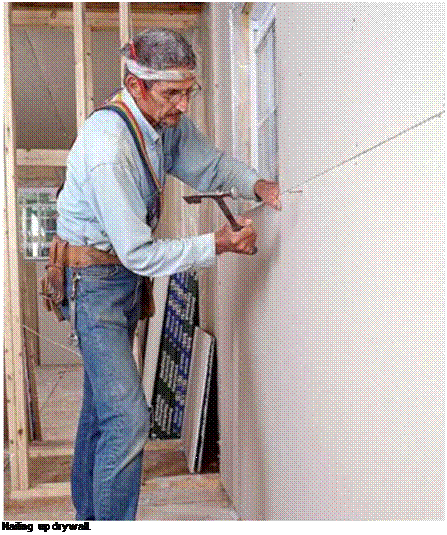
• Have the drywall delivered. Install drywall on the walls and ceilings.
• Schedule and have the drywall nailing (or screw) inspection.
• Tape and finish the drywall.
• Paint the interior ceilings and walls.
• Install the underlayment for the vinyl floor covering.
• Put down the vinyl floors.
• Install all remaining finish floors (wood, tile, etc.) except for carpeting.
• Protect the floors until construction is completed and all major appliances are installed.
• Install the cabinets and countertops.
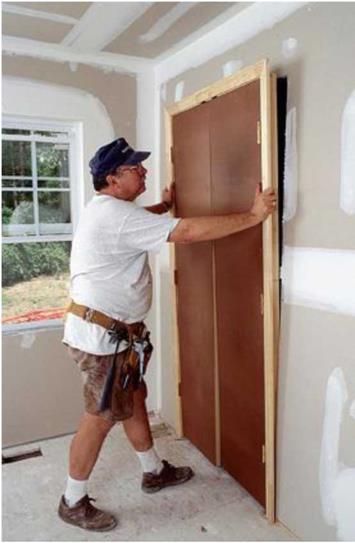
• Order prehung interior doors two weeks before your anticipated need. Install the doors.
• ![]()
 H ave the trim—door and window casings, baseboards, windowsills, aprons, and closet shelves and poles—delivered. Install the trim.
|

• Prime, paint, and finish-coat the doors and trim. Touch up where necessary.
• Install the finish plumbing and the electrical and heating units.
• Install the door locks.
• Install the medicine cabinet, towel bars, closet poles, and other hardware and fixtures.
• Lay wall-to-wall carpeting.
• Complete the work on the driveway and walkways (where applicable).
• Put on the house number. Set up the mailbox.
• Grade around the house so the ground slopes and drains water away from the house.
• Landscape. Plant trees, grass, shrubs, and flowers.
•  Schedule the final inspection.


Leave a reply