STEP 2 PLATE THE WALLS
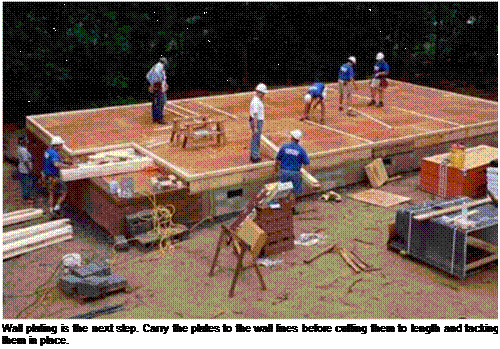
This step involves laying out all of the lumber required for the top and bottom plates, cutting the plates to length, and temporarily tacking them on their layout lines so that matching marks can be made on both plates for the studs, doorways, windows, and intersecting walls. Don’t plate, mark, and build one wall at a time. This old method is time-consuming and makes it difficult to frame accurately. Instead, put all the plates down for every wall, beginning with the outside walls.
It’s best to plate the long, outside through walls first, then plate the outside butt walls that extend between the through walls. As shown in the illustration on the facing page, through walls have plates that run through from corner to corner. Walls that fit between or intersect other walls are called butt walls. After you
• Plate exterior walls first, beginning with through walls.
• Plate interior butt walls second.
• Use 8d nails to temporarily tack plates in place.
•  When possible, tack top plates directly on top of bottom plates.
 Select straight plates. Check 2x plate lumber for bow and twist and select only the straightest boards for plates. This makes for strong, straight walls.

finish plating the outside walls, you can move inside, beginning with the longest walls and working your way toward the shortest ones.
Plating a wall involves three procedures. STACK THE PLATES. Place two layers of plate stock (2x4s are used for the wall framing on this house) along the layout line for the wall. These layers will become the top and bottom plates. Reserve the straightest 2 x4s for the plates, and use the longest plates (typically 16 ft.) on the longest exterior walls. Pay attention to where the top plate stock butts together. These butt joints should be at least 4 ft. away from an intersecting wall.
TACK THE PLATES IN PLACE. After you’ve distributed the plate stock, you can start tacking it down. Using 8d nails, tack, or


![]()

![]()

![]()
Most walls are plated this way. The bottom plate is tacked to the floor and the second plate is tacked to the first with 8d nails.
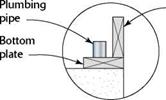
Two ways to plate walls that house pipes
|
|
temporarily nail, the bottom plate to the subfloor right on the line. Drive an 8d nail about 1 ft. from the end of each board and another near each intersecting wall. Tack the top plate directly on top of the bottom plate. Continue stacking and tacking until you reach the end of the wall.
CUT THE PLATES TO LENGTH. As you’re stacking and tacking, you’ll also be cutting plates to length with a circular saw. Where 2x plate stock butts together, make sure that the ends are square-cut and that they meet snugly. Although it’s acceptable for the bottom plate to be a little short, the top plate must be as close as possible to the exact length. The bottom plate of a framed wall is nailed to the subfloor. Roof trusses are nailed to the top plates.
When the outside walls have been plated, you can start scattering plate stock for the interior walls. Don’t do this haphazardly. Just as when you were laying out the walls, it’s best to plate the long, parallel interior walls first. These long walls become through walls into which shorter walls butt. Plate the shortest walls last. Pay attention to which interior walls are butt walls and which ones are through walls. If the walls are plated properly, it is easier to build and raise them. I run all plates continuously, ignoring door and window openings. The bottom plate will be cut for the door openings later.


Leave a reply