RIGID-FOAM INSULATION
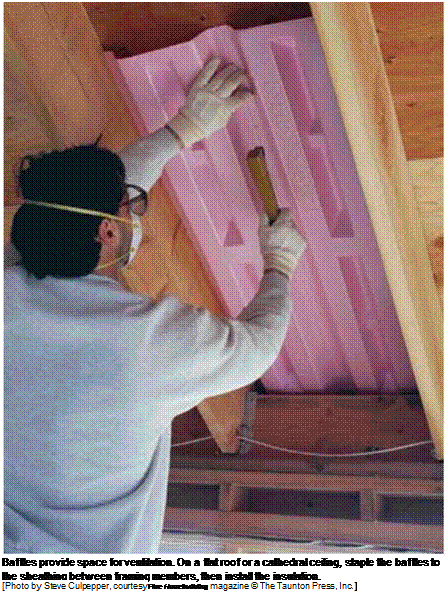
Light, fairly inexpensive, and easy to cut and install, rigid-foam insulation has a lot going for it. This insulation board comes in different thicknesses and sheet sizes. Depending on the manufacturer, it comes in shades of blue, green, and pink. A 1/2-in.-thick sheet is rated at R-3; a 1-in. sheet is rated at R-5.
EXTERIOR USE. Rigid foam is often used on building exteriors. In regions where there is no danger of earthquakes or hurricanes, foam sheets are frequently used in place of wall sheathing.
With this type of installation, sheets of plywood or OSB are still required at the corners of the house and every 25 ft. to provide lateral bracing for the structure; however, foam boards are used between the corner sheets and are nailed directly to the studs (see Chapter 6).Taping the seams between the sheets improves the foam’s performance as a wind barrier.
I like to use foam insulation on the exterior of framed walls, because up to 25 percent of a wall’s area can consist of solid wood— studs, headers, trimmers, and so on. Wood acts as a thermal bridge, allowing heat or cold to be conducted through a wall. Rigid foam helps block this conduction. Sheathing with 4-ft. by 9-ft. foam panels enables you to cover a standard-height wall and the rim joist below it.
Rigid-foam insulation gives you more flexibility in meeting code requirements. Used in conjunction with high-density R-15 fiberglass batts in a 2×4 wall, rigid foam can bring the R-value of a 2×4 wall up to that of a 2×6 wall with standard R-19-rated fiberglass (without the expense of wider framing). Using 2×4 walls, instead of 2x6s, means that your house gains an extra 2 in. all the way around the interior.
There are two important considerations if you’re sheathing a house exterior with foam insulation. First, some types of exterior siding (wood shingles and clapboard, for example) are best installed over solid backing rather than over foam board. Second, if you’re installing rigid foam over plywood or OSB sheathing, make sure the jambs for the doors and windows you order are wide enough for the wall. Standard-width jambs may be too narrow. INSTALLING THE FOAM. Working with rigid foam is simple.
It cuts easily with a utility knife. To nail sheets to the wall, I use either 1 V4-in. roofing nails or nails with plastic heads, which are used to secure felt paper to the roof deck. In windy areas, I like to nail about 12 in. o. c. around the edges and 24 in. o. c. in the field. Make sure you fit the sheets together tightly.


and expect them to do their job. Insulation batts must fit snugly between studs or joists and cannot be jammed in tightly or packed loosely and sloppily with gaps all over the place. Kraft paper-faced batts have tabs, which should be stapled to the face of the studs every 12 in. or so.
Many installers staple insulation tabs to the stud sides of the drywall instead of the face.
This makes it easier to install drywall, but when the paper tabs are stapled to the inside of the studs, a slight gap is left along both sides. Gaps are taboo when you’re installing fiberglass insulation because they reduce the insulating value of the wall, especially on vertical walls.
If you plan to install fiberglass insulation in warm, humid climates (such as the southeastern United States), buy unfaced batts (see the photo on p. 201). Fiberglass insulation with kraft paper facing acts as a vapor barrier on the inside of exterior walls, potentially causing moisture problems.
For partial bays (less than МЬг in. or 22//2 in. wide between studs) and small spaces, such as over headers and under windows, insulation must be cut to fit. Measure the width and length of smaller bays and cut the insulation about Vi in. to 1 in. larger (no more!) in each direction so that it will fit snugly in the cavities (see the sidebar on p. 204). You don’t need to staple smaller pieces of insulation in place; the snug fit should hold them until the drywall is installed.
While you’re insulating, keep in mind that another property of insulation is sound suppression. Given its relatively reasonable cost, you may want to use unfaced insulation in bedroom walls that adjoin a bathroom, living room, or utility room.
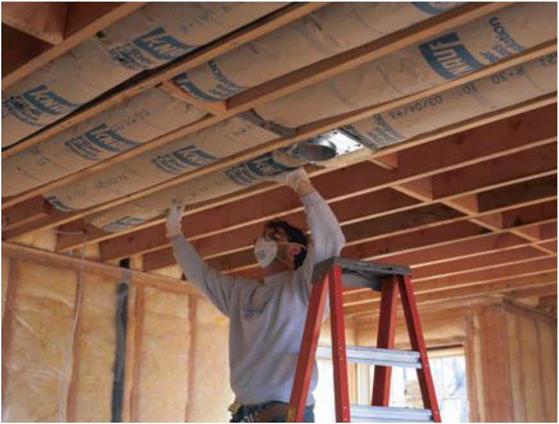
Take even more care when insulating the ceiling (see the photo below). Any heat that escapes into the attic can cause snow to melt, possibly causing an ice dam on your roof. When insulation batts butt together end to end in the ceiling, make sure the joints are tight.
 Because of the importance of keeping heat in the living area and out of the attic, I prefer using blown-in cellulose for the attic, even if the walls are insulated with fiberglass batts. Cellulose settles into and around gaps in the framing, forming what amounts to a giant down comforter over the entire living area of your house. And remember, it doesn’t cost much to add a few more inches of cellulose— say, 14 in. to 18 in. rather than just 12 in.—but it will save on heating and cooling costs for the life of the house.


Leave a reply