ORDERING DRYWALL AND ASSOCIATED SUPPLIES
Like shingles, siding, and insulation, drywall amounts are calculated by the square footage of the area to be covered (in this case, the walls and ceilings). Rather than measuring the ceiling and walls in every room, experienced drywallers use a shortcut calculation. They simply multiply the total square footage of a house by 31/2 (3.5). For instance, a 24-ft. by 36-ft. house has 864 sq. ft. of floor space, and 864 times 3.5 equals 3,024 sq. ft. of drywall coverage. A 4×12 sheet of drywall covers 48 sq. ft. of wall. Dividing 3,024 sq. ft. by 48 proves that you need 63 sheets of drywall for this particular house.
Your drywall order
For the modest-size houses that Habitat builds, it’s best to make up most of your drywall order with 12-ft. drywall panels. A 4×12 sheet of drywall is more difficult to carry than a 4×8 sheet, but it covers more area and often eliminates the need for butt joints on a wall or ceiling. To fine-tune your drywall order, subtract any greenboard you will be using in the bathroom. Also, if you decide to go with 5/8-in. drywall on the ceiling, subtract the floor area (864 sq. ft. in our example) from the square-foot total, then order that amount of 5/8-in. drywall for the ceiling.
Have the drywall delivered several days before you plan to hang it. If you’re using any 5/8-in. drywall, stack those sheets on top of the V2-in. sheets. Storing all the drywall in one room creates a lot of weight on a few floor joists. Therefore, make a neat pile in each room, with the drywall flat on the floor, finish side facing up, or lean the sheets against the wall.
Screws and nails
Professional drywall hangers rarely use drywall nails. Screws hold better than nails, and a screw gun automatically drives the screws just the right distance, dimpling the drywall surface without breaking the paper.
If you’re not a seasoned drywall hanger, you’ll probably find it useful to drive a few nails to hold a panel in place against the studs or ceiling joists. Then you can finish installing the panel with screws. A 5-lb. box of drywall nails and a 50-lb. box of 1i/4-in. drywall screws should give you all the fasteners you need for a 1,200-sq.-ft. house. If you’re hanging 5/8-in.-thick panels, order 1 г/2-in.-long fasteners.
Joint tape, corner beads, and drywall compound
You can order these finishing supplies when you order your drywall. Joint tape comes in rolls; order 400 ft. for every 1,000 sq. ft. of drywall.
Every outside corner covered with drywall requires a corner bead. These steel or plastic trim pieces are typically sold in 8-ft. or 10-ft. lengths. When estimating the amount of bead to order, make sure you account for corners where drywall wraps around window and door openings.
As far as drywall compound goes, the typical Habitat house requires about nine 5-gal. buckets. For the Charlotte house, we used an all-purpose compound called Durabond®, which comes in powdered form and is mixed with water at the job site. Other folks prefer to buy premixed compound, which comes in buckets or boxes.
|
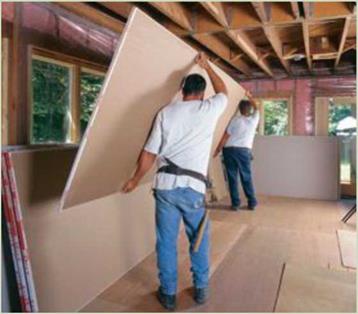
Drywall is heavy! Carrying a long sheet, like this 12 footer, is definitely a two-person job. [Photo © The Taunton Press, Inc.] |
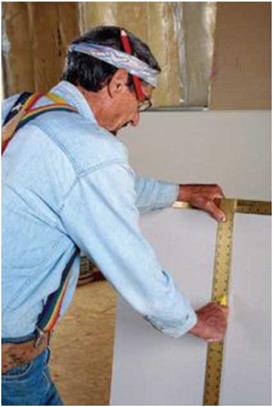
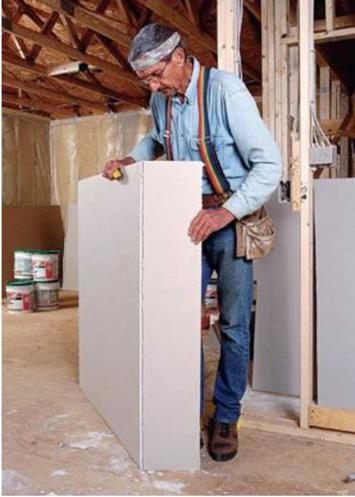 Remove fasteners that miss the framing. It’s easy to tell when a drywall screw or nail misses a stud, joist, or other framing member. When that happens, remove the fastener and make a dimple (a concave mark with a drywall hammer) at the spot so the hole can be filled and hidden with joint compound.
Cut the drywall panel to length. First score the sheet with a sharp utility knife. A large T-square, held to the measurement mark, guides the cut (see the photo at left). Once scored, the drywall breaks right along the cut line (see the photo at right). Cut the piece free by slicing along the crease on the back.
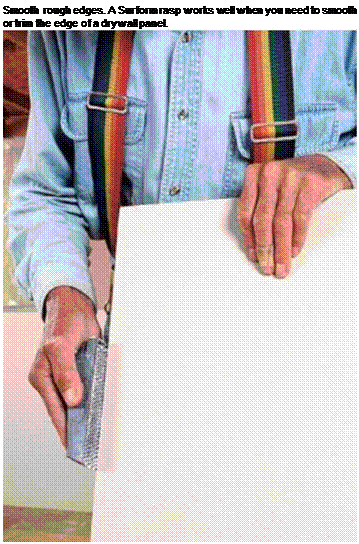
the gypsum core—about ‘/s in. or so. There’s no need to force the blade deep into the panel. Once the panel has been scored, snap it away from the cut, as shown in the photo above right. Running a utility knife along the crease on the back of the panel will separate the pieces. If the cut edges are rough or uneven, smooth them with a Surform rasp (see the bottom left photo on the facing page).
CUT ACCURATE HOLES IN PANELS
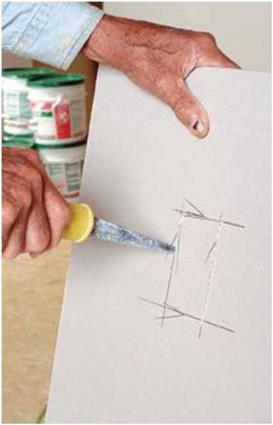
Holes for electrical outlet boxes, heating vents, and pipes must be laid out and cut accurately. Take your measurements from a wall, ceiling, floor, or sheet of drywall already in place. I like to transfer these measurements to the drywall panel with a T-square. For electrical outlets and heating vents, use a T-square to outline the hole, then make the cut with a small drywall saw. Plunge the point of the saw into the panel from the “good” side and saw along the cut line
(see the top right photo on the facing page). The finished cut should be within l/s in. of the outlet.
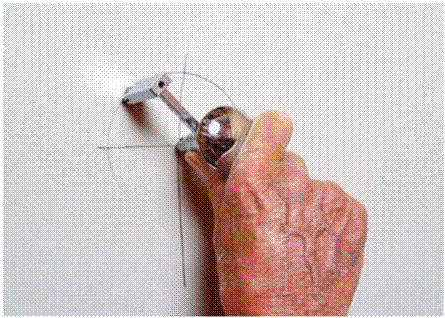
For a dryer vent or a round electrical outlet, measure and mark the center of the cut. Then use a compass or another round electrical box as a template to outline the hole. To make the cut, use a small drywall saw, a utility knife, or a circle-cutting tool made specifically for this job (see the bottom right photo on the facing page).
Another method for marking the location of an electrical box, regardless of its shape, is to rub the face of the box with chalk or a keel, place the sheet in position on the wall, and press the sheet against the outlet. The chalk will show you where to cut. Cut gently so you can avoid tearing the paper facing on the “good” side.
Use a drywall router to save time
Most of the time you can drywall right over door and window openings, attic access holes,
and heating vents, then cut around the outlet boxes with an electric drywall router, as shown in the bottom photo on p. 220. (Get a feel for this tool by making some practice cuts on scrap drywall.)
Make sure the electrical wires are shoved to the back of all the boxes, and double-check to be sure there isn’t power at any of the boxes for which you’re routing holes. Tack the sheet on the ceiling or wall, then mark on the sheet the location of each outlet with a line noting the edge of the box and an “X” showing the side the outlet is on. Don’t nail too near the outlet or you could break the drywall, but be sure to drive enough nails or screws into ceiling panels so they won’t fall down.
 |
 |

 Set the router bit to extend about /4 in. past the base plate. With the router running, insert the bit into the center of the box and gently move it until it hits the side of the box. Pull
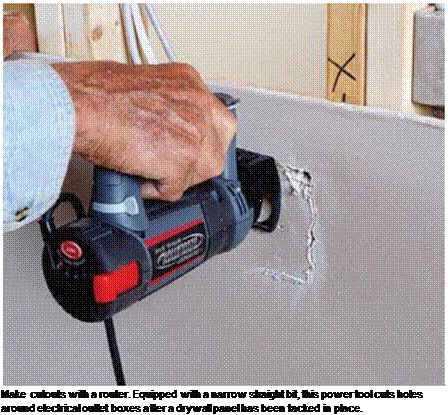

 the bit out and reinsert it just to the outside of the box. Cut in a counterclockwise direction, maintaining slight pressure against the box.
The router generates some dust, so wear a good mask. A router or a large drywall saw can be used to cut larger openings as well.


Leave a reply