MORE SIDING OPTIONS
![MORE SIDING OPTIONS Подпись: The exterior of the house can be closed in rapidly with sheets of textured plywood or OSB. [Photo by Don Charles Blom]](/img/1312/image530.gif)
![]()

In addition to vinyl siding, there are three more exterior finishes to consider if you’re interested in affordability, low maintenance, and attractive appearance:
COMPOSITE WOOD. These planks are made the same way as OSB sheathing panels, but they look like solid – wood clapboards or horizontal lap siding when installed. This siding comes with a factory-applied primer coat, and it needs to be painted after installation. Composite-wood planks don’t split, crack, or warp like solid-wood siding does, but they may not be a wise choice in extremely wet climates. These clapboards nail on walls much like cement fiber boards.
STUCCO. Two types of stucco finishes can be applied to house exteriors. Lightweight acrylic-type stucco treatments are available for application over specially prepared foam insulation board. Old-fashioned Portland cement-based stucco can be applied to masonry walls and to wire or stucco lath that’s been fastened to wall sheathing or directly to studs. It’s best to hire experienced professional
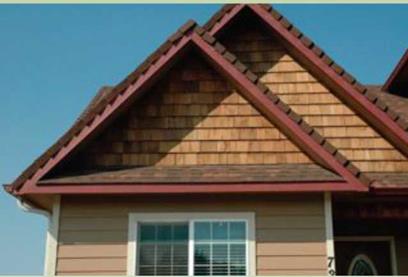
crews to do these treatments. In hot, sunny climates, stucco stands up better than most other siding treatments. SHINGLES. Many houses, especially in coastal areas, have cedar shingles on their exterior walls. Sometimes in Oregon we will shingle the gable ends of a house just to give it a distinctive look. I think it is safe to say that if you can nail composite shingles on a roof you can learn how to nail wood shingles on a wall. You can also buy cement fiber shingle panels that make it easier to cover a gable end or even an entire house
When you use shingles, start by covering the exterior walls with OSB panels and a good housewrap. The courses of shingles can be laid out with a story pole. The first course is doubled just as if they were roof shingles. Check with a local contractor to make sure you are using the right fasteners to nail each shingle in place. In coastal areas you will want to use a nail that doesn’t rust easily.
PLYWOOD OR OSB SIDING. I have been sheathing houses with plywood panels for years. In the past, some of these products didn’t hold up well over time. In wet
![MORE SIDING OPTIONS Подпись: Windows can be trimmed in a number of ways. Here we are using 1x3s to trim and seal this window. [Photo by Don Charles Blom]](/img/1312/image533.gif)
![]()
 climates, the plywood delaminated. In dry climates, the surface cracked easily and paint peeled off. Houses began to look like the prairie house I lived in during the 1930s.
Pretty shabby.
Texture 1-11, orT1-11, plywood panels come in different sizes and textures. The standard size of these plywood sheets is 4 ft. by 8 ft., with 1/4-in.-wide grooves cut into the face every 4 in., 8 in., or 12 in. These sheets can be purchased with a textured face without grooves and even come in 9-ft. and 10-ft. lengths. These longer lengths allow you to sheathe both an 8-ft. wall and the rim joist with one piece. The same patterns and sizes are available as an OSB product. I actually prefer the OSB panels, called Smartside®, because they come paint-primed on the front side.
I have been using these panels in wet, coastal Oregon on some of the small houses we have built. You can rapidly close in the exterior walls with this material. I always prime the backside and edges before installation.
Installation is straightforward. The panels can usually be nailed directly to the studs once the housewrap is on and the windows are in place. Some people square up the framed
walls on the floor and nail on sheathing before standing the walls upright.
The siding needs to extend down over the foundation 1 in.
I begin by snapping a chalkline 1 in. below the bottom sill plate all the way around the house. Start from the corner that has a 4 ft. o. c. stud layout. Use a level to make sure this first panel is nailed on plumb and level directly on the chalkline. Get this first one right and all the following panels will install easily. I like to nail off the sheets with 7d or 8d galvanized ringshank nails. Nail each panel every 6 in. around the perimeter and every 12 in. out in the field.
Make your measurements and cuts within 1/8 in. to 1/4 in. around windows, doors, electrical outlets, or dryer vent. Before nailing these panels in place, run a bead of good exterior caulk around the openings and under the sheathing. Once the sheets are nailed in place, fill any gap between the panel and the window or door frame with caulk to help prevent water from entering at these points.
Trim forT1-11 or OSB sheeting is rather simple. Use roughsawn 1x4s to cover the outside corners and full 1-in.-sq. stock ripped from a 2×4 on the inside corners. Use frieze blocks between rafters when they are exposed, and 1x3s or 1x4s to trim around the windows and doors.


Leave a reply