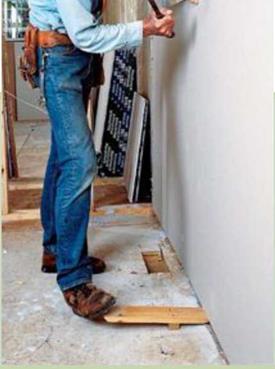
MAKING A DRYWALL-PANEL LIFTER
 This small lever comes in handy when you’re installing the bottom course of drywall panels. By wedging the beveled edge of the tool under a bottom panel and stepping on the outboard end, you can lever the bottom panel against the bottom edge of the top panel and hold it there until you drive a few fasteners. Although you can buy a panel lifter, it’s easy to make one. Cut a piece of 1×4 about 16 in. long, then cut a taper on the flat face at one end. If the drywall must be lifted more than 3/i in., add a piece of 1 x2 to the bottom of the lifter.


Window trimmers and headers are often wrapped in drywall. The same is true of trimmers and headers in closets where bifold or bypass doors will be installed. In these locations, drywall can replace the wood jamb as the finished surface. This is a good place to use up some of the scrap you’ve created. I try to select straight factory edges to go against the window frame. But other builders install vinyl J-bead trim where the drywall meets the window frame (see the illustration on p. 226). Nail the J-bead to the trimmer, then slip the drywall into the J-channel. This is an easy way to obtain a clean, straight, durable drywall edge.
I also install drywall about 2 in. up the attic access hole and cap it with J-bead. This leaves a trim surface on which the lid can rest. The lid can be made from a piece of drywall with several layers of rigid-foam board glued to the back for insulation.
STEP 4 INSTALL THE CORNER BEAD
Check for covered wall outlets. When installing drywall, it’s easy to overlook electrical outlets and fasten a panel right over these small boxes. As you’re installing panels, look in the usual places to make sure the outlets haven’t been covered. Check for receptacles every 6 ft. or so along walls near the floor and above kitchen countertops. Alsocheckforlightswitches near doorways.
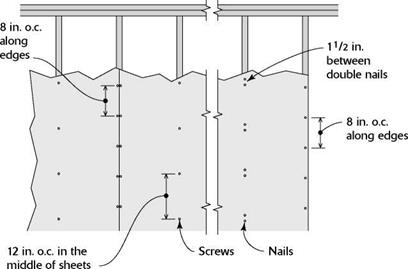
When using nails instead of screws, you may be required to double-nail.


Leave a reply