Horizontal siding panels are usually 12 ft. 6 in. long, though some companies make longer panels. Siding is sold by the square, or the number of panels needed to cover 100 sq. ft. To estimate how many squares of siding you’ll need, calculate how many square feet of wall surface you need to cover, add 10 percent for waste, then divide by 100.
Order enough starter strips to go around the entire building; these typically come in 10-ft. lengths. You’ll also need trim for each inside and outside corner. You can order trim pieces that are the same color as the siding or use a contrasting color, as we did on this house.
If the windows didn’t come with an integral J-channel, or channel surround, then order enough J-channel to cover the top and the sides of all the windows and doors. J-channel is also used along the rake and soffit, as shown on p. 152.You also need to order enough undersill trim to go below each window and to cap the top edge of the last piece of wall siding on the eave walls, which is how they are often finished.
Large-head, 11/2-in. to 2-in. galvanized nails are used to attach both the siding and the trim. A 50-lb. box should be adequate for a small house. Finally, don’t forget about the vinyl soffit panels for closing in the area under the eaves. As shown in the following pages, soffit panels may require J – or F-channel trim.
|
SAFE SCAFFOLDING KEEPS YOU OUT OF HARM’S WAY
On single-story construction, most scaffold work can be done with good sawhorses and good planks. Make sure the planks you choose have a solid, even grain and small, tight knots. If a plank breaks, a fall of only a couple of feet can put you out of commission for a while. And just because you buy good scaffold planks today doesn’t mean that they will be safe to use a year from now, especially if they’re left out in the elements. I prefer to use manufactured decking planks made of steel and aluminum. They are more expensive, but they make a more secure working platform.
When you have to work higher up, you’re better off buying or renting solid-pipe scaffolding. These 6-ft.-high units are easy to set up, and they create a 5-ft. by 8-ft. working platform. Make sure the legs are set on a firm foundation and not just on bare earth. Pipe-scaffolding units can be stacked on top of each other for working on a two-story building. If you will be working more than
|
|
|
10 ft. high, ask for guardrails, which are easy to install and help protect you from an accidental fall.
Some builders like to use pump jacks and ladder jacks as an alternative to pipe scaffolding. Available at most supply houses, these jacks are useful when installing sheathing, housewrap, or siding. Used in pairs, pump jacks attach to double 2×4 or single 4×4 (31/2-in.) posts that are held upright with braces temporarily nailed to the roof or to the wall framing. Each pump jack can move up and down on its post to adjust the elevation of the work platform.
If you’re using pump jacks, make sure the units come with a built-in guardrail that protects you from falling backward. Make sure the uprights rest on a solid base and not on bare earth. Ladder jacks are steel brackets that hook on the rungs of ladders. Once the brackets are secured to a pair of ladders, you can set planks on the brackets. If you want to move up and work at a higher level, you must remove the planks and reposition the brackets.
|
|
|
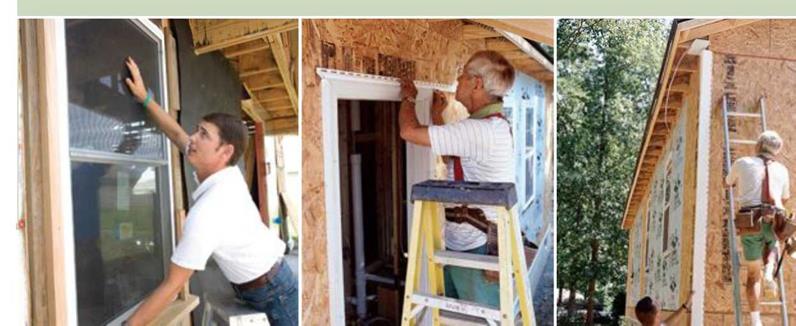
The walls look strange covered with foam boards and wood panels.
Vinyl siding will be a big improvement.
All the windows must be installed before the siding goes on.
It takes teamwork to get the window frame into its opening and centered properly.
Vinyl starter strips and different kinds of trim must be nailed in place before we install the siding panels.
|
|


Exterior trim
Aluminum-clad exterior trim goes well with vinyl siding because, like vinyl, it’s also a nomaintenance finish treatment. Aluminum sheets have a factory-applied finish and come on large rolls in various widths. Often referred to as coil aluminum, this sheet material is bent at the job site to fit around exterior trim boards.
To prep for this treatment, rough fascia boards (also called gutter boards) are nailed to the ends of the roof trusses and to the rafter tails on the roof extension above the side door (see the photo on p. 154). Some of these trim details are covered in Chapter 5 and should be completed before the roof is sheathed and shingled. Other trim details, such as the boxed gable-end return shown on p. 173, can be done as the aluminum cladding goes on.


Leave a reply