Essential Hand Tools
The fundamental tasks of carpentry are measuring, marking, cutting, and joining. And though circular saws and power drill-drivers have largely replaced handsaws, braces, and screwdrivers, many carpentry tasks can still be done with hand tools (see the photo above). Like power tools, many hand tools have improved over the years.
 |
|
 |
|
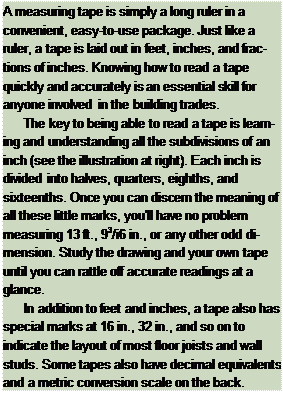
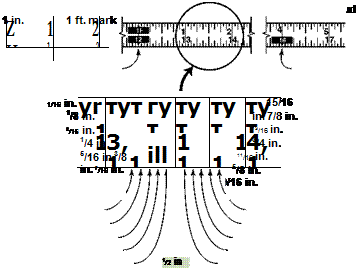
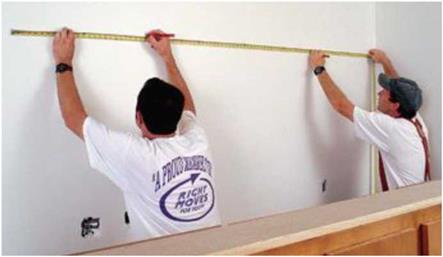
Just as I sometimes enjoy writing letters on my old manual typewriter, it’s also fun to measure with my old 6-ft. wooden folding rule. Flexible steel tapes have replaced old-fashioned wooden rules, because they’re more compact and capable of measuring much longer distances quickly and accurately. Steel tapes come in many sizes and lengths, but the most common are 16-ft., 25-ft., and 30-ft. models. I prefer a 16-ft. tape, because it feels better in my hand.
A 100-ft. tape is useful for checking building lines and squaring foundations. Tape measures have moving parts and receive heavy use,
so use the following tips to treat them with Measuring and marking. A steel tape measure is one of the most-used tools
special care: in a carpenter’s kit.

![Essential Hand Tools Подпись: Horizontal and vertical. Available in different lengths, levels can quickly test for plumb (vertical) and level (horizontal). [Photo by HFHI/David Spielman]](/img/1312/image072_0.gif)
• Don’t leave a tape extended open on the floor, where it could be stepped on and creased. A creased tape will never work properly.
• If a tape is allowed to retract too quickly, the hook can break off when it hits the case. Learn to slow the tape with your fingers as the hook approaches the case.
• Clean any tape that gets gummed with wood pitch, tar, or caulk. A soft rag dampened with mineral spirits works well to remove those materials.
• When working in wet weather, wipe the tape dry with a cloth before reeling it into the case. Moisture inside the tape case can cause rust and friction, which can shorten the tape’s life span.
Building a house involves math problems galore. Whether figuring out the amount of concrete needed for a driveway, the square footage of floor space in a house, the number of studs for a wall, or the amount of shingles needed for the roof, these are not numbers you want to leave to
![Essential Hand Tools Подпись: New calculators that work in feet and inches make it easy to solve many construction problems. [Photo by Don Charles Blom]](/img/1312/image073_2.gif)
chance. Math challenged or not, I recommend using a small hand-held calculator. There are several on the market, and they work in feet, inches, and fractions (see Resources on p. 279).
Checking for level (horizontal) and plumb (vertical) are construction tasks that carpenters do every day. Both 2-ft. and 4-ft. levels are good to have around. The 2-ft. model allows you to get into tighter spaces—to check a header or rough sill for level, for example. A 4-ft. or 6-ft. model provides greater accuracy across longer distances, such as when checking walls for plumb. More so than perhaps any other carpentry tool, a level must be treated with loving care to remain useful (an inaccurate level does you no favors). Check your levels for accuracy before you put them to work (see the tip at top left).
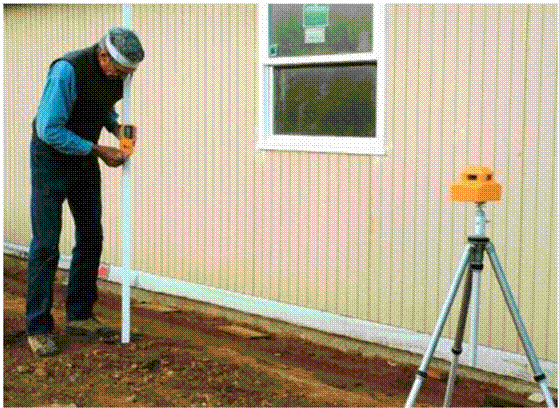 |
Everyone wants a house that is built straight, plumb, and square. This may be why lasers are now almost as common as hammers on the job site. Small, self-leveling laser units cast a beam of light that can help ensure accurate measurements. Some of these laser units are small enough to fit in the palm of your hand (see Resources on p. 279).
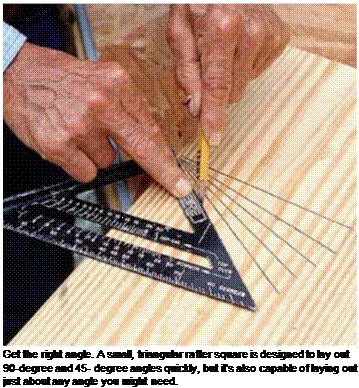
Most things a carpenter builds are either square or rectangular. With a good square or two, you can mark square lines exactly and make square cuts precisely. These days, the most useful square is a small rafter square, often called a Speed® square—the brand name of a popular model (see the photo at left). This triangular square fits conveniently inside a nail bag. It’s rugged and easy to use and lets you lay out almost any desired angle, in addition to the usual 45-degree and 90-degree angles.
Once you’ve measured, it’s time to mark. A carpenter’s pencil and a lumber crayon, or keel, are the two most common marking tools you’ll need. A carpenter’s pencil is flat (so it won’t roll away if you set it down), and it’s less apt to break than a regular pencil. A keel marks easily where pencils can’t—on materials such as tarpaper, housewrap, and concrete. It’s waterproof, too.
![]()
![]()

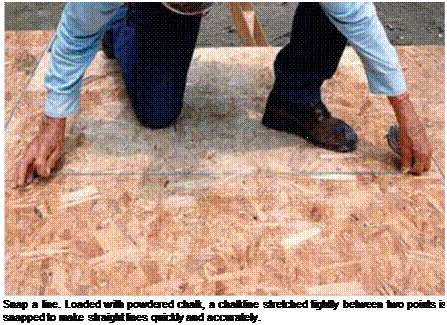
A chalkline is also essential. The first chalkline I used was simply a string pulled through a solid chunk of chalk. Today’s chalklines come in cases or reels that hold both
 a string and a supply of powdered chalk. You pull the chalk-covered string out of the case, snap your line, and then rewind the string inside the case, where it becomes covered in chalk again, ready for the next line. The chalk comes in many colors, including a few neon shades. Chalk that leaves a permanent line is good for working in rainy weather.
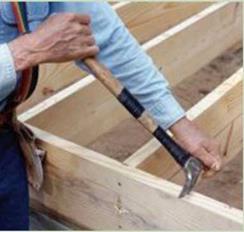
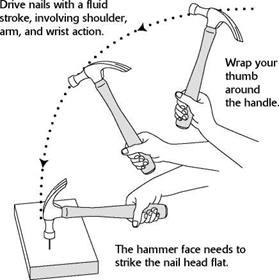
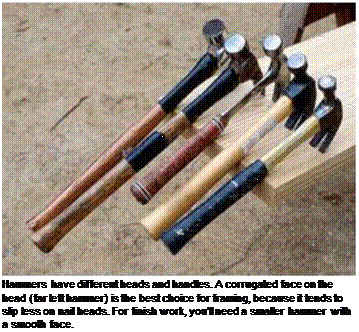
Carpenters can be a bit touchy about their hammers. You may have more luck borrowing a carpenter’s pickup truck than a favorite hammer. These days, most framers west of the Mississippi prefer a 21-oz. hammer with a serrated face and a 16-in.- or 18-in.-long wooden handle. My preference is the well-balanced Dalluge® hammer. Women friends in the trade tell me they like the Stiletto®, a 14-oz. framing hammer made of titanium with a steel face. East of the Mississippi, I see carpenters mostly using smooth-faced hammers with metal or fiberglass handles.
Hammer faces and weights vary greatly (see the photo above). The best advice I can give is to select a professional-grade hammer that feels
good to you. Definitely check out a hammer in person before you buy it. It should match your physical strength, feel well balanced, and be comfortable in your hand. When I bring a new hammer home, I usually reinforce the upper part of the wooden handle by wrapping it with electrical tape.
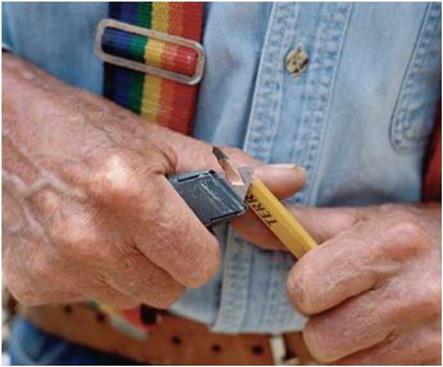
A few more essential tools round out a carpenter’s basic, must-have kit. Perhaps foremost on this list is a utility knife. On the job site, a utility knife may be used to open packages or cut building paper, fiberglass insulation, shingles, vinyl, or drywall. You’ll also need it several times a day to sharpen a carpenter’s pencil. I recommend using a knife with a retractable, replaceable blade and a handle with space inside to hold several replacement blades. When a blade becomes dull, replace it or restore its edge with a whetstone. A dull blade doesn’t cut as neatly and is dangerous because of the extra force required to make it cut.


 You’ll need a good pair of tinsnips to cut
steel packaging bands around lumber. Snips are

 also essential when working with aluminum cladding and vinyl siding. Be careful when using these cutting tools. Accidents with utility knives are common.


Leave a reply