CROSS-SIGHTING A JAMB
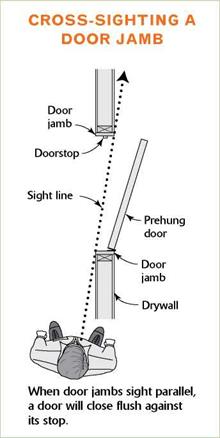
Once the jambs are installed, you need to cross-sight them—that is, check to see that they’re parallel or in the same vertical plane. Close the door and make sure it rests flat against the stops at both the top and the bottom. Sometimes the door hits the bottom of the stop, for example, but misses the top by 1/s in. or more. This may happen because the door is warped, but it can also occur when two jamb sides are out of parallel.
To check whether the two jambs are parallel, stretch two strings diagonally across the door frame to form an "X." If the strings just touch in the middle, the jambs are parallel. With experience, you can also learn to check for parallel jambs by eye.
Step back along the wall, about 3 ft. from the door opening, and sight across the jambs from one jamb to the other to see whether they’re parallel (see the illustration at near left).
CORRECTING SKEWED JAMBS.
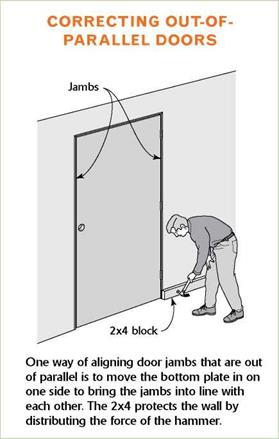
If the jambs are out of parallel, correct the problem by moving the bottom plate a bit. Sometimes the bottom plate is not nailed directly on the chalkline when the walls are framed, causing the jamb sides to be out of parallel. To fix it, place a 2x block on the floor against the bottom plate and use a big hammer to push it back on the line (see the illustration at far right).The method may sound a bit harsh, but it works.
If the door touches the stop on the strike side at the top of the jamb
but not at the bottom, the wall on the strike jamb needs to move in toward the door. If the door touches the stop on the strike side at the bottom of the jamb but not at the top, the wall on the hinge jamb needs to move a bit away from you. Normally, very little movement is needed, so even though you are using a hammer, be gentle.
As a last resort, you can use another, though less satisfactory, way to correct the problem. You can carefully pry off the doorstop trim on the lock jamb, close the door, and renail the trim snugly against the door.
|
|
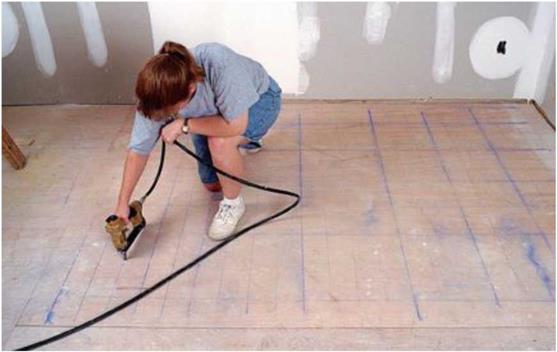 Install underlayment with a nailer. The quickest and most efficient way to nail off vinyl-floor underlayment is with a pneumatic nailer. Chalklines snapped on the underlayment panels form a grid of 4-in. squares that indicate where to staple.
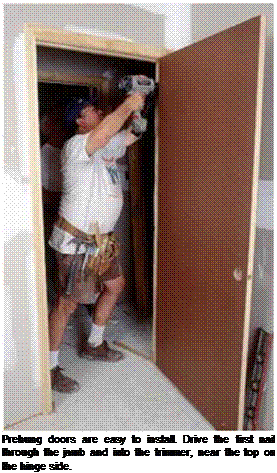
in an opening. Whichever style of prehung door you have, the installation process is basically the same. If the floors will be carpeted, put a 7/i6 – in.-thick block of OSB or plywood (3/4 in. wide by 1 in. long) under each jamb side. The block will be hidden once the floor is carpeted. Otherwise, unless you have ordered shortened doors, you may have to trim the bottom of the door so it won’t drag on the carpet. The block, especially important when setting a heavy door, keeps the door assembly from settling and causing the door to stick.
Professional trim carpenters often order shortened doors from the supplier. That allows them to set the jambs right on the subfloor without having to raise them for carpeting. There is no need to buy shortened doors for thin vinyl floors. Check to see what other builders are doing in your area.
![CROSS-SIGHTING A JAMB Подпись: Leave enough operating clearance. Leave a 1/8-in. margin between the door and the jamb so the door can open and close freely. [Photo by Andy Engel, courtesy Fine Homebuilding magazine © The Taunton Press, Inc.]](/img/1312/image772.gif)
![CROSS-SIGHTING A JAMB Подпись: Keep the jambs straight. A heavy door can bow a jamb inward at the top hinge. Straighten the jamb by lifting up the door on the lock side and then nailing the jamb securely in place. [Photo by Andy Engel, courtesy Fine Homebuilding magazine © The Taunton Press, Inc.]](/img/1312/image773.gif)
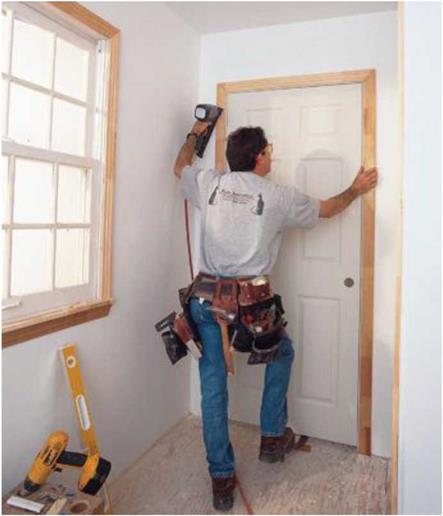
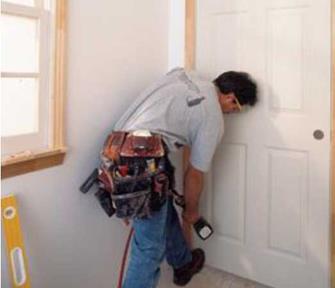
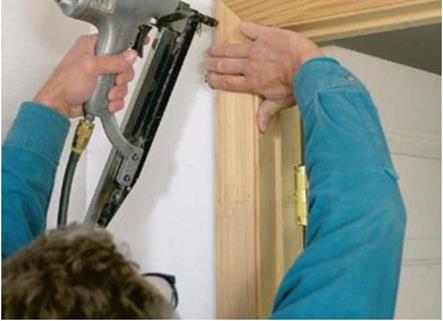
assembly in the opening and drive a 6d or an 8d finish nail through the jamb, about 3 in. or so from the top on the hinge side (see the bottom photo on p. 245).
With any luck, the trimmer on the hinge side will be plumb and you can nail the jamb directly to it without the use of shims. Use a 4-ft. level to check the hinge-side jamb for plumb and straight. Make sure the margin between the underside of the head jamb and the top of the door is at least ‘/8 in., about the thickness of a nickel, all the way across the top (see the photo below). If the margin at the top is too tight (less than ‘/8 in.) or too wide (more than XA in.), it can be corrected by raising a jamb side. The hinge side can be raised, even with a nail at the top, with a flat bar under the jamb.
Once the margin is correct, nail again near the bottom hinge. Remember to shim under every jamb that doesn’t rest directly on the subfloor.
When setting heavy doors, the weight on the top hinge can bow the jamb outward. If that happens, place a bar under the door and raise the strike (lock) side of the closed door until the hinge jamb is straight or even bowed back slightly. Then drive a nail through the jamb on the hinge side, both above and below the top hinge.
You don’t need to plumb the strike side of a prehung door. Just bring the jamb near the door so that the margin between the jamb and the door is consistent—and at least XA in.—all the way around the door. Once the margin is correct, the strike-side jamb can be shimmed and nailed like the hinge side (see the illustration on the facing page). Keep all nails well above and below the lock area.
When jambs come with casing trim installed, drive 6d finish nails through the casing and into

![]()
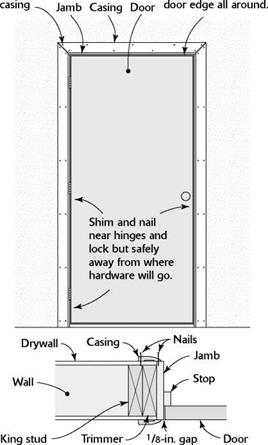
 the trimmer all the way around the door. Try not to drive nails into any grooves in the casing. This makes it hard to fill and sand nail holes.
Any space between the jamb and the trimmer can be filled with a shim before you nail the jamb to the rough framing. I am not a fan of tapered shims, because unless you use a pair of them a jamb may not be installed flat and straight. I prefer using small pieces of plywood Є/8 in., 3/i6 in, /4 in., or thicker) for shims. I slide a 3-in.-sq. shim between the jamb and the trimmer to provide solid backing before nailing the jamb sides in place. If there is a wide gap between the jamb and the trimmer, don’t fill the space with a stack of tapered shims. Instead, use a single thick shim.
To strengthen the door assembly, remove a short screw from each hinge and drive an identical-looking but longer screw through the hinge and jamb and into the trimmer. This step helps anchor the hinges and hinge-side jamb to the wall framing.
Throughout the process, continually check the door to see that it opens and closes with ease and that the jamb sides cross-sight, as described
in the sidebar on p. 244. If a problem develops, it’s best to find out along the way, rather than after the last nail has been driven home. If you’re driving nails by hand, use a nail set to set them below the surface of the wood so they can be hidden with putty.
Install bifold and bypass doors
Bifold doors work well in small areas, such as closets and laundries. They are supported by top and bottom pivots or guided by an overhead track. I find bifold and bypass doors easy to install, but the less expensive versions are

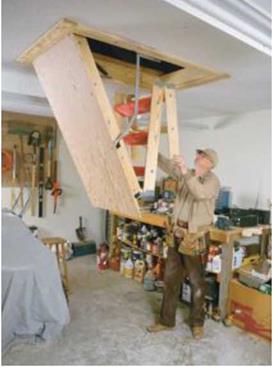 for everyday use. But if it is installed properly and used carefully, a folding staircase works quite well.
Most folding staircases consist of three ladder sections that are hinged together and attached to a ceiling-mounted trapdoor. The door is hinged and held flush to the ceiling with springs. You pull on a cord to open the door and pull down the stairs. As the door swings down, you can unfold the two bottom sections of the staircase (see the photo at left). The entire unit fits into a rough-framed attic-access hole between ceiling joists. The opening is typically 221/2 in. wide by 54 in. long. Simply follow the installation instructions provided by the manufacturer.

![CROSS-SIGHTING A JAMB Подпись: Temporary ledgers simplify installation. A pair of boards can be screwed to ceiling framing, supporting the ends of the drop-down staircase until it's secured. [Photo by Jefferson Kolle, courtesy Fine Homebuilding magazine © The Press, Inc.]](/img/1312/image785.gif)
not very durable. Many of the cheaper models have fittings that just can’t take serious use. Good hardware costs more up front but may save you from having to replace the entire unit prematurely.
Step-by-step installation instructions come in every bifold and bypass door package. Once the trimmers and header have been wrapped in drywall, the opening for a bifold should be the size of the doors. A 3/0 bifold door is installed in a 36-in.-wide opening. The opening for bypass doors should be 1 in. less than the size of the doors. For example, a 5/0 bypass door needs a 59-in.-wide opening.
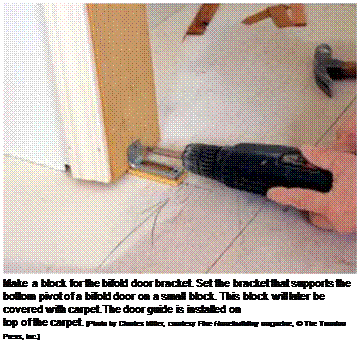
If the floor will be carpeted, nail a plywood block (usually about 1/2 in. or 3/4 in. thick) under the brackets that support the bottom pivot of bifold doors (see the photo on p. 247). If you are working on a slab, drill holes in the concrete and set sleeves in the holes. Then glue the block in place and screw it into the holes. The carpet will cover the block. A similar block needs to be placed in the center of bypass doors to hold the bottom door guide.
Some people like to install a folding staircase to give them access to attic space. A factory-made folding staircase doesn’t meet the code requirements for a regular stairway, so it’s not designed


The stair unit comes out of the box completely assembled. When attaching it to the joist chords and header, use the screws that come in the package—not drywall screws. Drywall screws are relatively brittle, do not possess much shear strength, and can break under a heavy load. To support the unit during installation, screw temporary ledgers (supports) to the ceiling joists that surround the opening. The ledgers should project about 1 in. into the rough opening. The ledgers hold the stair unit while you secure it in place.
The unit is installed much like a prehung door. You need to shim between the sides of the stair jambs and the supporting joists before driving the screws through predrilled holes. Once a few screws are in place, open and shut the door now and then to ensure that it opens easily and that the reveal, or space, between the door and the jambs is even all the way around.
The bottom section of the stairway must be cut to length, with the ends of the legs (or stringers) cut at the correct angle so they rest solidly on the floor. To find the angle, swing the staircase down and unfold all but the last section. Extend a 1×4 board alongside an upper-section stair stringer so that the 1×4 reaches the floor. Place another board on the floor and against the 1×4, then mark the cutoff angle on the 1x 4. Once you cut that angle on the 1x 4, transfer it to measured cutoff lines on both bottom-section stringers and cut them to length.


Leave a reply