BUILDING CORNERS AND CHANNELS
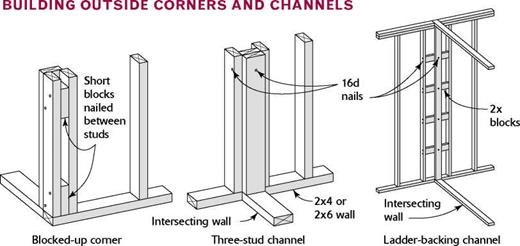
Like headers, outside corners and channels can be built in a number of different ways, and preferences tend to be regional. The most common constructions are shown in the illustration below. A two-stud outside corner works well in most cases, but if you are planning to install clapboard or fiber-cement siding directly to the studs (with no exterior sheathing), you’ll need more backing at the outside corners. A blocked-up corner provides more backing and mak es good use of 2x offcuts. In addition, all of these outside corner configurations provide backing on the inside of the wall for drywall or other wallboard.
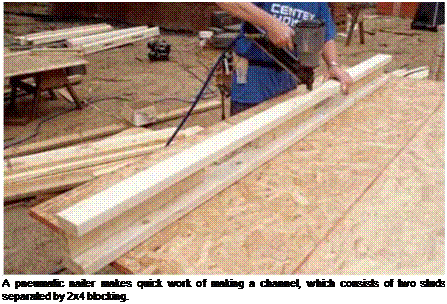
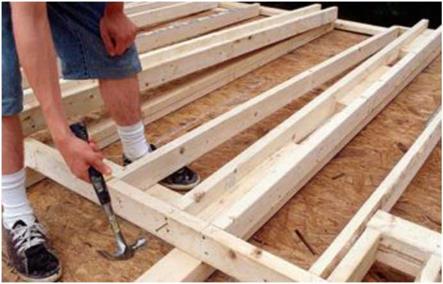
Channels (sometimes called tees) are most easily made with a flat stud or blocks nailed between two regular studs. I place a crowned or knot-filled stud between two good studs. In some parts of the country, framers build ladder-type channels to provide backing at intersecting walls. Building ladder backing doesn’t save a lot on materials, but it does allow more insulation to be inserted at those spots.
Both corners and channels are nailed together with one 16d nail every 2 ft. o. c. When nailing channels to the top and bottom plates, make sure that the flat stud is oriented correctly to provide backing for an intersecting wall. It’s not difficult to put in a channel upside-down.

|
|
|
|
||||


explains the main types of corners and channels. You can build corners and channels in place as you frame the walls, or you can build them all at once in a central location, then distribute them and insert them in the walls as needed.
Keep your eyes open for studs that are bowed, twisted, or crowned. Set them aside to use for blocking and roof braces. This ensures a more uniform finished wall and makes it easier for
finish carpenters to install cabinets, countertops, and interior trim. It’s always good to think about how to make future tasks easier. So take care to use straight studs in all walls that will hold kitchen cabinets.
Nail on the top and bottom plates
It’s finally time to pry apart the two wall plates that were tacked together on the subfloor.

![]()


Working on one wall at a time, separate the top wall plate from the bottom plate, removing the 8d tack nails as you go. Leave the bottom plate tacked to the floor for now. Nail the top plate first, using the bottom plate to keep the studs aligned. Move the top plate straight up to the upper ends of the studs. Don’t turn a top plate end for end as you move it into position or you’ll have a real mess. The exterior walls can be framed over the interior walls rather than flat on the deck or slab (see the top photo above). This is okay. The most important element in wall framing is to keep the frame reasonably straight and square on the floor.
This is not difficult to do. Take your time until you get it right.
Begin nailing studs to the plate at an outside corner. Make each stud flush with the edge of the plate. Drive a pair of 16d nails through the plate into each stud. You will find that consistently working either from left to right or from right to left has a natural feel. Over time, you will develop a rhythm to nailing studs that involves not just your hands and arms but your entire body.
If you are using a pneumatic nailer, always drive the bottom nail first. Then remove your hand from the stud and drive the top nail. If you keep your hand in place while driving the top nail, sooner or later you will miss and drive a nail into your hand. Unfortunately, I learned this the hard way.
When you come to a door or window opening, be especially careful to nail each king stud on the “X” mark next to the header location. Once all the wall, king, and top cripple studs are nailed to the top plate, pull up the bottom plate and begin nailing it in place, always paying attention to your layout marks. Repeat the process. Nail all wall members to the bottom plate just like you did with the top plate.
I always nail the blocks for a recessed, or in-wall, medicine cabinet while the wall is flat on the floor. At the “MC” marking, hook your tape on the bottom plate and measure up 4 ft. and 6 ft. on the two studs on each side. Nail a flat block below the 4-ft. marks and above the 6-ft. marks. This leaves a clear space of 2 ft., which is the height of a standard recessed medicine cabinet.


Leave a reply