Shoring
Shoring temporarily supports loads carried by bearing walls while you modify them—say, to add a window or a door opening. Typically, shoring is installed after removing finish surfaces and rerouting pipes and wires but before cutting into a bearing wall. If you’re not sure if the wall is bearing or whether it can be safely modified, have a structural engineer inspect the house and review your remodeling plans. This is hard-hat work.
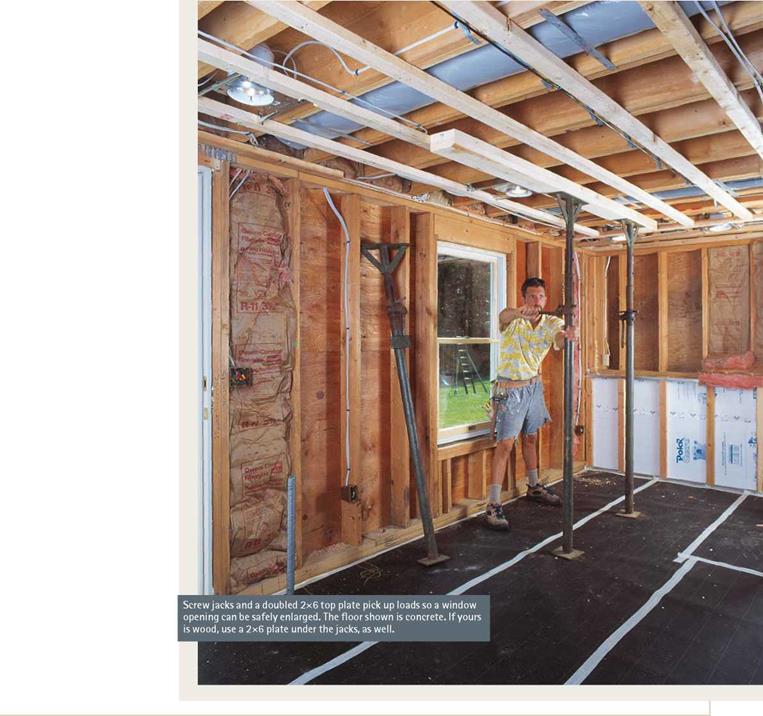
For first – and second-floor walls, two types of shoring are common: screw jacks used with top and bottom plates, and temporary stud walls built from 2x4s. In either case, position shoring back 2 ft. to 3 ft. from the wall you’re working on so you’ll have room to move tools and materials.
► If you’re using screw jacks, doubled 2×6 top plates will distribute loads better. Here’s how to laminate the top plates in place: Use two or three

|

16d common nails to nail the upper 2×6 directly to the ceiling joists; then face-nail the second 2×6 to it. Ideally, the top plates should extend one joist beyond the new opening on both sides. Don’t overnail, you’re just holding up the plates till you get jacks underneath. Plumb down to mark the location of the single 2×6 sole plate. Place jacks every 4 ft., and plumb them. Tack-nail the top of each jack so it can’t fall over. Then raise one jack in tiny increments before moving to the next. Raise ceiling joists no more than Vs in.—just enough to take pressure off the bearing wall.
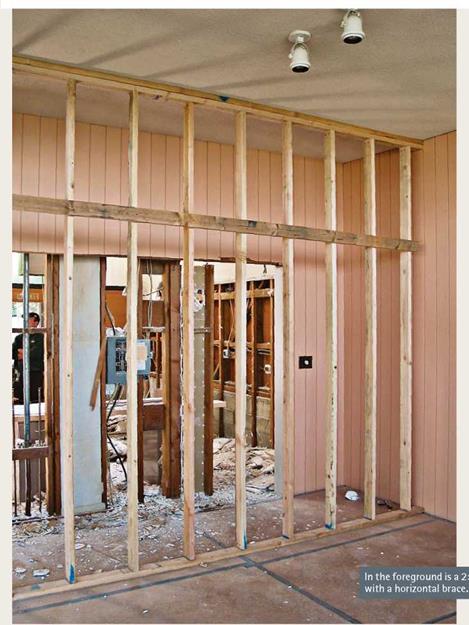
► Building a temporarily stud wall is similar: Tack-nail the top plates; then plumb down to
mark the bottom plate. (To keep the bottom plate in place, tack-nail it to the joists underneath.) Cut studs in. longer than the distance between the plates because, here, the studs do the lifting. Toenail the studs to the top plate on 16-in. or 24-in. centers. Then use a sledge to rap the bottom of each stud till the stud is plumb. Recheck each stud for plumb as you progress, and monitor them periodically.
Once shoring supports the loads above, remove the studs from the bearing wall as needed to enlarge openings, add headers, and the like. If the bearing wall transfers loads from upper stories down into girders or foundation walls, study the lengthy section on jacking and shoring in Chapter 10.
![]()

![]()
Once shoring is in place, you should be safe in removing bearing walls. Check with a structural engineer if you have any doubts. Again, wear safety gear (hard hat, eye protection, work boots with thick soles, and so on) and test the electrical outlets to be sure the power is off. If you need to do any jacking, read Chapter 10.


Leave a reply