APPLYING A WATER-BASED FLOOR FINISH
Applying a water-based polyurethane does not differ much from applying an oil-based finish and, as noted in the preceding section, water – based finishes are more benign. Although "Finishes, Cleaning Solvents, and Applicators,” on p. 494, offers general guidance, consider the can label as the last word on drying times, recommended applicators, and so on.
Cutting the edge is the first step when applying any type of floor finish. Use a brush or paint pad to apply a 6-in. swath of finish around the perimeter of the room, along cabinet bases—in short, any place that would be difficult to edge with a large applicator. Pour finish into a sloping paint tray with a replaceable liner, so you can easily reload the paint pad, brush, or large applicator.
If you’re applying a slow-drying finish, you can edge the whole room before switching to a large applicator. However, because water-based finishes dry quickly, it’s best to edge one section


![]()
![]()
![]()


of a wall at a time, so you can use a T-bar applicator to overlap edged borders while they’re still wet. Maintaining a wet edge is the key when applying water-based finishes: Edges that dry before they’re overlapped have a distinct lap mark.
Working the floor with a T-bar applicator is like a ballet with chemicals. After cutting the edge, pour a thin puddle of finish along one wall, parallel to the floorboards, but stop the puddle 3 ft. to 4 ft. shy of the far wall. Holding the applicator pad at a slight angle—somewhat like a snowplow blade—pull the applicator through the finish. Angle the applicator so that excess finish flows toward the inside of the room so you can spread it out on the return pass. The ballet comes at the end of each turn, as you sweep the applicator pad 180°, spread the finish evenly, and set up for the next pass. It’s easier to do than to describe.
Periodically pour more finish in a long puddle to maintain a wet edge. Having a second person to pour the finish and touch up missed spots is helpful but not essential. If you see a missed spot after the finish has started to set, let it dry and be sure to coat that area the following day, when you apply the next coat. Once each coat is dry, screen – sand it lightly, vacuum, and dry-mop it with a tack rag over the mop. Then apply the next coat.
|
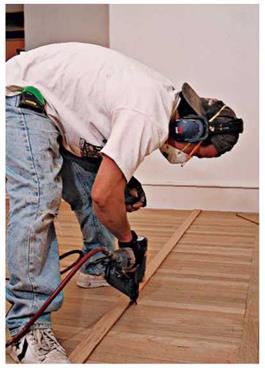
Square-edge wood strip flooring is face-nailed, so use a straightedge to line up the nails for a neat, professional appearance. Because tongue – and-groove flooring is nailed through the tongues, those nails are hidden. |
In general, don’t walk on the floor till the final coat has cured at least 3 days, and—because this finish is water based—do not damp-mop it for a month.


Leave a reply