Moisture Content Effect on Bearing Capacity – a Danish Study

Relationships between bearing capacity and moisture content were studied in the Danish Road Testing Machine (ALT-facility) (Krarup, 1995). A typical Danish pavement was built in the facility, and for almost one year the only condition that was changed was the level of the water table. No load was applied except for FWD – measurements. The layer stiffness moduli (E-values) of the pavement layers were calculated from FWD-measurements with the program ELMOD (Dynatest, 1989). Based on the test results, a relationship between E-value and suction, pore pressure and degree of saturation was established. Simple linear regression describes the

Slighty clayey sand – Noucelles

1. pd = 1.70 Mg/m3 : M = 111.1 + 0.119 s

R = 0.980, N = 11

2. pd = 1.62 Mg/m3 : M = 113.1 + 0.084 s

R = 0.971, N = 13

Silt – Sterrebeek

3. pd = 1.75 Mg/m3 : Mr = 80.4 + 0.092 s

R = 0.918, N = 26

4. pd = 1.59 Mg/m3 : M= 73.7 + 0.064 s

R = 0.900, N = 15

Slighty clayey sand – Noucelles

5. pd = 1.70 Mg/m3: G = 42.1 + 0.074 s

R = 0.868, N = 10

6. pd = 1.62 Mg/m3 : G = 47.3 + 0.055 s

R = 0.879, N = 13

Silt – Sterrebeek

7. pd = 1.70 Mg/m3 : G = 34.0 + 0.078 s

R = 0.953, N = 14

8. pd = 1.62 Mg/m3 : G = 29.3 + 0.049 s

R = 0.942, N = 11

iSS * lem I

Suction head, s, (cm)

Fig. 10.18 Correlations between the resilient modulus and the suction for the two soils ana­lyzed for a confining pressure of 20 kPa and a deviatoric stress of 20 kPa (BrUll, 1983). Figure courtesy of the Belgian Road Research Centre

Note: Mr = Resilient Modulus (MPa), G = Shear Modulus (MPa), R = coefficient of correlation, N = number of data points, s = suction (cm), light dotted lines show 95% confidence limits for Mr.

relation between the value of the E-value and suction measured by the tensiometer in the form: E = B1 + B2 x s, where

• E is the layer E-value in MPa from the ELMOD calculation;

• B1 and B2 are constants; and

• s is the measured suction in kPa.

The regressions reveal high levels of R-squared within the range of the measured suction values for all unbound layers. The measured values and the linear regression lines from three of the tensiometer depths are plotted in Fig. 10.20.

When calculating the stress in a pavement (a continuous body), the stress accord­ing to Boussinesq is independent of the E-modulus of the material. Combining this statement with Terzaghi’s principle of effective stress, it becomes unpredictable to what extent E-values from FWD-tests relate to positive pore pressure measured in standpipes. Positive pore water pressure only appears in what is considered to be a saturated condition. In the Krarup study, the upper pavement layers only became saturated for very short periods and water/suction versus time series exist for this granular base course layer data.

The available measured data, linear and linear-exponential regressions were tested on the data to investigate any dependency. The linear regression came up with a R-squared value ranging from 0.56 to 0.88, whereas the linear-exponential regression had the best fit at 0.72. The data and the linear regressions were plot­ted in Fig. 10.21. Note the much lower values of stiffness were determined in-situ than those typically measured in laboratory triaxial assessments (cf. Fig. 10.12 for example).

The reason for the decrease of the lower unbound layer material stiffness over the monitoring period is expected to be the water that adheres to the surface of the mineral’s granular materials, more than any pore water pressure phenomenon.

Saturation: Saturation and E-values are not expected to reveal a linear relation­ship, as the change in E-value dependent on degree of saturation occurs at a certain level of saturation determined by the void size distribution. The results plotted in Fig. 10.22 are derived from time series and are not scattered data points. During the monitoring period the saturation increased and decreased, so the curves should be read from left to right and then back again so as to follow time.

The two time series of saturation data from 20 to 40 cm below surface are plotted with the E-values assigned to the sub-base layer, and therefore plotted with the same

set of E-values. Figure 10.23 shows that granular base course and sub-base layers tended to have threshold E-values in the test pavement. Keeping the low E-values of the subgrade at the construction time in mind, the E-value of the natural till subgrade might continue to decrease as long as the water table is above the material.

As a rather strong relationship between E-value and suction was confirmed from the measurements, the relation between suction and saturation becomes interesting. In soil water research the relationship is the so-called soil-water characteristic curve or the retention curve. From experiments in the laboratory the relationship can be found for small soil samples. Data measured in the test pavement were plotted as Fig. 10.23.

AN OVERVIEW OF BATHROOM FIXTURES

This short section provides an overview of what’s available and a few buzzwords to use when you visit a fixture showroom. Start your search on the Internet, where most major fixture and faucet makers show their wares and offer design and installation downloads. One of the most elegant and informative sites is www. kohler. com.

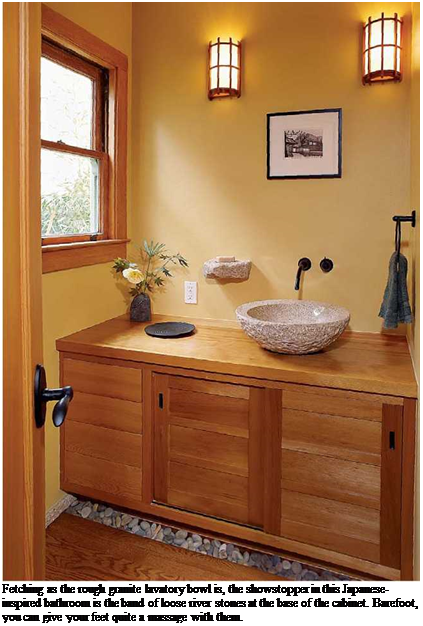
Lavatories (bathroom sinks) are available in a blizzard of colors, materials, and styles. Styles include pedestal sinks, wall-hung units (including corner sinks), and cabinet-mountedbcvaiories. Wall-hung lavs use space and budgets economi­cally, but their pipes are exposed, and there’s no place to store supplies underneath. Pedestal sinks are typically screwed to wall framing and sup­ported by a pedestal that hides the drainpipes. Counter-mounted lavatories are the most diverse, and they use many of mounting devices dis­cussed earlier in this chapter for kitchen sinks. Less common are vanity top (vessel) basins, which sit wholly on top of the counter, as shown in the photo at right.

Lavatory materials should be easy to clean, stain resistant, and tough enough to withstand daily use and the occasional dropped brash or blow-dryer. The most durable lavs are enameled cast iron. Although lighter stainless-steel lavs are tough and stain resistant; their sleek, polished look is distinctively modern, so they may not look good when matched with traditional porce­lain fixtures. Vitreous china (porcelain) lavs have a hard, glossy finish that’s easy to clean and durable, but it’s not as durable as enameled cast iron. Hard use can chip and crack vitreous fix­tures. Spun-glass lavatories are made from soda lime glass, often vividly colored and irregularly textured. Finally, solid-surface lavatories are typi­cally bonded to the underside of a countertop of a similar material (see "Countertops for Kitchens and Baths,” earlier in this chapter).

Important: Make sure lavs and lav faucets are compatible. Most lavatories are predrilled, with faucet holes spaced 4 in. (centerset) apart, or 8 in. to 12 in. (widespread). There are single lavs for single-hole faucets. And undermounted lavs may have no faucet holes at all; you need to drill the holes in the counter itself.

Toilets and bidets are almost always vitreous china and are distinguished primarily by their types and their flushing mechanisms. Close to 99 percent of toilets sold are of these three types: traditional two-piece units, with a separate tank and bowl; one-piece toilets; and wall-hung toilets. The other 1 percent includes composting toilets, reproductions of Victorian-era toilets with pull – chain flushing mechanisms, and so on. As noted in Chapter 12, toilet-base lengths vary from 10 in. to 14 in. (12 in. is standard), which can come in handy in a renovation when the wall behind the toilet is too close or too far.

Choosing a toilet is a tradeoff among factors such as water consumption, loudness, resistance to clogging, ease of cleaning, and cost. Wash­down toilets are cheap, inclined to clog, and

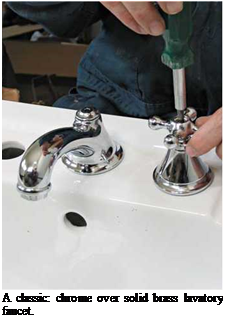
Подпись: A well-made faucet has some heft to it, and when you turn its handle or handles on and off, they feel solid—like the thunk of a well-made car door when you close it. To compare faucet quality, play with the most expensive faucets in the showroom. Then, if you find a less expensive model with some of that satisfying solidness and in a style you like, it might serve well enough. 1111 Подпись: A classic: chrome over solid brass lavatory faucet.

banned by some codes. Reverse-trap toilets are quieter and less likely to clog than wash-downs. The quietest and most expensive models are typi­cally siphon-jet or siphon-vortex (rim jet) toilets. Siphon toilets shoot jets of water from beneath the rim to accelerate water flow. Kohler® also offers a PowerLite™ model with an integral pump that accelerates wastes to save water and a Peacekeeper™ toilet that "solves the age-old dispute over leaving the seat up or down. . . .

To flush the toilet, the user simply closes the lid.” A Nobel Prize for that one!

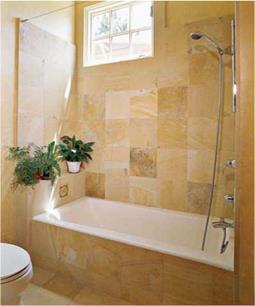
Bathtubs and shower units are manufactured from a number of durable materials. And site – built tub/shower walls can be assembled from just about any water-resistant material. Bathtubs are typically enameled steel, enameled cast iron, acrylic, or fiberglass; preformed shower units are most often acrylic or fiberglass. Steel tubs are economical and fairly lightweight; set in a mortar bed, they retain heat better and aren’t as noisy if you knock against them. Cast iron has a satisfy­ing heft, retains heat, and is intermediate in price; but it’s brutally heavy to move. For that reason, many remodelers choose enameled steel, acrylic, or fiberglass to replace an old cast-iron tub. Acrylic and fiberglass are relatively light­weight and are available in the greatest range of shapes and colors; their prices range widely, from moderate to expensive.

Standard tub sizes are 2 ft. 6 in. to 3 ft. wide; lengths are 4 ft. 6 in. to 5 ft. However, if space is tight, you can opt for a compact tub or replace a tub with a shower stall. Shower stalls come as com­pact as 32 in. sq., but that’s a real elbow knocker. Stalls 36 in. sq. or 36 in. by 42 in. are more realis­tic. One-piece molded tub/shower units don’t win beauty prizes, but if properly detailed and sup­ported, they are virtually leakproof.

CHOOSING A LAVATORY FAUCET

If you’re buying a new lav and new faucets, make sure they’re compatible. As noted earlier, lavato­ries often have predrilled faucet holes spaced

4 in., 8 in., or 12 in. apart. Most inexpensive to moderately priced faucets with two handles have valve stems 4 in. on center. Beyond that, the biggest considerations are faucet bodies, finishes, handle configurations, and spout lengths.

Faucet bodies will last longest if they’re brass, rather than zinc, steel, or plastic. Brass is less likely to leak because it resists corrosion and can be machined to close tolerances. Forged brass parts are smoother and less likely to leak than cast brass, which is more porous. If you spend

5 minutes operating an nonbrass faucet, it will likely feel looser than it did when you started.

image684

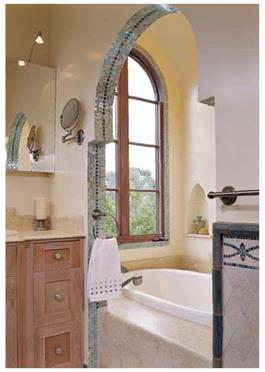
This Moorish-inspired bath alcove has iridescent glass tiles.

Faucet finishes are applied over faucet bodies to make them harder, more attractive, and easier to clean. The most popular finish by far is polished chrome, which is electrochemically bonded to a nickel substrate; it doesn’t corrode and won’t scratch when you scrub it with cleanser. Manu­facturers can apply chrome plating to brass, zinc, steel, and even plastic. But although chrome plat­ing protects faucet surfaces, their inner workings will still corrode and leak, if they’re inclined to.

By the way, brass-finish faucets consist of brass plating over chrome (over a solid-brass base). Brass finishes oxidize, so they should be protected with a clear epoxy coating. Alterna­tively, faucets finished with physical vapor depo­sition (PVD) coatings gleam like brass, but won’t dull or corrode.

Faucet handles are an easy choice: one handle or two. Hot on the left, cold on the right—who’d have thought you could improve on that? But there’s no denying that single-lever faucets are much easier to use. Also consider the valves inside the faucets. Ceramic-disk and brass ball – valves will outlast plastic and steel.

Spouts should have a little flare and be long and high enough to get your hands under them to lather up properly. If you’re a hand scrubber, look for a spout at least 6 in. to 8 in. long that rises a similar amount above the sink.

GREEN FRAMING

Green Framing is as much an attitude as it is an act of doing certain forms of framing. There are some framing designs and materials that are considered “green" but to be a green framer it takes a belief that you want to be a part of the global effort to reduce our effects on the ecosystem. In this chapter I will show you how the green movement is affecting the materials we use and in some cases the way we frame. I will also give you a basic understanding of the construction industry efforts to become green. In additions to this, I will discuss some behaviors that if you so choose will make you a part of the movement.

A little history is probably a good place to start.

It’s hard to say when the first discussions about how the human race is effecting the environment occurred and what we can do to our building practices to prevent ill effects, but Optimum Value Engineering, which has become known as Advanced Framing, was one of the first applications of green building. Advanced framing is an effort to conserve energy by altering framing techniques. It was soon realized, however that an overall building effort was needed to direct the construction industry in order to achieve the best effects. In 2000 the United States Green Building Council (USGBC) was formed and they created LEED (Leadership in Energy and Environmental Design) which is a construction and design industry joint effort to define and certify construction using green methods. The LEED program creates a tool for measuring the green building effectiveness by assigning credits in six areas: Sustainable Sites; Water Efficiency; Energy and Atmosphere; Materials and Resources; Indoor Environmental Quality; and Innovation and Design Process. Credits are totaled for individual jobs allowing for certification at different levels including, Certified, Silver, Gold, or Platinum. These certifications can be used in marketing programs.

LEED is an excellent construction – and design- oriented program to promote green building, however, it is a new and separate organization requiring its own fees and training. In 2008, the International Code Council (ICC) and the National Association of Home Builders (NAHB) came out with the National Green Building Standard ICC700-2008. Designed to guide the residential construction industry in green building, this standard was similar to the LEED system. It provided a rating system of environmental categories similar to LEED and performance levels of Bronze, Silver, Gold or Emerald. The ICC700-2008 is a good guide, but is hard to regulate.

In 2010, the ICC published the International Green Construction Code (IGCC), the first ever compilation of international green building codes and standards. USGBC along with other agencies worked to help develop the IGCC. USCBC’s LEED program set the format for guiding the design and construction industry in green building; however, it is a voluntary program and does not have jurisdictional enforcement capabilities.

The IGCC has similar topics for its five main content chapters, however, once the IGCC is accepted by a jurisdiction it becomes law for that jurisdiction. Unique to the IGCC for the other building codes is a section of regulations that relates to individual jurisdictions, so that each jurisdiction has to select from a group of regulations as to which ones they will require. There is an elective section where jurisdiction is required to determine the amount of a list of elective requirements that must be met.

It’s all a bit confusing and most of it does not apply directly to framing, however some items will. For example, Chapter 5 of the IGCC, “Material Resource Conservation and Efficiency," notes a requirement to develop a construction material and waste management plan that requires not less than 50 percent of non-hazardous construction waste to be diverted from landfills.

Green building is wide spread in the construction process, however green framing is limited. Four parts of green framing that I will discuss are as follows:

1. Greening Framing Feeling

2. Advanced Framing

3. Material Selection

4. Structural Insulated Panels (SIPs)

Energy-Saving Tips

WHILE YOU’RE THINKING about insu­lation and ventilation, you should also pay attention to a few other details that relate to energy conservation. Taken together, these small improve­ments can make a big difference in how well your house works.

a Locate the water heater near the kitchen and bathroom. This avoids long runs of pipe that increase plumbing costs and dissipate heat between the water heater and the faucets or showerheads.

a In cold climates, keep water-supply lines out of exterior walls.

a. Use an insulated wrap for the water heater. Some water heaters come with built-in insulation. If yours doesn’t, buy a water heater insula­tion kit to reduce heat loss and con­serve energy.

a Insulate all hot-water lines, and insulate cold-water lines in a crawl space. Both foam and fiberglass wrap pipe-insulation kits are avail­able at building-supply outlets and home centers.

a. Install low-flow showerheads. A showerhead with a built-in shutoff valve provides even more savings, allowing you to shut off the water while soaping up.

a Consider using a small solar panel to preheat your water. The sun’s energy is free. With a solar panel, you can reduce the energy used by your hot-water heater.

Habitat for Humanity has devel­oped many guides to help home­builders and homeowners save energy and money. They are available online and from HFH International (see Resources on p. 278). Take advantage of these resources and increase your understanding of how to build durable, energy-efficient houses with good indoor-air quality.

time that people are generally home (it doesn’t make much sense to exchange air when no one’s home). The fan we have in our home is centrally located in a hallway, but check with your HVAC contractor to locate yours. Beware of bargain-priced fans. Those models are almost always noisier than other vent fans. An experienced HVAC contractor can advise you on which models run quietly and reliably.

Whenever fans are blowing indoor air out­side the house, fresh air must come in to replace it. This ensures a healthy supply of fresh air and prevents negative air pressure from drawing exhaust gasses from the fire­place or furnace flues, which is a serious safety hazard. The simplest way to provide replace­ment air when exhaust fans are running is to open a window or two. It’s not necessary for
the window to be fully open; just a crack will usually do. If it’s cold outside, open a window in a utility room, unused bedroom, or some­where away from the main living area.

If you’re building a house where the win­ters are long and very cold (in Maine or Minnesota, for example), it may be necessary to have an HVAC contractor install a heat recovery ventilator (HRV) to bring replace­ment air into the house at a more comfortable temperature. Those devices typically work by blowing warm indoor air outdoors while pulling an equal volume of outside air indoors. Since only a thin membrane sepa­rates the passing airstreams, some of the inte­rior’s warmth is transferred to the fresh incoming air.

Correlated-sampling techniques

Correlated-sampling techniques are especially effective for variance reduction when the primary objective of the simulation study is to evaluate small changes in system performance or to compare the difference in system performances between two specific designs (Rubinstein, 1981; Ang and Tang, 1984). Consider that one wishes to estimate

Подпись:Подпись: (6.81)A© = ©1 — ©2

in which

©1 = J g1(x) f 1(x) dx = E [ g1(X)] ©2 = / g2(y) f2(y) dy = E [ g2(Y)]

Подпись: A© = ©1 — ©2 Подпись: 1 n Подпись: Eg1( Xi) — E g2(Yi) . i = 1 i = 1 Correlated-sampling techniques Подпись: (6.82)

with f 1(x) and f 2(y) being two different PDFs. By Monte Carlo simulation, A© can be estimated as

in which Xi andYi are random samples generated from f 1(x) and f2(y), re­spectively, and A©i = g1(Xi) — gjjYi).

The variance associated with A© is

Var(A©) = Var(©©1) + Var(©2) — 2Cov(©b ©2) (6.83)

In the case that random variates Xi and Yi are generated independently in the Monte Carloalgorithm, ©1 and ©2 also would be independent random variables.

Hence Var(A©) = Var((©1) + Var(©2)________________________

Note that from Eq. (6.83), Var(A©) can be reduced if positively corre­lated random variables ©1 and ©2 can be produced to estimate A©. One easy way to obtain positively correlated samples is to use the same sequence of uniform random variates from U(0, 1) in both simulations. That is, the ran­dom sequences {X1, X 2,…, Xn} and {Y1, Y 2,…, Yn} are generated through Xi = F—l(Ui) and Yi = F—1(Ui), respectively.

The correlated-sampling techniques are especially effective in reducing vari­ance when the performance difference between two specific designs for a system involve the same or similar random variables. For example, consider two de­signs A and B for the same system involving a vector of K random variables X = (X1, X2,…, XK), which could be correlated with a joint PDF fx(x) or be independent of each other with a marginal PDF fk(xk), k = 1, 2,…, K. The performance of the system under the two designs can be expressed as

Подпись: OA,I = g &B,i = g Correlated-sampling techniques Подпись: i = 1,2,..., n (6.85a) i = 1, 2,..., n (6.85b)

Подпись: p f, AПодпись: P f, B

Подпись: in which xki = Fk (uki) is the inverse CDF for the kth random variable Xk operating on the kth standard uniform random variate for the ith simulation.
Подпись: Example 6.12 Refer to the pump reliability problem that has been studied in previous examples. Now consider a second pump the time-to-failure PDF of which also is an exponential distribution but has a different parameter of в = 0.0005/h. Estimate the difference in the failure probability between the two pumps over the time interval [0, 200 h] using the correlated-sampling technique with n = 2000. Solution Again, the sample-mean Monte Carlo method with a uniform distribution U(0, 200) is applied as in Example 6.7. In this example, the same set of standard uniform random variates {u1, U2,..., U2000} fromU(0,1) is used to estimate the failure probabilities for the two pumps as
Подпись: — Y (0.0008e-a0008ti i=1
Подпись: — Y (0.0005e-°m°5ti i=1
Подпись: in which ti = 200ui, for i = 1, 2,..., 2000. The difference in failure probabilities can be estimated as
Подпись: Apf = pf,A - Pf,B = 0.05276
Подпись: which is within 0.125 percent of the exact solution e 0 0005(20°) — e о.оооазоо) = e-01 — e—016 = 0.0526936. The standard deviation of the 2000 differences in failure probability Ai = 200[ fA(ti) — fB (ti)], i = 1,2,... ,2000, is 0.00405. Hence the standard error associated with the estimated difference in failure probability is 0.00405/V2000 = 0.00009.

in which g( ) is a function defining the system performance, and a and b are vectors of design parameters corresponding to designs A and B, respectively. Since the two performance measures ©A and ©B are dependent on the same random variables through the same performance function g( ), their estimators will be positively correlated. In this case, independently generating two sets of K random variates, according to their probability laws for designs A and B, still wouldresult in a positive correlation between ©A and ©B. To further reduce Var(A©), an increase in correlation between ©A and ©B can be achieved using a common set of standard uniform random variates for both designs A and B by assuming that system random variables are independent, that is,

For the sake of examining the effectiveness of the correlated-sampling technique, let us separately generate a set of independent standard uniform random variates {Ир u2,…, U2000} and use them in calculating the failure probability for pump B. Then the estimated difference in failure probability between the two pumps is 0.05256, which is slightly larger than that obtained by the correlated-sampling technique. However, the standard error associated with Ai = 200[f a(4) — f в(t)] then is

0. 00016, which is larger than that from the correlated-sampling technique.

RUTTING RESISTANCE

Resistance to permanent deformation is the best known and most recognizable fea­ture of courses made from SMA mixtures. This resistance has its origins in the very strong skeleton of coarse particles of an aggregate mix. This issue was already thor­oughly deliberated in Chapters 2, 3, and 6, therefore only some additional informa­tion about testing that feature is provided below.

TABLE 12.1

A Comparison of Essential Functional Properties of Some Popular Asphalt Mixtures for Wearing courses

preferred

Functional

Required Fundamental mix

Typical values of various surfacing Types 0/13 mm size

properties

properties

oca

UTFC

SMA

cca

High skid

High surface

2-3 mm

1.5-3 mm

1-2 mm

0.2-0.5

resistance

texture

High

18-25%

12-20%

0%

mm

0%

interconnected internal voids High aggregate

Aggregate

Aggregate

Aggregate

Aggregate

polishing

dependent

dependent

dependent

dependent

Low tire-road

resistance Negative texture

Yes

Yes

Partially

No

noise

Low spray

Macrotexture

2-3 mm

1.5-3 mm

1-2 mm

0.2-0.5

generation Low construction

Low layer

30-40 mm

18-20 mm

30-40 mm

mm

30-40 mm

and

maintenance

thickness High durability

Medium-

Medium-

High

High

cost and construction delays and

(low maintenance cost)

Long functional

high

8-12 years

high

8-12 years

10-12

Lowa

vehicle damage

life

Early trafficking

Yes

Yes

years

Yes

Yes

Low windscreen

Low

Low

None

None

breakages

Source: From Pretorius F. J., Wise J. C., and Henderson M., Proceedings of the 8th Conference on Asphalt Pavements for Southern Africa (CAPSA’04), 12-16 September 2004.

Note: CGA = Continuous graded asphalt; OGA = open graded asphalt; SMA = stone matrix asphalt;

UTFC = ultra-thin friction courses.

a Functional life is low or non-existing relative to spray reduction and wet weather friction.

Meeting My Role Model on a Habitat Build

Подпись: THE FIRST TIME I remember working with Helen Sanders was when we were patching a rotten roof on a Habitat rehab in Charlotte, North Carolina, in 1992.1 was up on theПодпись: PHILIPPINES

roof, cutting out rotten sheathing with a circular saw, reaching as far as I could, with my foot supported by Helen, whom I’d just met. Just as I was stretched to my limit, depending totally on her for support, Helen said, “You know, my friends say a 72-year-old woman doesn’t have any business being up on a roof.” I fin­ished cutting out the rotten section of roof, but she had shaken my world: T thought she was 50.

Since then, Helen and I have become best friends. It has been nine years since we were up on that roof. We have traveled with Habitat to Africa, participated in several of Jimmy Carter’s Habitat projects, and worked hundreds of days together for our local affiliate. Helen continues to
work every Thursday in the field, moving at a steady, even pace. Her specialty is vinyl siding, though she can do it all.

Helen, who was a Navy Lieutenant in 1945 and was widowed nearly 25 years ago, is unflappable, taking everything in stride. Now 81 years young, her experience and attitude provide me with a wonderful perspec­tive on life. Over the years, she’s become almost family, helping me build my two-story garage and spend­ing time with my family (my children adore her), all the while quietly exud­ing a serenity I hope someday to attain myself. Role models are where you find them, but I found mine on a roof, working for Habitat.

-Anna G. Carter

[Photo ® Anna G. Carter.]

Подпись: NSIDEПодпись: 208 I COMFORT

for installing a poly vapor barrier are provided in the next section.

Vapor barriers are often eliminated in warm climates, especially in areas of low humidity, such as the Southwest. But you may want to consider installing a vapor barrier beneath the exterior siding if the house will be exposed to warm, moist air outdoors and fre­quent air-conditioning indoors.

In mixed-climate zones—the region that extends from the mid-Atlantic states through the Carolinas and west by southwest to north­
ern Texas—the need for a vapor barrier is minimal. In those regions, where mild winters are the rule, any moisture that does enter the wall cavities can dry from the outside in during the summer and from the inside out during the winter.

Installing a polyethylene vapor barrier

To work effectively, a vapor barrier must be installed with care. Even the smallest holes in a poly or kraft-paper vapor barrier must be

sealed with houscwrap tape or its equivalent. Use a durable, high-quality tape; neither duct tape nor packing tape will hold over the long run.

A friend of mine is a carpenter in Fair­banks, Alaska. They’re serious about vapor barriers up there. They cut sheets of poly from rolls that are 10 ft. to 20 ft. wide and 100 ft. long, covering the entire ceiling and all the exterior walls (on the inside). They even make sure to put poly behind a bathtub installed against an exterior wall.

In any given room, there are two steps to installing a poly vapor barrier. This isn’t a job you want to do solo; have helpers so that some can spread the sheet out over framing mem­bers while others staple it fast. You can begin as soon as all the insulation is in place.

1. Install the ceiling poly. Cut a piece of poly to fit the ceiling. If you have to use several pieces, make sure they overlap by at least one joist (or rafter, if you’re working on a cathe­dral ceiling). Seal overlaps with a layer of mas­tic, acoustical sealant, or housewrap tape. At the edges of the ceiling, the poly should lap at least 3 in. down onto the walls. Begin stapling the poly to the joists or joist chords in the center of the room and work out toward the walls. My friend staples about 12 in. o. c. through small, precut squares of heavy paper. This keeps the poly from tearing. Fit the poly tightly into all corners so the drywall will go on easily. The drywall holds the poly tight against the studs and insulation.

2, Install poly on the walls. Make this sheet continuous so that it laps over the ceiling poly along the wall’s top plate and extends past the bottom plate to lap about 3 in. onto the sub­floor surface. First staple the sheet along the top plate, working from the upper center of the wall and down and out to the edges of the
wall. If you need to join one sheet of poly to another, overlap them by at least one stud and seal the lap as described previously.

You can sheet right over door and window openings, then cut openings in the poly after it’s completely stapled in place. If the windows and doors have already been installed, cut the poly along the inner edge of the jambs. If the windows and doors haven’t been installed yet, wrap the poly around the trimmers, headers, and sills. Avoid loose flaps that can catch the wind and cause tearing.

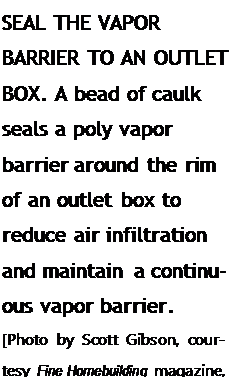
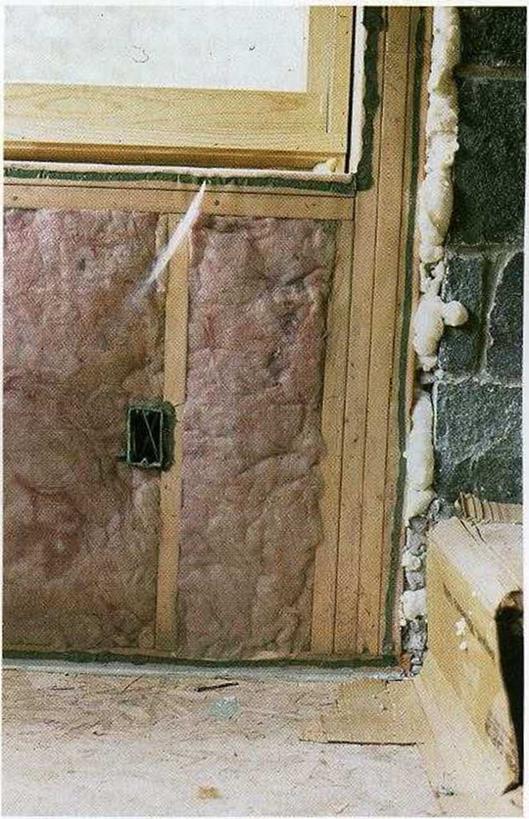
Подпись:To prevent leakage at electrical outlets, use airtight boxes. Available at most electrical – supply stores, airtight boxes have a broad, flex­ible gasket around the front edge, where a poly barrier can be sealed easily. Alternatively, you can simply cut a box-size opening in the poly and seal the poly to the electrical box with a bead of caulk (see the photo below).
Meeting My Role Model on a Habitat Build

Подпись: Helping HandПодпись: Avoid single-speed fans. You'll appreciate having a vent fan that can operate at more than one speed. Multiple-speed and variable- speed models cost a little more, but they enable you to use a lower, quieter speed during extended operation.STEP 4 Provide Adequate Ventilation

Now that we have a tight, well-insulated house, what do we do when we want a breath of fresh air? And how can we rid the house of kitchen odors and steam from cooking, show­ers, and the like? Indoor-air-quality problems are magnified in a new house because of fumes from new carpets, vinyl flooring adhe­sive, and paint. Obviously, you can open a couple of windows to get some fresh air, as long as the weather is cooperative. But what if you’re not comfortable opening windows in your neighborhood? That’s a problem. And what if it’s -15°F outside? What if its 105°F and humid? Opening windows when the weather is extreme or unpleasant undermines the effort you put into creating an energy – efficient house. There is a better solution, and it’s called mechanical ventilation.

All houses need at least a few small fans in critical locations where large volumes of vapor are created. A mechanical ventilation system can help maintain good indoor-air quality without making a lot of noise or cost­ing a fortune. Unfortunately, my experience is that many local building codes (and build­ing inspectors) have some catch-up work to do when it comes to understanding house ventilation. You’re better off finding a knowl­edgeable and reliable HVAC (heating, ventila­tion, and air-conditioning) contractor with up-to-date knowledge of home ventilation requirements. That said, proper ventilation for small, affordable houses isn’t all that difficult to obtain.

Source ventilation is the key to reducing moisture and odors

You can start by installing adequate spot, or source, ventilation wherever moisture or odors are created. Venting moist air directly
to the outside prevents it from escaping through the walls or ceilings, where it can cause damage. At a minimum, showers and stoves should have exhaust fans that are con­trolled by simple on-off switches or wired to come on automatically when a bathroom light is turned on or the stove is being used. For a stove installation, mechanical ventilation is usually provided by a vent hood equipped with a fan. In a bathroom, a variety of ceiling – mounted fans are available, including models with built-in lights.

Exhaust fans in moisture-producing areas should always be vented directly outdoors. That means out through a wall or up through the roof and not into an eave soffit or a crawl space. When we moved into our home in Oregon, I discovered that the clothes dryer was vented into the crawl space. Some pretty creepy looking stuff was growing down there in the dark. Even worse is venting moist kitchen or bathroom air into the attic.

Try to keep vent runs short—less than 10 ft., if possible. Avoid running vents through the attic, if possible; install them in interior soffits and dropped ceilings instead. If you can’t avoid running a vent through the attic,

then make sure it is well insulated. This is cru-

%

cial in cold climates, where heat inside the attic can cause ice damming along the eaves. This is serious business, so pay attention to the details.

Good indoor-air quality requires air exchange

We all need fresh air to stay healthy, and in a tightly built house, some form of mechanical air exchange is essential. You can provide air exchange fairly inexpensively by using a bath­room exhaust fan controlled by an automatic timer. Look for a fan that moves air at 80 CFM (cubic feet per minute) to 120 CFM. Set the timer to run the fan about two-thirds of the

Meeting My Role Model on a Habitat Build

210


COMFORT INSIDE


Antithetic-variates technique

The antithetic-variates technique (Hammersley and Morton, 1956) achieves the variance-reduction goal by attempting to generate random variates that would induce a negative correlation for the quantity of interest between separate sim­ulation runs. Consider that Gq and ©2 are two unbiased estimators of an un­known quantity в to be estimated. The two estimators can be combined together to form another estimator as

Подпись: (6.75)1

G a = 2(®1 + ®2)

The new estimator Ga also is unbiased and has a variance as

Var(©a) = 1 [Var(©1) + Var(©2) + 2Cov(©b ©2)] 4

If the two estimators ©1 and ©2 were computed by Monte Carlo simulation through generating two independent, sets of random variates, they would be independent, and the variance for ©a would be

Var(© a) = 1[Var(©i) + Var©)] (6.77)

4

From Eq. (6.76) one realizes that the variance associated with ©a could be reduced if the Monte Carlo simulation can generate random variates, which result in a strong negative correlation between ©1 and ©2.

In a Monte Carlo simulation, the values of estimators ©1 and ©2 are functions of the generated random variates, which, in turn, are related to the standard uniform random variates. Therefore, ©1 and ©2 are functions of the two stan­dard uniform random variables U1 and U2. The objective to produce negative Cov[©©1(U1), ©2(U2)] can be achieved by producing U1 and U2, which are nega­tively correlated. However, it would not be desirable to complicate the computa­tional procedure by generating two sets of uniform random variates subject to the constraint of being negatively correlated. One simple approach to generate negatively correlated uniform random variates with minimal computation is to let U1 = 1 — U2. It can be shown that Cov(U, 1-U) = -1/12 (see Problem 6.31). Hence a simple antithetic-variates algorithm is the following:

1. Generate ui from U(0, 1), and compute 1 – ui, for i = 1, 2,…, n.

2. Compute 91(ui), 02(1 – ui), and then Qa according to Eq. (6.75).

Example 6.10 Develop a Monte Carlo algorithm using the antithetic-variates tech­nique to evaluate the integral G defined by

b

Подпись: G =g (x) dx

in which g (x) is a given function.

Solution Applying the Monte Carlo method to estimate the value of G, the preceding integral can be rewritten as

b


g (X) fx ( X )


g (x)

fx (x)


G=


fx (x) dx = E


a


Antithetic-variates technique

where fx(x) is the adopted distribution function based on which random variates are generated. As can be seen, the original integral becomes the calculation of the expectation of the ratio of g (X) and fx(X). Hence the two estimators for G using the antithetic-variates technique can be formulated as

Подпись: (6.78a)G = ьА g( X 1i)

1 n^fx ( X 1i)

i=1

G = 1 V g(X2i)

2 n f x (X2i)

i = 1

in which Xa = F-l(Ui) and X2i = F—1(1 — Ui), with Fx(■) being the CDF of the random variable X. The algorithm for the Monte Carlo integral using the antithetic – variates technique is

1. Generate n uniform random variates Ui from U(0, 1), and compute the correspond­ing 1 — Ui.

2. Compute g(xu), fx(X1i), g(X2i), and fx(X2i), with xu = F—1(ui) and X2i =

F—l(1 — ui).

3. Calculate the values of G1 and G2 by Eqs. (6.78a) and (6.78b), respectively. Then estimate G by Ga = (G1 + G2V2.

In the case that X has a uniform distribution as fx(x) = 1/(b — a), a < x < b, the estimate of G by the antithetic-variates technique can be expressed as

b — n

ga = ^na ^2g(x1i) + g(x2i)] (6.79)

i=1

Rubinstein (1981) showed that the antithetic-variates estimator, in fact, is more ef­ficient if g (x) is a continuous monotonically increasing or decreasing function with continuous first derivatives.

Example 6.11 Referring to pump reliability Example 6.6, estimate the pump fail­ure probability using the antithetic-variates technique along with the sample-mean Monte Carlo algorithm with n = 1000. The PDF selected is a uniform distribu­tion U(0, 200). Also, compare the results with those obtained in Examples 6.6, 6.7, and 6.8.

Solution Referring to Example 6.7, uniform distribution U(0, 200) has a height of 0.005 (see Fig. 6.8). The antithetic-variate method along with the sample-mean Monte Carlo algorithm for evaluating the pump failure probability can be outlined as follows:

1. Generate n pairs standard uniform random variates (ui,1 — Ui) from U(0, 1).

2. Let tn = 200 Ui and t^i = 200(1 — Ui). Compute ft(tn) and ft(t2i).

3. Estimate the pump failure probability, according to Eq. (6.79), as

Pf, a = 200 £[ ft (hi) + ft (t2i)]

i=1

Using this algorithm, the estimated pump failure probability is pf = 0.14785. Comparing with the exact failure probability pf = 0.147856, the estimated failure probability by the antithetic-variates algorithm with n = 1000 and the simple uniform distribution is accurate within 0.00406 percent. The standard deviation s associated with the 2n random samples is 0.00669. According to Eq. (6.74), the standard error associated with pif a can be computed as s/V2n = 0.00015. The skewness coefficient from the 2n random samples is 0.077, which is close to zero. Hence, by the normal­ity approximation, the 95 percent confidence interval containing the exact failure probability pf is (0.14756, 0.14814).

Comparing the solutions with those of Examples 6.6, 6.7, and 6.9, it is observed that the antithetic-variate algorithm is very accurate in estimating the probability.

CREATING BATHROOMS THAT WORK

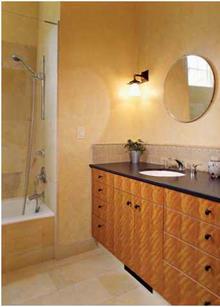
image679Подпись: The understated beauty of nature continues in this cabinet's soft, beveled edges and muted finishes. Slip- matched “ropey" cherry doors and drawers are edged with solid wood. Note the fine-grained “absolute black" granite countertop and matte black metal pulls.

Here are 12 factors that help make a bathroom comfortable, functional, and easier to clean:

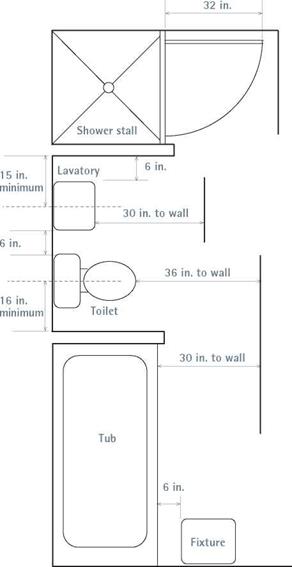
► Enough room to use fixtures. Bathroom space isn’t efficient if there’s not enough room to use the fixtures easily and safely. "Bath Fixture Clearances," on p. 324, shows mini – mums, which may be superseded by local building codes.

► Keep it secure and intimate. Although shared bathrooms should be accessible to the rooms they serve, bathroom users should feel secure once inside. Avoid multiple-door accesses. Keep the room’s scale intimate as well: Warm, cozy spaces are best.

► Put private fixtures far from the door.

The most-used and least private fixture, the lavatory, should be nearest the door, so people can pop in and wash their hands quickly. But toilets and tubs should be farther away. Insulate walls and install a tight-fitting door to suppress bathroom sounds. Cast-iron waste pipes are quieter than plastic ones.

► Alcoves and half-walls. Placing fixtures in alcoves and odd spaces around the perimeter of a room maximizes the floor space in the middle. Isolating toilets or tubs with

image680

The tile on the tub surround and floors is Solnhofen limestone, which was formed 150 million years ago in the Mesozoic Era, when warm seas covered present-day Germany. Close up, you can see fossilized sea snails in the stone.

Подпись: I Bath Fixture Clearancesimage681Подпись: Bathrooms with minimal clearances are a tight fit. If you've got room to spare, by all means space fixtures farther than the prescribed minimums. their own doors also makes it possible to share a bathroom during morning rush hours, yet still have privacy.
► Natural light. Windows and skylights allow rooms to be small without causing claustrophobia. To block the view of neigh­bors, install translucent or textured glass, or place windows high on the wall. Windows in showers are generally not a good idea because water sits on windowsills and rots them. Ideally, skylights should open.

► Adequate artificial light. For general lighting, plan on 3 watts to 4 watts of incan­descent or 1.5 watts to 2 watts of fluorescent lighting per square foot. For fixtures in alcoves, use a 75-watt or 100-watt recessed, vapor-proof ceiling fixture. To illuminate bathroom mirrors, however, install light fixtures on the walls: one over the mirror and one on each side. Ceiling fixtures alone will make that face in the mirror look ghoulish.

► Comfortable fixtures. "Standard Cabinet Dimensions," on p. 301, suggests counter heights. If they are too high or low for your family, change them so you don’t need to stoop or stand on tiptoes. As for tubs, if you can’t stretch out in a standard tub or squared tub as you’d like, look into oversize models or slope – back, cast-iron clawfoot tubs in a salvage yard. Shower stalls should be big enough to towel off in—36 in. by 36 in.

► Handsome hardware. Buy well-made shower valves, showerheads, and lavatory faucets with nickel – or chrome-plated finishes. They cost two or three times what bargain home-center accessories do, but they’ll last. The same goes for towel bars, switch plates, mirrors, and other accessories—buy quality.

► Use appropriate materials. Water reigns in a bathroom, so use materials that can withstand it. Resilient flooring and tile are great on bathroom floors; wood isn’t. Even when wood is face sealed with a tough modern finish, its end grain can absorb water. And in time, standing water will cloud most finishes. As explained in "Setting Beds," on pp. 383-384, don’t use drywall as a substrate for tile around tubs and showers.

► Ventilate, ventilate. Even if there’s a window in the bathroom, be sure there’s an exhaust fan in the ceiling near the shower.

If it’s a light/fan combo, the fan switch should have an integral timer so the fan can keep running after the light is turned off. See "Controlling Moisture and Mold," on p. 332, for the whole story.

► GFCI protection. All electrical outlets, including fans, must be protected by ground fault circuit interrupters (GFCIs). Shocks could be fatal in such a moist environment, so the National Electrical Code requires GFCI protection on all bathroom and many kitchen outlets. See Chapter 11 for more information.

► Easy-to-clean details. Countertops with integral bowls are much easier to keep clean because there’s no seam for crud to collect in. For the same reason, undermount sinks are

Подпись:preferable to sink rims or mounting clips that sit atop the counter. Nonporous baseboards or backsplashes allow you to swab comers with a mop or sponge without worrying about dousing walls or wood trim. Finally, you can mop bathroom floors in a flash if you have wall-hung toilets.
Choosing a Range Hood

Cooktops and stoves should be vented by a range hood. In addition to sucking up the smoke of a charred steak, range hoods exhaust airborne grease that might other­wise migrate to a cool corner and feed mold or adhere to woodwork and discolor its finish, as shown in the photos on p. 454.

Range hoods are most often wall-mounted directly over a range. Alternatively, there are downdraft and side-draft vents that pop up from a counter area to suck away fumes. Over island and peninsula ranges, you can install chimney-type vents. In gen­eral, install the type of vent that will carry exhaust gases outdoors with the shortest and straightest duct run possible. Because heated air rises, wall-mounted and chimney types are inherently efficient, whereas downdraft and side-draft vents pull heated gases in directions they wouldn’t go naturally and can even pull burner flames sideways.

Range hoods vary from low-powered and inexpensive (less than $50) to custom – designed units that cost thousands. A 100-cfm (cubic feet per minute) wall-mounted hood should be adequate to vent the average four-burner, 30-in.-wide range. But if that same range is located on a kitchen island, its range vent should draw 125 cfm to 150 cfm. More is not better when sizing range hoods. For one thing, larger hoods are noisier. Midsize range hoods average 3 sones to 3.5 sones (a measure of noise), which is too noisy to have a conversation near; monster hoods can reach 8 sones. (As a compari­son, refrigerators register 1 sone.) Oversize hoods can also expel so much air that they create back-drafting, in which negative in-house air pressure draws furnace or fireplace exhaust gases back down the chimney (see Chapter 14 for more on back-drafting).

Ideally, a range hood should be slightly wider than the range, say, 3 in. wider on each end, and mounted 30 in. above the range. But follow the hood maker’s suggested mounting height; more powerful hoods can be installed higher. Finally, buy a unit with a good-quality filter that can withstand regular washing with soap and water. Most filters are aluminum mesh, better ones are stainless steel; many can be popped into the dishwasher, which spares homeowners a very greasy and unpleasant task.

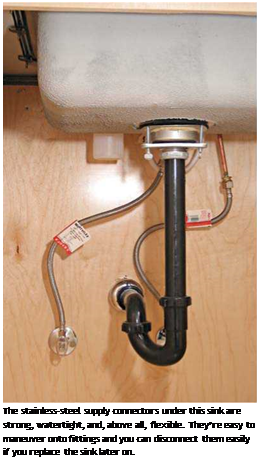
Подпись:Подпись: on. The sealant will be a layer of plumber's putty or, more likely, silicone caulk: Follow the sink manufacturer's recommendations. Make any final adjustments to the sink's position before applying a bead of silicone caulk along the edge of the sink rim, where it rests on the counter. With a moistened finger, compress this caulk line and remove the excess silicone. (If you will install a counter over the sink rim, apply the silicone on top of the sink rim just before the countertop is installed, as shown in the photo on p. 321.) Fasten mounting clips, if any, and then attach the supply risers and the sink drain. Bathroom Planning If a bathroom is comfortable and its fixtures are in decent shape, you might want to add only light fixtures or a vanity. But if the bathroom is musty, add a bath fan (see Chapter 14). If fixtures are tired or chipped, you can minimize renovation costs by hooking new fixtures to existing pipes. But if a bathroom is drafty, cold, or uncomfortable, you may be wise to tear out finish surfaces, insulate it well, and position the fixtures more efficiently. But first, here are a few thoughts on what makes bathrooms pleasant. In general, be skeptical of range hoods that recirculate air through a series of filters rather than venting it outside.
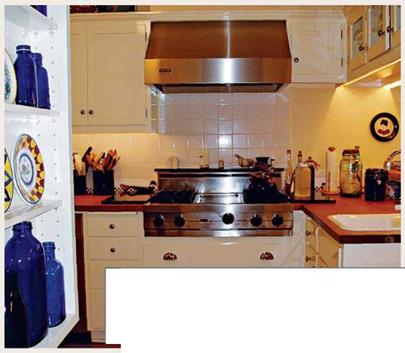
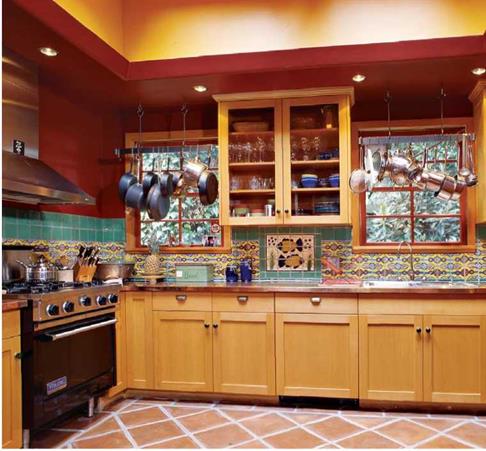
image676

A nicely matched stainless-steel range hood and cooktop. Because cooktops are used far more often than ovens, the architect paired an oven and a microwave on an opposite wall, and put large drawers for pots and pans under the cooktop—so they’d be close at hand.

image677Подпись: The Rutherfords' kitchen is well stocked with Mexican spices and colors. At left is a brushed-stainless-steel range hood. Sheet-copper counters are “not for the faint of heart," Marty Rutherford notes. “Everything stains copper. But each time you polish it, it just glows and becomes more mellow."

Kitchen Lighting

image678

Ceiling light set back 10 in. to 12 in. from

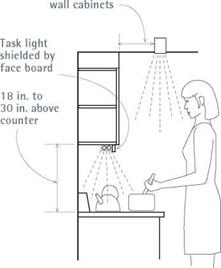
To illuminate work areas without strong shadows, use a combination of task lighting and general lighting.