As you paint, be methodical so you won’t need to touch up missed areas. Paint top to bottom: Do ceilings, walls, trim and baseboards before doing doors and windows. Paint back to front: Many painters go to the deepest recess of a room— often, a closet—and work methodically toward a

door. Paint inside to out: If you start painting in the backs of built-ins and cabinets, your final brushstrokes on the outermost edges will be clean and crisp.
Once you’ve prepped the surfaces, masked off baseboards, and spread your drop cloths, it’s time to paint.
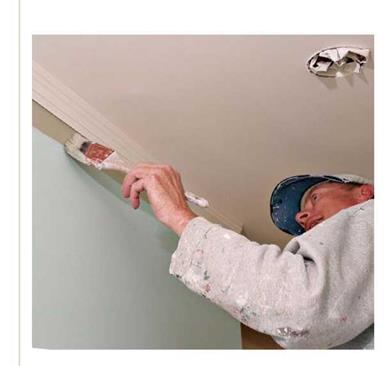
Painting the ceiling begins by using a brush to cut in a 2-in. to 3-in. border where the ceiling meets the walls and near all moldings. This cut-in border reaches where a roller can’t and thus allows you to roll out the rest of the ceiling without getting paint on the walls. Later, as you roll within h in. to 1 in. of the ceiling-wall intersection, you’ll cover the brush marks, so the paint texture will look uniform. This operation goes much faster if one painter on a step bench cuts in, while the second painter rolls on paint, using an extension pole to reach the ceiling.
To avoid obvious lap marks, paint the ceiling in one session, working across the narrowest dimension of the room. Roll out paint in 3-ft. by 3-ft. sections—about one roller-load of paint. First roll the paint in a zigzag pattern, which distributes most of the paint (fat paint) in three or fours strokes; then go back and roll the paint evenly. When the roller is almost unloaded, slightly overlap adjacent areas already painted. Keep roller passes light, and don’t overwork an area. Once the paint is spread evenly and starting to dry, leave it alone so its nap marks can level out.
For a smooth finish, use a standard 9-in. roller cover with %-in. to И-in. nap. Thanks to the extension pole, you can reach the ceiling easily, without needing to stand directly under the roller and its fine paint rain. To minimize mist and drips,
run the roller up and down the bucket ramp several times when loading. But don’t fret about small, stray spots on walls because you’ll cover them later when you roll the walls.
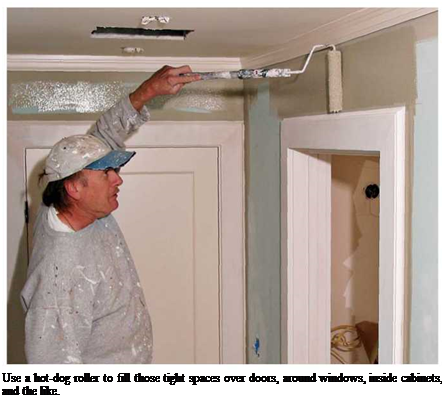
Painting the walls is nearly the same as painting ceilings— cutting in with a brush and rolling larger areas—except that you can load more paint on the roller. To reduce spatter, roll up on the first stroke; the excess will fall back to the roller. Continue rolling in a zigzag pattern to unload the roller before rolling out the paint. A 6-in. hot-dog roller can paint the areas over doors and windows that are too narrow for a standard 9-in. roller. Rolling is always faster than brushing because you don’t need to dip a roller in paint continually. If you’re careful around electrical outlets, you can also use a hot-dog roller there.

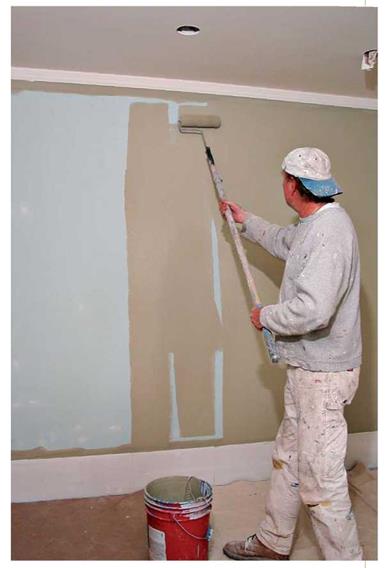
After unloading most of the paint on the roller in a zigzig pattern, spread it out evenly, top to bottom.
With more paint on your roller, you can cover slightly larger expanses of wall, say, 3 ft. by 4 ft. If you start at the top of the wall and work down, you’ll roll over any drips from above. Cover brush marks by rolling within ’/2 in. to 1 in. of the ceiling; this is important when applying darker hues because rolled-on paint reflects light differently from brushed-on. Slightly overlap adjacent sections. To avoid unloading excess paint along outside corners, lighten up as you roll.
Finally, sand lightly between coats when you apply oil-based paint, especially enamels on cabinets or trim. On walls, use 220-grit sandpaper or a dry sanding block. It’s not necessary to sand latex paint, unless you’ve waited several weeks between coats; until latex is 100% dry, new coats adhere easily.
Painting the interior trim
begins with the preparation tasks. Prepare the trim, window sashes, and doors by filling nail holes with nonshrinking wood filler, priming bare wood, caulking gaps with acrylic latex caulk (letting it dry overnight), lightly sanding all trim with 180-grit sandpaper, and vacuuming dust and debris. Enamel paint—which dries to a hard, glossy finish—is best for trim, window sashes, and doors because it’s the most durable. By the way, there are both oil-based and latex enamels.
Painting straight edges requires a quality brush and a steady hand. If you can develop a steady hand, you won’t need to apply and remove masking tape, which takes a lot of time. In most cases, all you need is a 2/2-in. or 3-in. angled sash brush, unless your baseboards are exceptionally wide. Start with crown (ceiling) molding, proceed to door and window trim, and finish with the baseboards. Always paint with the grain, cutting trim edges first, then filling in the field with steady back-and-forth strokes. To avoid lap marks, paint about 3 ft. of trim at a time, overlapping adjacent sections while they’re still wet. If the paint is drying too fast, add Flood’s Floetrol to latex paint or its Penetrol to oil-based paint.
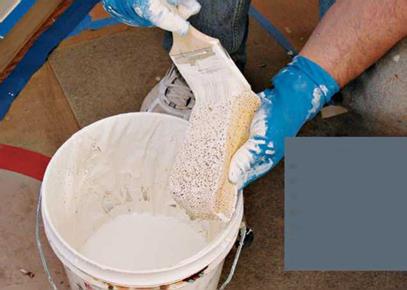
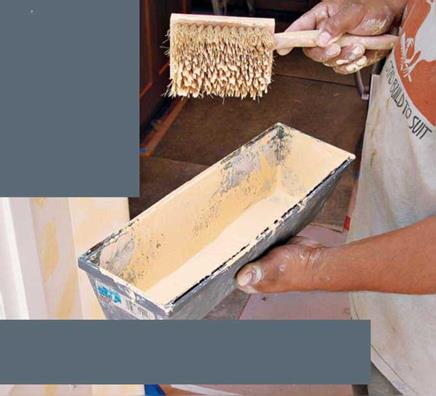
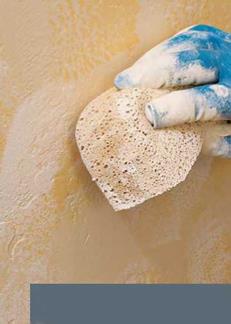 If trim edges are thinner than Yu in., they’ll be difficult to cut-in without spreading trim paint on the wall. In that case, overlap the wall paint onto the trim edge so that it covers the edge completely, producing a clean, straight line. In other words, the thin edge of the trim will be covered with wall paint, not enamel, but your eye won’t notice.
Windows sashes vary greatly in design. But as a general rule, paint them from the inside of the sash out. That is, if sashes are divided into multiple panes by muntins (narrow wood sections between panes of glass), paint the muntins first. Then paint along the insides of sash rails and stiles where they meet glass. Finally, paint the faces of sashes. To develop a rhythm, paint all the


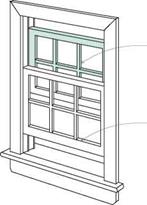
 vertical muntins—one side at a time—then the horizontal muntins. By painting similar windows elements at the same time, rather than jumping around, you’ll be less likely to miss elements and the work will go faster.
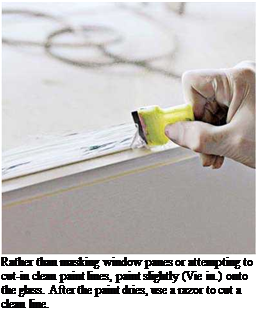
Don’t worry about cutting in clean edges at the glass. Instead, paint slightly onto the glass (Кб in.), even if unevenly, thus creating a tight seal. After the paint dries, use a razor to cut a clean line on the glazing.
|
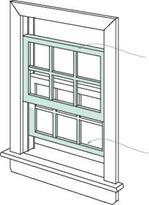
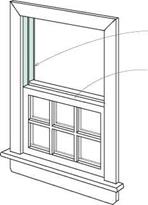
Lower the outer sash and paint its lower half.
|
|
Lower and later raise both sashes to paint jambs and trim.
|
Open windows to paint their edges. When painting double-hung windows, follow the steps at left. If you are repainting the exterior of the house at the same time, go outside and paint the accessible parts of the window. Slide the window sashes back to their original position, and finish painting. To prevent binding, move the sashes as soon as the paint is dry.
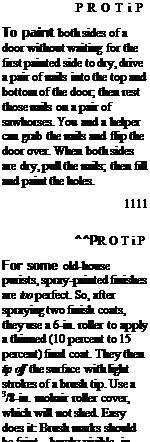
Painting a door is easiest if you pull its hinge pins and lay it across a pair of sawhorses. (If that’s not possible, shim beneath the door so it can’t move.) For the best-looking results, remove all door hardware except hinge leaves, especially if you’re spray-painting. Cover the hinges with masking tape. If you prefer not to remove the old latch mechanism and escutcheons, carefully mask them too.
If you’re brush-painting a flush door (flat surface), divide it into several imaginary rectangles, each half the width of the door. Apply paint with the grain and overlap the edges of adjacent sections. Work from top to bottom. Painting panel doors is similar, but work from the inside out: Paint the insides of the panels first, next the rails (horizontal pieces) top to bottom, and finally the vertical stiles.
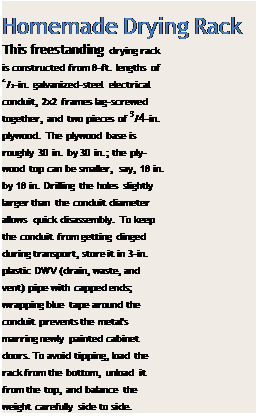
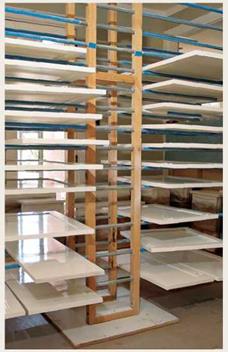
Painting cabinets is faster if you remove and spray-paint drawers and doors, and brush-paint cabinet frames. You’ll need a spray room isolated from the house (a clean garage is ideal); a drying rack for doors; and a sprayer, which you can rent.
Be sure to read the earlier sections on painting safety and spray-painting, which emphasize ventilation, using electric heat in spray and drying rooms, and wearing a respirator mask.
Start by washing doors and drawer fronts, especially those near the kitchen stove. If your cleaner isn’t cutting the grease, try TSP or denatured alcohol, wearing goggles and gloves. That done, examine the cabinet parts and their hardware, and plan to replace the doors or drawer fronts that are warped or not repairable, as well as hardware that’s broken or outdated. Before disassembling cabinet parts for spraying, assign each door and drawer a number. Write these numbers just inside the cabinet frame, where they won’t be covered by paint. Number the doors on bottom edges (least visible) or behind the hinges.
If you’re reusing the hinges, use a utility knife to score the hinge locations into each door. Note: Tape over door-hinge mortises if you’ll reuse the hinges. Otherwise, paint buildup in the mortise may misalign the hinges and thus the doors. Either cover the mortises with tape or leave the hinges on the doors and mask off the hinges.
Remove hardware before prepping the doors. If existing paint is flaking or the doors are dented, start with 100-grit sandpaper in a random-orbit
|
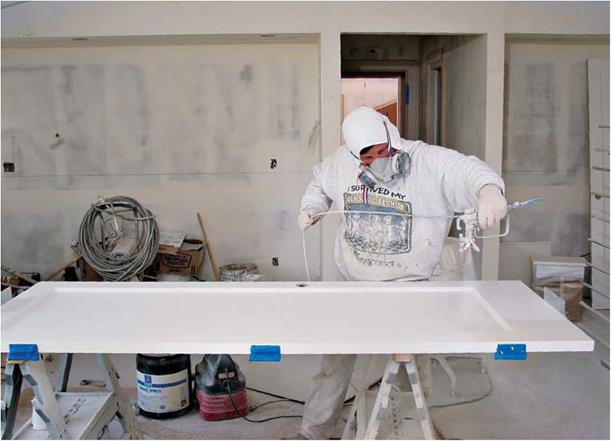
To spray-paint a door, first place it across sawhorses at a comfortable working height. Mask hinges to keep paint off and ensure that the doors will hang correctly when reinstalled. Then move the sprayer smoothly and continuously, maintaining a constant distance from the surface. Overlap preceding passes by about a third. On each pass, begin spraying before the spray tip is over the door, and don’t release the trigger till the paint fan is past the far edge. Use your free hand, as shown, to keep the hose out of the way.
|
|
sander, wipe off dust with a damp rag, and then fill cracks and holes with nonshrinking wood filler. Repeat the sequence as needed, ending with a 220-grit sanding by hand. However, if the old paint is in good condition, a single pass with 220-grit paper and a damp rag is all you’ll need to prep before painting.
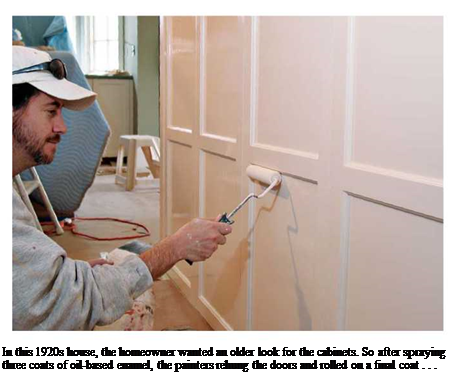
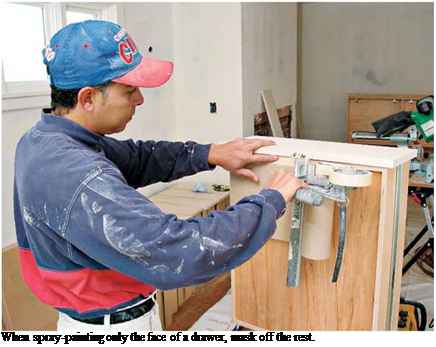 For the most durable surface, apply a coat of primer-sealer, followed by three coats of enamel, which will hide well, even if you’re applying light paint over dark. Use acrylic-latex paint for the primer and finish coats, even if the cabinets are presently covered with oil-based enamel. Top – quality latex enamel is almost as tough as any oil – based enamel, it dries faster, and it’s much easier to clean up. To minimize runs, keep the doors horizontal during spraying and drying. Between coats, sand lightly with 320-grit garnet sandpaper. Painting drawer faces is essentially the same, except that you should mask off the drawer sides. Paint cabinet frames from the inside out, finishing with long, vertical strokes on the frame faces.

Stripping and Refinishing Interior Trim
Natural wood can be handsome, but stripping layers of old paint or dulled finish is an enormously tedious, messy job. The following questions and tests may give you easier options.
SIX QUESTIONS BEFORE STRIPPING
► What kind of wood? Builders often used plain or inferior-grade softwood for trim they intended to paint. Test-strip a small section to see if the wood is worth stripping. Common pine or spruce and badly gouged wood probably aren’t.
► How thick is the wood? If wood paneling is a Иб-in. veneer, it may be too thin to sand, let alone scrape and strip. © After turning off the electrical power, move panel battens (vertical pieces) or electrical outlet covers to see the edge of a panel.
► What kind of paint? Trim paint in houses built before I960 likely contains lead, which becomes hazardous if you sand it or heat-strip it. Yet it may be perfectly safe if it’s intact and well maintained. Analyze a paint sample, as explained on p. 443. Also, the more paint layers, the bigger the mess.
► Clear finishes that have become dull and grimy may just need a good washing. Using a damp rag, rub Murphy’s® Oil Soap onto a small section and wipe it dry quickly. If that clouds the surface, stop; but if it brightens the woodwork, keep going.
► If a clear finish remains dull after a test – wash or is worn looking, scuff-sanding and
a new application of the old finish may do the trick.
► If painted or clear finishes are cracking, peeling, or otherwise coming off, new coatings won’t stick. To test adherence, use a utility knife to lightly score a 1-in. by 1-in. area into nine smaller squares (like a tic-tac-toe array). Press a piece of duct tape onto the area and pull up sharply: If two or more little squares pull off, you should strip the paint or finish.
STRIPPING SAFELY
Before stripping woodwork, read "Painting Safely,” on p. 440, and "Lead-Paint Safety,” on p. 442. Many of the concerns when stripping are the same as those when painting. Most important, wear a respirator mask with replaceable filters. Also wear rubber gloves, goggles, and a long-sleeved shirt. Lay down plastic tarps (or layers of newspaper) to protect floors and capture paint debris, mask off areas you’re not stripping, and ensure adequate ventilation. Even if a chemical stripper is relatively odorless and claims to be eco-friendly—keep it off your skin and out of your lungs! Read instructions for all stripping chemicals before using them, and if you’re using a heat gun, have a fire extinguisher close by.
STRIPPING METHODS
Test-strip small sections of woodwork to see which method—or combination of methods— works best for you.
Stains and clear finishes are thinner than paint and more inclined to run, so mask off adjacent areas before starting prep work.
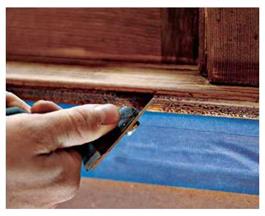
Metal scrapers with straight edges work well on flat surfaces without too many layers of paint or clear finish. A scraper with changeable heads enables you to scrape varying contours. For best results, hold the scraper head roughly perpendicular to the surface and pull the tool toward you. Caution: Sharp scraper heads can easily gouge wood, especially softwoods like fir and pine, whose contours may obscured by thick paint.
Heat guns soften paint so you can scrape it off. Heat guns can remove many layers of paint, but stay alert when using them. Maintain a constant distance from the surface you’re stripping, and keep the gun moving so you don’t scorch one spot. Using a heat gun on shellac and varnish gets tricky because they have low kindling temperatures and tend to burn when heated; first, try stripping them with metal scrapers.
What’s That Finish?
To identify your woodwork’s finish, rub on a small amount of the test-solvents in this list, starting at the top of the list (the most benign) and working down till you’ve got your answer. When applying solvents, wear rubber gloves, open the windows, and wear a respirator mask.
► Oil. If a few drops of boiled linseed oil soak into the woodwork, you have an oil finish: tung oil, linseed, Watco® or the like. If the oil beads up on the surface, the woodwork has a hard finish, such as lacquer, varnish, or shellac. Keep investigating.
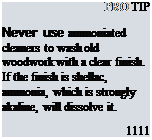
► Denatured alcohol. If the finish quickly gets gummy, congratulations! It’s shellac, which will readily accept a new coat of shellac after a modest sanding with an abrasive nylon pad or 220-grit sandpaper. Older woodwork with an orange tinge is often shellac-coated.
► Mineral spirits (paint thinner). This
will dissolve wax immediately. Dampen a rag and wipe once. If there’s a yellowish or light brown residue on the rag, it’s definitely wax.
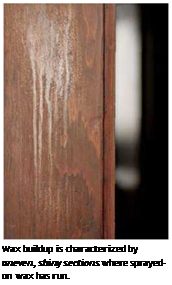
If your woodwork finish has an unevenly shiny, runny appearance, suspect spray-on wax.
► Lacquer thinner. This solvent dissolves both varnish and shellac, so try denatured alcohol first. If alcohol doesn’t dissolve the finish but lacquer thinner does, it’s varnish.
► Acetone. This one will dissolve varnish, too, in about 30 seconds. But if acetone doesn’t affect the finish, it’s probably polyurethane.
Never use a heat gun next to glass—for example, on window muntins—because you could crack the glass. Heat guns can also ignite dry materials within walls, so stop using guns well before the end of the workday so woodwork can cool. Before you leave for the day, sniff around for smoke or "hot smells.”
 For chemical strippers, a rule of thumb is the stronger and smellier the chemical, the faster it

 will strip paint or finish. For example, methylene chloride will soften multiple layers in 10 minutes to 15 minutes; whereas “safe” DBE (dibasic ester) based strippers may need 24 hours. Given enough time to work, a stripper should soften all layers of paint or finish. Follow the strippingtime recommendations on the container label. By the way, semipaste strippers are best for vertical surfaces. Even when brushed on thickly, they won’t run.
Chemical strippers require patience and care. Use a rag to cover the cap before opening the container, so stripper won’t splash on you. Pour stripper slowly into a work pail, and close the container immediately so it won’t spill if the container is bumped or knocked over. As you apply stripper, brush away from yourself. To avoid tracking stripper throughout the site, replace plastic tarps as they become fouled with softened paint. Or lay down newspaper, which is cheap and easy to roll up before stuffing it into a garbage bag.
Once your tarps or newspaper are in place, brush on stripper liberally. A 18-in. to 14-in. coating of stripper should stay wet long enough to soften all the layers of paint or finish. To make sure that slower strippers stay moist, press a sheet of lightweight plastic (polyethylene) right onto the stripper-coated woodwork; the stripper won’t dissolve the plastic. Periodically lift an edge of the plastic and try scraping off the paint. Be patient: Remove the plastic only when the softened paint scoops off easily. Till then, leave the plastic on.
Although renovators usually use a wide spack – ling knife or a putty knife to scoop off softened paint, a wooden spatula with a beveled edge is a near-perfect tool because it won’t gouge the chemically softened wood. Whatever tool you use, unload sludge from your scraper after each pass. Use a toothbrush, a nylon potato brush, or a handful of wood shavings to dislodge softened paint from detailed or hard-to-reach areas. Only occasional spots should need additional stripper.
When the woodwork is bare, scrub off the stripper residue with a solvent recommended by the manufacturer—typically, mineral spirits applied with a nylon abrasive pad, then blotted dry with paper towels. Follow that with a dilute solution (5 percent to 10 percent) of household cleaner in warm water and wipe that off with paper towels. Allow the wood to dry thoroughly—at least a day or two—before filling holes or sanding. Note: Don’t use steel wool to scrub stripper or remove paint. Otherwise, steel particles can stick in the wood and then rust, marring the new finish.
|
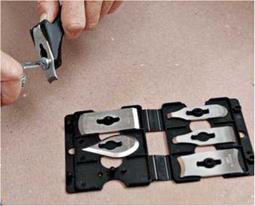
This hand scraper comes with six interchangeable stainless-steel blades, which will fit most contours you’re likely to encounter.
|
REFINISHING WOODWORK
Once your stripped woodwork has dried, patch it with wood putty that dries to the same color as the unfinished wood. (Putty lightens as it dries.) Test a number of putty colors, allowing each to dry well before test-staining or finishing. When a patch is so hard that your thumbnail can’t gouge it, the putty’s dry enough to sand.
Sanding. If the woodwork is in good shape and doesn’t need filling, just scuff-sand it (sand it lightly) with 220- or 320-grit sandpaper before applying a clear finish. More likely, you’ll need to use several grades of sandpaper, starting with 80-grit or 100-grit to sand down tool marks or dings, moving on to 150-grit, and ending with 180-grit or 220-grit.
Sand sections completely with one grit before switching to another, even if you think an area is smooth enough. If you switch from 120-grit to 150-grit while sanding a baseboard, for example, it may have two different shades when you stain or finish it.
If there’s a lot of woodwork to sand, use a palm-size power sander (also called a block sander) for the first three sandings, and finish up by hand sanding with the wood grain, using 180-grit or 220-grit garnet paper. Wrap sandpaper around a standard blackboard eraser or a scrap of 2×4 to hand-sand flat areas; sandpaper wrapped around a dowel works well on concave areas. After sanding, wipe or vacuum the surfaces to remove the dust.








 If trim edges are thinner than Yu in., they’ll be difficult to cut-in without spreading trim paint on the wall. In that case, overlap the wall paint onto the trim edge so that it covers the edge completely, producing a clean, straight line. In other words, the thin edge of the trim will be covered with wall paint, not enamel, but your eye won’t notice.


 vertical muntins—one side at a time—then the horizontal muntins. By painting similar windows elements at the same time, rather than jumping around, you’ll be less likely to miss elements and the work will go faster.

 For the most durable surface, apply a coat of primer-sealer, followed by three coats of enamel, which will hide well, even if you’re applying light paint over dark. Use acrylic-latex paint for the primer and finish coats, even if the cabinets are presently covered with oil-based enamel. Top – quality latex enamel is almost as tough as any oil – based enamel, it dries faster, and it’s much easier to clean up. To minimize runs, keep the doors horizontal during spraying and drying. Between coats, sand lightly with 320-grit garnet sandpaper. Painting drawer faces is essentially the same, except that you should mask off the drawer sides. Paint cabinet frames from the inside out, finishing with long, vertical strokes on the frame faces.




 For chemical strippers, a rule of thumb is the stronger and smellier the chemical, the faster it


 will strip paint or finish. For example, methylene chloride will soften multiple layers in 10 minutes to 15 minutes; whereas “safe” DBE (dibasic ester) based strippers may need 24 hours. Given enough time to work, a stripper should soften all layers of paint or finish. Follow the strippingtime recommendations on the container label. By the way, semipaste strippers are best for vertical surfaces. Even when brushed on thickly, they won’t run.
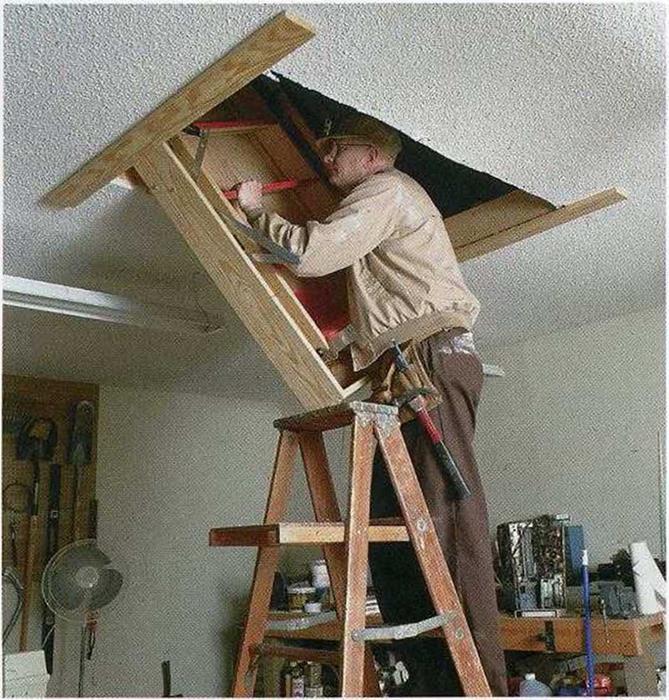
 The bottom section of the stairway must be cut to length, with the ends of the legs (or stringers) cut at the correct angle so they rest solidly on the floor. To find the angle, swing the staircase down and unfold all but the last section. Extend a 1×4 board alongside an upper-section stair stringer so that the 1×4 reaches the floor. Place another board on the floor and against the 1×4, then mark the cutoff angle on the 1×4. Once you cut that angle on the 1×4, transfer it to measured cutoff lines on both bottom-section stringers.

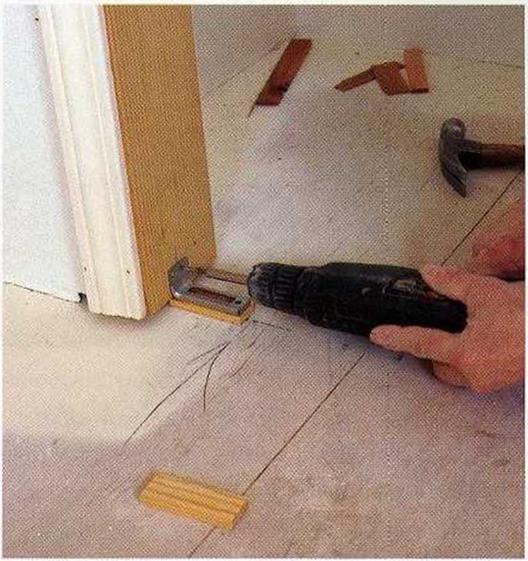
![SETTING A PREHUNG DOOR Подпись: MAKE A BLOCK FOR THE BRACKET. Set the bracket that supports the bottom pivot of a bifold door on a small block. This block will later be covered with carpet. [Photo by Charles Miller, courtesy Fine Homebuilding magazine, ф The Taunton Press, Inc.]](/img/1312/image912.gif)

![SETTING A PREHUNG DOOR Подпись: A DROP-DOWN STAIRCASE PROVIDES EASY ACCESS. Installing a factory-made folding staircase lets you gain convenient access to attic space. [Photo by Jefferson Kolle, courtesy Fine Homebuilding magazine, s The Taunton Press, Inc.]](/img/1312/image914.gif)


 note
note 0
0