Blessings and calamities

A flood in an alluvial valley is two-faced. It is always a threat when it is more severe than usual. But when well synchronized with the cycles of agriculture, the flood can be used to fertilize and water the soil before plowing and planting. This is the case with the

Figure 1.4 The deity “Nile” (Hapy), God of nourishment worshipped during the flood (note its full breasts), temple of Philae at Aswan (photo by the author).

Blessings and calamitiessummer flood of the Nile, which extends from June through August. The Tigris and Euphrates Rivers, on the other hand, flood in the spring (March through June), which coincides with the ripening of grains. Therefore in these regions, it is essential to com­plete the harvest before the flood – whose early arrival is always possible – can wash out the crops, especially from unprotected lands. In stark contrast to the hymns that laud the floods of the Nile, one can see a sense of urgency in a letter from a senior officer of the kingdom of Mari, located on the middle course of the Euphrates just downstream of the Neolithic site of Bouqras (see the map of Figure 2.1), written in about 1800 BC. The letter pleads to the king for help in completing the harvest before the early flood arrives: “My Lord: this is Kibri-Dagan, your servant. I realized that the river was in flood. It is wors­ening for three days I have undertaken to harvest the palace grain. But, the river is in flood. [….]. The remaining grain in my district exceeds my strength. If my Lord agrees, it is nec­essary to obtain help from Dumtan, Zurubban, and Hishamta (three villages in the region).

22

These workers must set out now for the water is already into the fields of Zurubban.”

The following letter from the same official shows the need to mobilize significant man­power to prevent flood damage:

“The Khabur (a tributary of the Euphrates) has flooded and Yaqqim-Addu sent me a message asking for help. I have called upon the people of Terqa (the city of which the author is the governor) and the people of my own district and I hastened to the aid of the flood gates

23

of Khabur. My Lord need not worry.” [22] [23]

Legislation Affecting Use of Recycled Material

The Resource Conservation and Recovery Act (RCRA). RCRA classified solid waste management facilities and practices, required states to develop comprehensive state plans for solid waste management (Dufour, op. cit., p. 99). RCRA also emphasized the growing landfill capacity problem and the need to develop approaches to handling wastes. In the preamble of RCRA, attention was called to the vast quantity of recoverable materials that are placed in landfills and to the fact that the recovery or conservation of many of these materials would benefit the United States by reducing projected landfill capacity require­ments, retaining and expanding our national resources, and reducing the country’s depen­dence on foreign resources.

In reference to recycled materials, Section 6002 of RCRA requires that federal, state, and local agencies receiving funds from the federal government must procure supplies and other items composed of the highest practical percentage of recovered or recycled materials, consistent with maintaining satisfactory levels of

• Product quality

• Technical performance

• Price competition

• Availability

Also, under RCRA, specifications cannot be written to discriminate against materials with recycled constituents. In addition, EPA was authorized to prepare guidelines for recy­cling, and resource recovery guidelines addressing procurement practices and information on research findings about the uses and availability of recycled materials. Guidelines cov­ering coal fly ash in portland cement, recycled paper, retreaded tires, building insulation, and rerefined oil have been developed. While not specifically required by EPA, the guide­lines encouraged most state highway programs to prepare specifications allowing the sub­stitution of fly ash in concrete.

Intermodal Surface Transportation Efficiency Act (ISTEA). ISTEA authorized DOT to coordinate with EPA and state programs in developing information on the economic savings, technical performance qualities, and environmental and public health threats and benefits of using recoverable resources in highway construction. TEA-21 provided technical corrections to ISTEA. ISTEA specifically calls out requirements for the per­centage of asphalt pavement containing recycled rubber from scrap tires.

In addition, state legislation has been developing to promote both research into the per­formance and viability of recycled materials and the procurement of such materials. Many have established mandatory recycling laws and most have used wastes or waste by­products in their highway programs.

RESOURCE RECOVERY AND USE OF WASTE MATERIAL

Given the vast amount of building materials required to construct and maintain the trans­portation infrastructure in the United States, the country’s highway system represents a tremendous opportunity for the beneficial use of reclaimed and recycled resources. However, the reclamation and reuse of waste material must be done in an environmentally responsible manner.

The handling, disposal, and reuse of solid waste is regulated by a number of environ­mental statutes. Increased cost of complying with these requirements has increased the appeal of recycling and resource management. Because solid waste material is not as uni­form as raw materials, the characteristics, performance, cost of preparing, and application of solid waste vary with the source and type of the material. Results in highway applica­tions vary considerably and depend on such parameters as climate, composition, material handling practices, and construction procedures. Factors to be considered when recycling a waste to a highway construction end use include the following [National Cooperative Highway Research Program (NCHRP), Transportation Research Board, Synthesis 199, Recycling and Use of Waste Materials and By-Products in Highway Construction: A Synthesis of Highway Practice, Washington D. C., 1994]:

Environmental Threats and Benefits. Along with the considerable environmental bene­fit of reducing the landfill burden, potential threats to the environment caused by the use of

RESOURCE RECOVERY AND USE OF WASTE MATERIAL

FIGURE 1.2 Decision chart for management of lead paint removal. (From K. A. Trimbler, Industrial Lead Paint Removal Handbook, 2d ed., Steel Structures Painting Council/KTA-Tator, Inc., Pittsburgh, 1993, with permission)

recycled material must be considered and compensated, mitigated, or otherwise overcome before use of recycled material is feasible.

Regulatory Requirements, Guidelines, and Restrictions. The federal and state legis­lation and guidance regarding recycled materials reflect reduced landfill capacity in the United States and the recognition that there is a net benefit to producing resources from waste. The federal government as well as some states now have recycling mandates in place. Permits are often required when conducting recycling activities, and/or when creat­ing an authorized disposal site in using certain wastes as embankment fill. If the recycling activity falls under the RCRA classification of “use constituting disposal,” additional reg­ulations apply.

Economic Cost and Benefit. Economic considerations are often the driving force behind recycling efforts on the county and city level, because of the increased landfilI costs and increasingly limited capacity. Recycling for highway departments may become more attractive as budget cuts increase and the price for recycled waste materials decreases. In some cases, recycled materials extend the service life of highway components, making the life-cycle costs of using such materials attractive.

Engineering Properties and Technical Performance. Because of the variability of the composition of waste materials, performance results for end products may vary signifi­cantly, requiring careful evaluation before identifying suitable applications for their use. The primary question is “does the performance of the material compare favorably with the same material constituted from raw materials?” In some instances, the use of waste material has consistently improved performance. For instance, silica fume use in portland cement results in higher compressive strength and higher resistance to corrosion of steel reinforcement due to the increased density and reduced porosity of the resulting concrete. (“Silicon,” Minerals Yearbook, U. S. Bureau of Mines, Washington, D. C., 1989.)

Construction Materials Shortages and Alternative Resource Availability. Millions of tons of aggregate are used each year in the construction of highways. Resources from exist­ing quarry mining are being depleted and the new sources are often not used because of restrictive regulation and preferred uses of the land. In areas experiencing shortages, recy­cling construction materials, waste minerals, and other products into aggregate is more cost-effective than shipping aggregate from distant quarries. Steel is one of the most widely recycled materials used in highways. Steel reinforcement can be composed completely of recycled scrap steel, and steel girders can contain as much as 25 percent recycled scrap steel. Recycling scrap steel greatly reduces reliance on foreign sources for raw materials in the steel industry. (NCHRP Synthesis 199, p. 6.)

Asthma Related to Mold Exposure

When Dori Bennett was 46 she consulted with Dr. Elliott for the sudden onset of severe asthma. She had apparently been in good health until she moved into a new home. A leak in the home was repaired prior to the move, and the house had passed inspection. After her asthma progressed to the point of requiring hospitalization, it was sus­pected that the source of her problem was in her home. An environmental consulting firm noted heavy growth of mold in the crawl space. Molds found included Aspergillus, Actinomycetes, Bacil­lus, Cladosporium, Fusarium, Mucor, Penicillium, Phoma, and Ulocladium. Several strains of virulent molds, some of which are known to cause asthma, pneumonia, hypersensitivity pneumonitis, and immune dysfunction, grew on culture plates.

Her family hired an environmental cleanup crew to rid the house of the mold in order to pre­pare it for resale. An outdoor unit was constructed to house a large heater fan to blow air under the house, while a unit on the opposite side of the house removed moisture-laden air. It took six weeks to dry out the earth under the house. A de­tailed mold remediation ofthehouseand contents followed. The cost of the cleanup was $40,000. When further testing showed that the house was fully remediated, it was sold. Ms. Bennett now lives in a home free of mold growth and her health is slowly improving.

Discussion

Mold and mycotoxin exposure can affect any organ in the body, including the respiratory, ner­vous, and immune systems. Homeowners, build­ing managers, and health care professionals need to be much more aware of this potential problem.

contained inside walls or other building cavi­ties such as attics and crawl spaces, the slightest air current can send spores swirling through the air, where they can be easily inhaled.

Carpets act as large reservoirs for dust, bacteria, and mold. Microbes commonly grow within the ductwork of forced-air heat­ing systems, which can spread mold and dust throughout the house. Unless kept spotlessly clean, toilets and many modern appliances that use water reservoirs, such as vaporizers and humidifiers, can breed microbes. Meth­ods for preventing and controlling mold infestation are discussed throughout the spec­ifications.

Strategies for Creating a Healthy Home

The use of toxic substances in construction is standard. Furthermore, certain prevalent construction practices lead to destructive moisture conditions, pest invasions, or un­safe combustion, all of which can cause even the most chemically inert home to become unhealthy over time. The occupants too will greatly influence the longevity and healthful­ness of any home through the day-to-day in­teraction they have with it.

We have organized the information in Part II of this book to correspond to the standard іб-division format commonly used by resi­dential contractors. In Part II we will explain
the many instances, some obvious and others less so, where undesirable materials and prac­tices may be found in standard construction. Healthier options for materials are listed and quality control measures for the construction phase are specified. Following is a brief over­view of the strategies behind the specifications found in Part II of this book. These five strat­egies are:

• Designing for health

• Employing a climate-based understanding for construction detailing

• Reducing toxic emissions through choice of building materials

• Introducing quality control measures dur­ing construction

• Providing for an ongoing healthy home environment through occupant education

Designing for Health

Although all homes should be designed to support health, healthy housing is unfortu­nately considered to be a specialized field of residential design. There are basic design fea­tures that should be included in all homes, but they are often overlooked. These features, es­sential to our health, safety, and sense of well­being, include:

Tools to Own

Consider buying most of the safety equipment listed here.

SAFETY EQUIPMENT

Hearing protectors will prevent permanent ear damage and reduce fatigue while using power tools. There are a number of styles, from reusable foam plugs to earmuffs; properly fitted, they should reduce noise 15 decibels to 30 decibels (db). Look for models that meet American National Standards Institute (ANSI) S3.19-1974 specifications.

Eye protection is a must when you’re using power tools or striking nails or chisels with a hammer. Safety glasses or goggles that meet ANSI Z87.1-1989 specs are strong enough to stop a chunk of metal, masonry, or wood without shattering the lens. (Most lenses are polycarbon­ate plastic.) Get eyewear that has vents to prevent fogging; you can also get combination safety glasses/sunglasses with UV 400 protection.

A hard hat won’t protect you if you don’t wear it, so find one that fits well. There are basically two types: Type I protects the top of your head,
whereas type II (ANSI Z89.1-1997) offers some additional protection if a blow to the head is somewhat off-center. Both are invaluable when you’re handling objects overhead or someone is working above you.

Work gloves are essential when handling caustic, abrasive, or sharp materials. Some rubber-coated work gloves will let you work with concrete with­out suffering skin burns, yet are flexible enough to pick up a dime. Auto-supply stores carry latex – free nitrile plastic gloves that are cheap, durable, and quite flexible.

A respirator mask with changeable cartridges can prevent inhalation of toxic fumes, such as those from epoxy resins and paint solvents. Such respirators are discussed further in Chapter 19.

A disposable paper dust mask is okay when working around nontoxic materials like sawdust.

Knee pads with hard-plastic kneecaps and sub­stantial padding allow you to move around on your knees comfortably, and they protect your knees from construction debris and prolonged contact with hard floors. They should be com­fortable enough to wear all day.

A headlamp (battery-powered) is invaluable in tight, dark spaces where you should have both hands free.

A safety harness should be attached to solid framing when you are working on roofs with a 6/12 pitch or steeper, over open framing, or on any other high, unstable workplace.

A first-aid kit should be secured to a prominent place at the work site so you can find it quickly when you need it.

Подпись: Ladder SafetyПодпись:image90Подпись: OF Tool Belts

Cleanup tools. You’ll need a household broom, a push broom, a dustpan, a heavy-duty rubber garbage can, a flat shovel for scooping debris, and a large-capacity (12-gal. to 16-gal.) wet/dry shop vacuum. You’ll find Dumpster™ tips at the end of this chapter.

Tarps. Buy at least one 9-ft. by 12-ft. tarp and one 45-in. by 12-ft. runner. Get good-quality, heavy canvas duck. Paint will soak through cheap fabric tarps, and sheet plastic is too slippery to work on.

You may not need all of the following tools, but it’s good to know what each can do.

A framing square with stair gauges is a basic layout tool for plumb and level cuts. It also enables you to set the rise and run for stairs as well as to make repetitive layouts such as for rafter ends.

Mason’s string has many uses, whether to sup­port a line level or to temporarily tie things together.

An adjustable square is a smaller version of a framing square and is somewhat less versatile.

A stud-finder enables you to find studs you need to find or want to avoid.

A small combination square fits easily into a tool belt and enables quick and accurate 45° and 90° cuts on small pieces. It also doubles as a depth gauge for getting notches to a certain depth, setting door stops to jamb edges, estab­lishing “reveals,” and so on.

An adjustable bevel gauge copies odd angles and transfers them to workpieces.

A try square is a precise tool that’s more of a shop or bench tool, handy for making sure that a table-saw blade is perfectly square to the table.

A chalkline box contains chalked line that you snap between points to mark straight chalklines on sheet materials or layout lines for framing. The line itself can double as a stringline. And, in a pinch, the box and line can also serve as a plumb bob.

A folding rule with sliding insert is great for accurate, inside measurements like inner cabinet or window widths. Because the folding rule is rigid, it will hold the dimension you set. The slid­ing brass insert doubles as a depth gauge.

THE ZEN OF

Tool-belt users can be divided into two groups: Walking hardware stores and minimalists. Whatever the load preference, pros who organize their belts so they can grab a tool without looking at it can outwork everybody because they get a rhythm down: hammer on one side, nails on the other; speed square on the left, pencil on the right; tape measure on the back of the belt—never a lost tool or a wasted motion. Before each job, they lay out the belt with just the tools they’ll need.

image91Measuring and layout tools: 1, framing square with stair gauges; 2, mason’s string; 3, adjustable square; 4, stud-finder; 5, combination square; 6, adjustable bevel gauge; 7, try square; 8, chalkline box; 9, folding rule with sliding insert;

10, tape measure; 11, compass; 12, Swanson Speed™ Square.

Подпись: PRO"ГIP Tarps won't protect finished wood floors from dropped tools and the like. Protect floors by putting down Уг-in. Masonite, or heavyweight papers like Ramboard™, which come on wide rolls (use duct tape over the seams). 1111

Tape measures are a must. A 16-ft. one will do for most jobs; but the wider tape of a 25-ft. model can span 7 ft. without collapsing, thereby allow­ing you to take an approximate reading across a span opening.

A compass draws circles or doubles as a scribe so you can fit flooring or sheet materials to the curved or irregular profile of a wall, cabinet, or baseboard.

A Swanson Speed™ Square enables quick 45° and 90° angle layouts. And with a little practice, you can set rafter pitches. Indestructible, this fits snugly in any tool pouch and is easily one of the most popular tools since the 1970s.

Management of Industrial Lead-Based Paint Removal Projects

The following steps have been developed for managing lead-based paint removal projects based on procedures in Trimbler’s Industrial Lead Paint Removal Handbook.

Initial Project Evaluation. In the initial project evaluation, the owner or specifier must determine whether the coating contains lead-based paint either by reviewing earlier plans and specifications for the structure or by sampling and analysis.

Prebid Assessment of Paint Removal Methods and Debris Generated. The owner or specifiers should estimate how much waste will be generated by methods evaluated to be appropriate to the size and circumstances of the project. Designing a testing program to evaluate the toxicity of waste generated may be appropriate for large paint removal projects.

Understanding the Regulations before Preparing the Specifications. The regulations regarding air quality, water quality, soil cleanup, unauthorized releases, worker protection, and hazardous waste generators should be thoroughly understood. How these regulations are enforced should be discussed with both state and local officials.

Preparing the Project Specifications. Both painting and lead removal requirements should be addressed in the specifications. These should identify the methods for surface preparation and the coating system to be applied. The relevant regulations, the degree of containment, and the evaluation of performance criteria should all be specified.

Developing a Worker Protection Plan. Prior to start-up, the contractor should provide a worker safety plan that addresses exposure monitoring, the compliance program, the respiratory protection program, personal protective equipment, housekeeping issues, hygiene facilities and procedures, medical surveillance, employee removal for exposure to lead, employee training, signage, record keeping, and employees’ right to observe and review monitoring information.

Preparing Environmental Protection Monitoring Plans. The procedures developed to verify environmental protection should include high-volume air samplers, tests for visible air emissions (opacity), personal air quality monitors, measurement (and reporting requirements) of unauthorized releases, and pre – and postproject soil quality and water quality sampling.

Developing Procedures for the Control and Handling of Hazardous Waste. Assuming that hazardous waste is to be generated, plans should be developed for identifying the waste, obtaining a hazardous waste generator identification number from the EPA, prepar­ing for proper notification and certifications with each shipment, preparing waste mani­fests, packaging and labeling waste, implementing contingency plans, conducting waste treatment and analysis for on-site handling, and record keeping.

Designing a Containment and Ventilation Plan. The contractor should develop detailed plans to select appropriate support structures and containment, address ventilation and other worker safety issues, provide emissions control, achieve water and soil protection and debris recovery, and verify the integrity of the containment structure.

Monitoring the Project. The project manager should develop a plan to monitor the ade­quacy of all of the control measures; visually monitor the project regularly and use approved testing methods to evaluate adequacy of controls; regularly monitor the ventila­tion system and the integrity of the containment; regularly examine waste storage facilities, and the handling and transportation methods and procedures; and verify worker protection and hygiene procedures. OSHA standards must be observed. Figure 1.2 illustrates a deci­sion tree to aid in the management of lead paint removal.

PATTERNS

If you are framing every day, the nailing patterns in this chapter will soon become second nature.

For the part-time framer, they can serve as a quick reference.

Building codes and generally accepted practices were followed in developing the nailing patterns in this chapter. When the plans call for other nailing patterns, however, be sure to follow them.

You will notice in this chapter that there are different nails specified for the same nailing. There are many different styles of nails. The five most frequently used categories are:

• Common nails

• Box nails

• Sinker nails

• Gun nails

• Positive placement nails

You will see a 3” x.131” nail specified frequently. This nail is the most common P-nail, or pneumatic gun nail, used.

The common nails are listed because they are typically specified by building codes. Most of the tests that are done to determine the strength needed use common nails. Box nails and sinker nails are listed because they are easier to nail, and less likely to split the wood. They are also commonly found at nail suppliers. The gun nails are listed because nail guns are used most often. Positive placement nails are made specially for nailing on hardware. They only work in positive placement nail guns.

Please note that common nails are listed with “common" written after the size. If the nail size has “common" after it, you can only use common nails. If it does not, you can use either common, box, or sinker nails.

The International Residential Code (IRC) is similar to the International Building Code (IBC) except it only covers one – and two-family dwellings. The patterns in this chapter are based on the 2009 IBC, which, in some cases, requires larger nails than the 2009 IRC.

PATTERNS PATTERNS

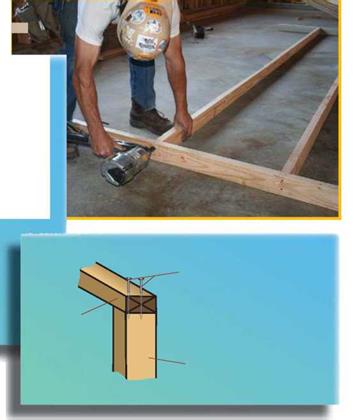
PATTERNSPATTERNSNail Top Plate to Studs

Specifications Guidelines

Specifications for scraping or blasting lead-based paint from structures should be written with worker safety and environmental issues in mind, so that qualified contractors who can adhere to a high level of quality and compliance are selected for the project. These specifi­cations should

• Describe the extent of surface preparation and the degree of containment required and let the contractor propose how to accomplish this.

• Identify key health and safety and environmental regulations to ensure that the con­tractor is aware of these regulations and plans compliance strategies in the bid.

• Clearly state that the paint to be removed is lead based. The highway department should have had the paint tested prior to contract bid if there is any doubt whether the paint is lead based. The cost differential is too great to make the assumption or let a contract with the lead concentration factor as an unknown.

• Specify how the waste is to be treated, tested, handled, and disposed of.

• Identify the worker protection standards and requirements that the contractor’s health and safety plan must meet at a minimum.

Sharing a Vision

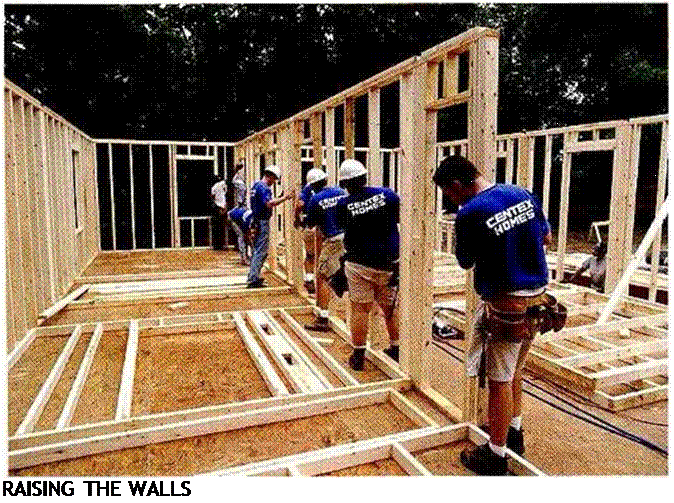
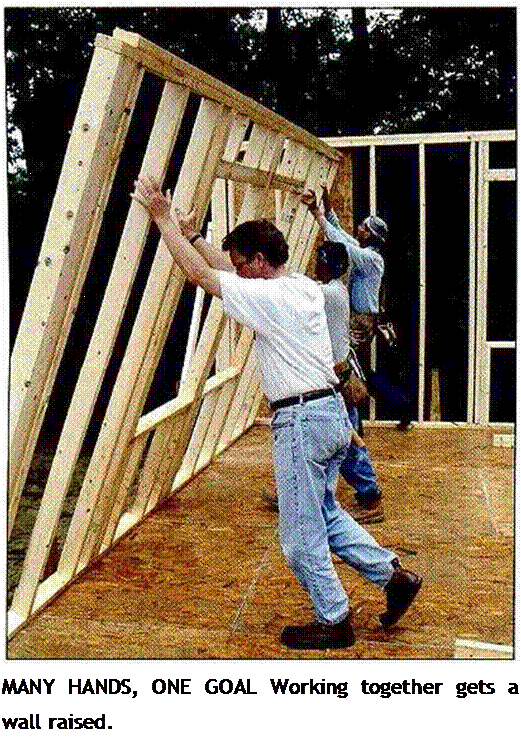
Подпись: MANY HANDS, ONE GOAL Working together gets a wall raised.

IT IS IMPORTANT TO HAVE a decent place to live. Most of us don’t want to live in a mansion. We only want a clean, safe place where we can live and raise our children. A decent house uplifts our spirits and provides dignity and hope for the future.

It is hard for many people to real­ize what it’s like to live in a moldy, leaky house with rat holes in the wall and plumbing that’s inadequate or nonexistent. Yet that is the condition of millions of people living around the world today. Poor housing is not just somewhere else, livery city in this country has its share.

Habitat for Humanity has a goal of eliminating poor housing by working
with families who need a hand up. There is no magic wand to wave that will produce a new home. Decent housing is built because people like you and me roll up our sleeves, pick up our hammers, and start building. What we may not be able to do alone can be accomplished when we work together. Lots of sweat, a little skill, and a shared vision get the job done.

During this process of working together, we build much more than houses. We meet all kinds of interest­ing people and develop close friend­ships as we work side by side, take breaks together, and share stories.

Подпись: і— —іПодпись: Helping HandПодпись: Rent a power pole. Most equipment rental dealers have a temporary power pole that you can set up at the job site. Mount the service panel, which the electric utility will install, on the power pole.

ensure that less-experienced workers are able to contribute meaningfully and feel good about the work they are doing.

Display patience, understanding, and openness

People of all ages and abilities come to Habitat job sites wanting to work. Try to give them work that they can do successfully, so that more than just a house is built. Sometimes it’s easy to get along with your coworkers; at other times, it’s quite challenging. You’ll find this to be true on a Habitat project, on your own construction site, and in every situation in life. We all know what it’s like to work with people who are arrogant, have an attitude, or are

unwilling to listen and learn. We also know what’s it’s like to work with people who treat us as equals, listen to us, show patience when we are trying to learn a new skill, and praise our efforts even when we fall short of expecta­tions. fry to be the latter, and have patience with the former.

A guide for

the first-time builder

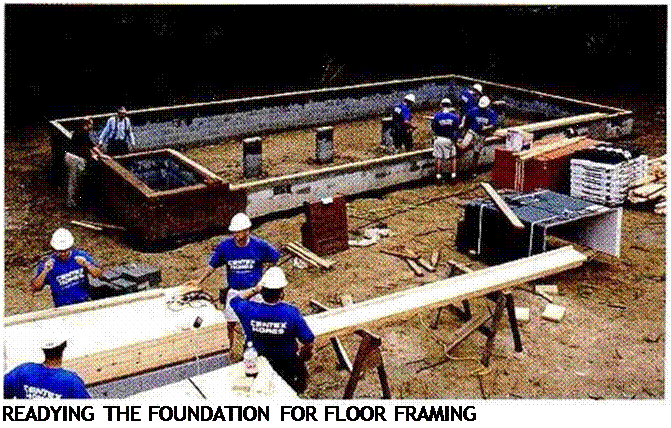
The checklist on the following pages contains most of the major steps involved in building a small house. Naturally, there will always be unforeseen or site-specific steps, but this list should serve as a fairly thorough guide to build­ing a house, from raw idea to move-in day.
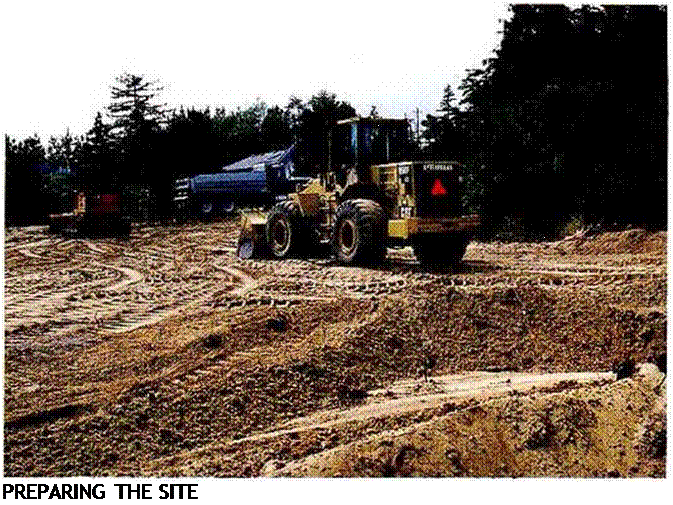
Подпись: PREPARING THE SITE Подпись:Getting started

a Look for land and determine whether you

4

can build on it.

a Acquire a piece of land.

a Survey vour land to confirm the boundaries.

a Buy or draw up plans or acquire plans through Habitat (see Resources on p. 278),

a Obtain permits from the building depart ment and other departments, if necessary.

a Contact subcontractors for the foundation, plumbing, electrical, heating, lumber, and material companies. Get bids on work and materials. Select subcontractors and sup­pliers. Schedule work and deliveries.

a Take out liability insurance.

a Contact the gas, electric, and telephone companies to locate on-site utilities.

a Prepare the site.

a Bring in temporary electrical power.

Foundation

a Trench and prepare for concrete footings and a foundation or slab.

a Before pouring concrete, lay down a gravel bed and install a plastic moisture barrier, if necessary.

a Call the building department to schedule an inspection of the concrete foundation foot­ing and reinforcing steel.

a Have the footings and then the foundation or slab poured.

Subfloor

a Have the floor framing and sheathing materials delivered.

a Frame the subfloor.

a Install the rough plumbing (water, gas, and waste lines) and heating pipes.

a Call the building department for the floor
joist framing, rough plumbing, and heating inspections.

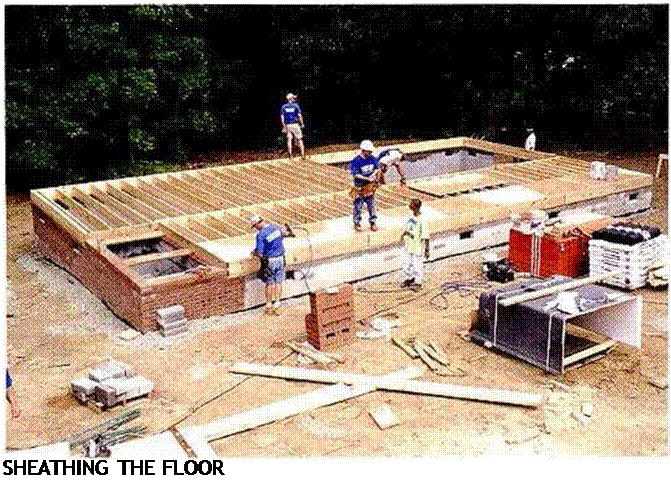
-a Sheathe the floor.

Walls

a Have the wall framing and wall sheathing materials delivered.

a Place chalklines on the floor to show the wall locations.

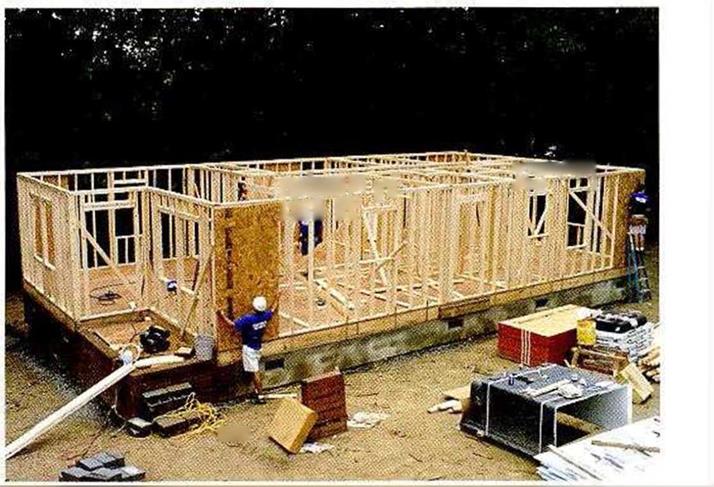
a Plate the walls, then cut and locate the headers. Frame and erect the walls.

a Brace the walls straight and plumb.

a Place the shower-tub units in the bath­rooms; cover them to protect the fiberglass.

a Sheathe the walls, if necessary.
Подпись:Подпись:Подпись: Schedule inspections ahead of time. To avoid delays, contact the building inspector several days before you expect each inspection to take place.Porch

a – Have materials delivered for the exterior porch, deck, and stairs. Build the porch, deck, and stairs. After they’re built, cover the decks and stairs with scraps of OSB to pro­tect them until the job is finished.

Roof

a Order the roof trusses at least two weeks in advance of your anticipated need.

ж Have the roof sheathing, fascia, and trusses delivered.

^ Install the trusses.

^ Install the fascia or gutter board and the barge rafters.

^ Install the roof sheathing on the trusses and the felt underlay on the sheathing.

a If required, have the roof sheathing inspected.

^ Call the plumber to put vent and exhaust pipes through the roof.

^ Shingle the roof. Install the ridge vent.

Doors, windows, siding, and paint

ж Order the windows and exterior doors two to three weeks before your anticipated need.

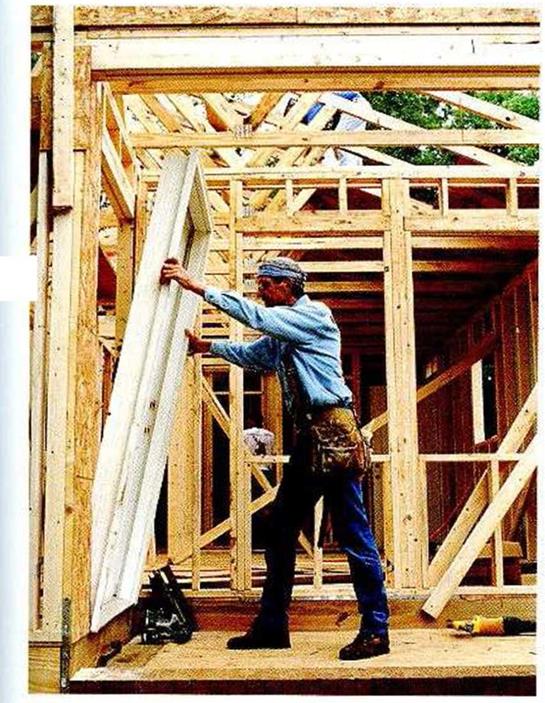
a Plumb the trimmers and install the win­dows and doors.

a Install the housewrap and exterior vapor barrier where needed.
Подпись: RAISING THE WALLS Подпись: BEGINNING TO SHEATHE THE WALLS Подпись: 'ПІЖІГЇЇГ ■■h*e ' і

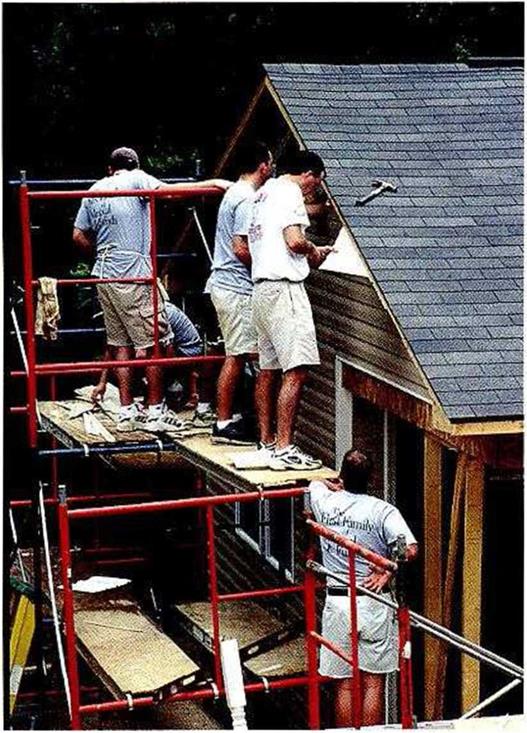
Sharing a Vision^ Have the siding and trim delivered; cover them with plastic for protection. Prime both sides of the wood siding and trim (if using). Install ihe siding.
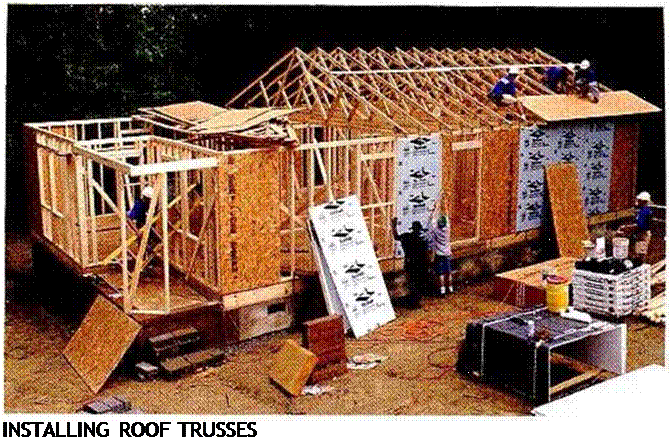
Подпись: INSTALLING ROOF TRUSSES Подпись: SHEATHING THE ROOF

Sharing a Vision
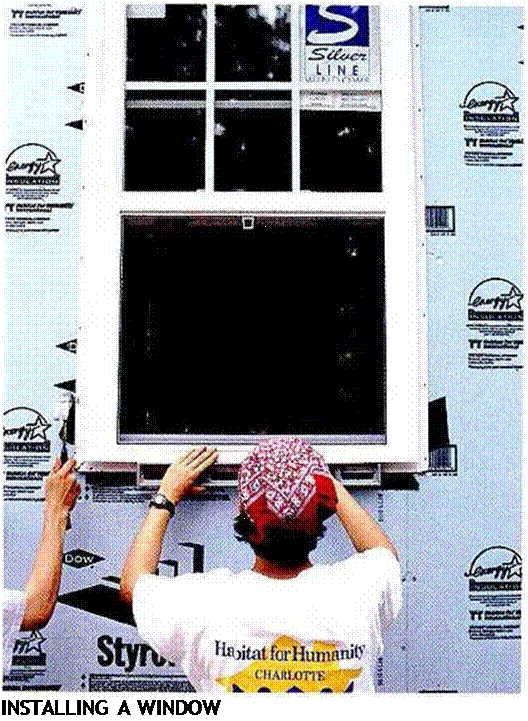
Подпись: INSTALLING A WINDOW

Sharing a Visiona Paint the exterior.

a Install the cutters.

Systems

a Install the rough electrical, heating and/or cooling ductwork, and gas lines.

a Install the cables for the telephone, television, and doorbell.

a Schedule and have inspections for the rough framing and the electrical, plumbing, and heating systems.

Insulation and ventilation

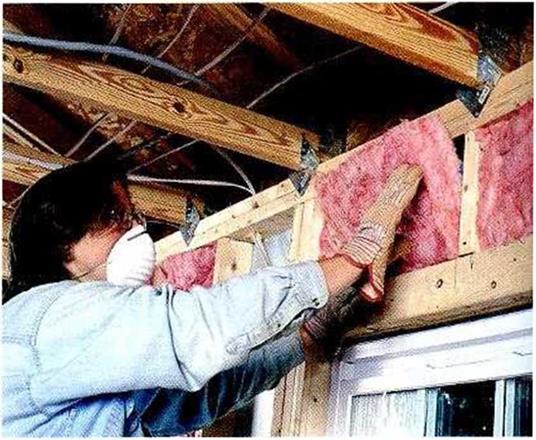
a Insulate the walls, ceilings, and floors.

a Install the interior vapor barrier where needed.

a Schedule the insulation and vapor barrier inspections.

Sharing a Vision

FINISHING VINYL-SIDING WORK

Drywall and paint

a Have the drywall delivered. Install drywall on the walls and ceilings.

^ Schedule and have the drywall nailing (or screw) inspection.

a Tape and finish the drywall.

^ Paint the interior trim and walls.

Finish floors

^ Install the underlayment for the vinyl floor covering.

a Put down the vinyl floors.

ж Install all remaining finish floors (wood, tile, etc.) except for carpeting.

Protect the floors until the construction is completed and all major appliances are installed.

Sharing a Vision

INSTALLING FIBERGLASS ВАТТ INSULATION

Built-ins and trim

^ Install the cabinets and countertops.

a Order prehung interior doors two weeks before your anticipated need. Install the doors.

^ Have the trim—door and window casings, baseboards, windowsills, aprons, and closet shelves and poles—delivered. Install the trim.

^ Prime, paint, and finish-coat the doors and trim. Touch up where necessary.

Sharing a Vision

NAILING UP DRYWALL

Finishing touches

a Install the finish plumbing and the electrical and heating units.

a Install the door locks.

a Install the medicine cabinet, towel bars, closet poles, and other hardware and fixtures.

a Lay wall-to-wall carpeting.

a Complete the work on the driveway and walkways (where applicable).

a Put on the house number. Set up the mailbox.

a Grade around the house sc the ground slopes and drains water away from the house.

a Landscape. Plant trees, grass, shrubs, and flowers.

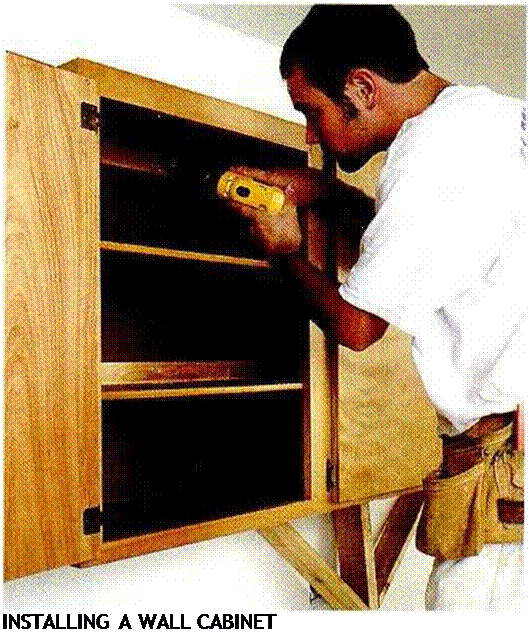
Sharing a VisionПодпись: INSTALLING A WALL CABINET a Schedule the final inspection.

Sharing a Vision

INSTALLING AN INTERIOR PREHUNG DOOR

If you can draw it, you can build it

If you’re drawing your own plans, the process— though slow and often frustrating—will give you a clearer understanding of your house than many builders ever have. It can save vou from making costly mistakes and will likely contribute to building a better house.

A good wav to test vour ability to visualize a house design based on plans is to visit some building sites where vou can examine both the plans and the actual construction details as the house goes up. If you’ve bought stock plans, they may seem bewildering initially; as you work with them, they’ll become much easier to read and understand. The ability to both draw and read plans gets easier with experience.

If you can draw it, you can build it If you can draw it, you can build it

FRONT ELEVATION EAST

STEP 5 Get Organized to Build

Building a house is a process that consists of a seemingly endless number of steps. Knowing which step follows which—for example» when to call the electrical company 😮 install a tem­porary power pole, when to call the plumber to install drains and vents in the joist system— is key to organizing tasks and materials so that work isn’t held up. This knowledge comes primarily from experience, but for the first­time builder I’ve listed most of the steps in the process (see pp. 16-21).

If you can draw it, you can build itWhen my brothers and 1 were building houses, we spent many hours planning and organizing so that we always knew what to do next, who would do it, and when and how it would be done. Organizing time and materials is an essential skill for any builder, whether that builder is working with professionals, friends, family, or Habitat volunteers. Staying organized and on top of the situation is espe­cially important when working with volunteers and unskilled helpers. Careful planning, good organization, and effective communication will