Materials MORE SIDING OPTIONS
IN ADDITION TO VINYL SIDING, there are three more exterior finisies to consider if you’re interested in affordability, low maintenance, and attractive appearance:
Composite wood. These planks are made the same way as OSB sheathing panels, but they look like solid-wood clapboards or horizontal lap siding when installed. This siding comes with a factory-applied primer coat, and it needs to be painted after installation. Composite-wood planks don’t split, crack, or warp like solid-wood siding does, but they may not be a wise choice in extremely wet climates.
Stucco. Two tyaes of stucco finishes can be applied to house exteriors. Lightweight acrylic-type stucco treatments are available for application over specially prepared foam insulation board. And old – fashioned Portland cement-based stucco can be applied to masonry walls and to wire lath that’s been fastened to wall sheathing or directly to studs. It’s best to hire experienced professional crews to do these treatments. In hot, sunny cli
mates, stucco stands up better than most other siding treatments.
Tl-11. This plywood paneling can serve as both sheathing and finish siding, so it can be a real money saver. Tl-11 typically comes in 4×8 sheets and is available in different thicknesses. The "good" side of the panel has a rough-sawn wood finish that is divided lengthwise by a series of parallel grooves. A house sided with Tl-11 has a rustic appearance.
The panels are installed just like regular sheathing is—эу nailing through the plywood into the studs and plates. Be sure to use galvanized nails. The long edge of each panel is milled to meet in a lap joint. Tl-11 needs the protection of a good exterior paint or stain for the sake of appearance and longevity. Although it’s not a good long-term (20 years or more) siding, it enables you to cut down on construction costs and provides a workable base for subsequent siding treatments. Vinyl siding, fiber-cement siding, clapboards, and shingles can all be applied right over Tl-11.


range from T in. to 8 in.; there’s even a wide» single-board siding panel with a decorative bead along the bottom edge. Manufacturers offer most of their siding with either a smooth surface or a textured, wood-grain finish.
When choosing a siding color, hear in mind that it will fade slightly over time. Also, darker siding will absorb more heat and expand more than light-colored vinyl.
To estimate how much siding vou’ll need, refer to the sidebar on p. 150. Keep in mind that when vou buy vinvl siding, vou’re act nail v buying a comprehensive system of siding components: siding panels, J-channel, inside
and outside corner pieces, and other types of trim designed to simplify the installation and enhance the appearance. Siding manufacturers also make compatible vinyl soffit paneling and other components, such as vents, electrical outlet covers, and special exterior trim. It’s smart to get an overview of the full range of compatible products before you order siding. Go online to visit manufacturers Web sites or call to request product information (see Resources on p. 278).





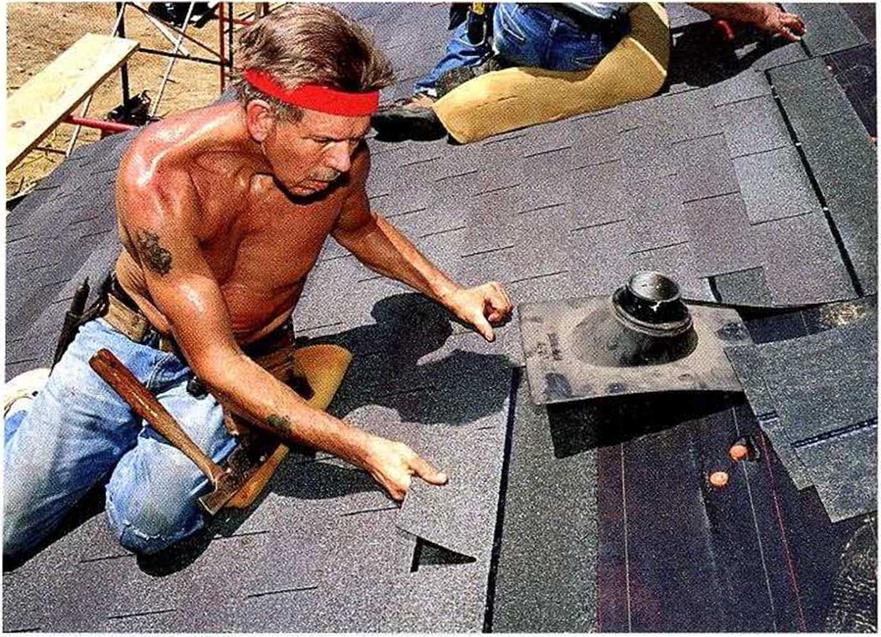
 shingles are laid on top of it. Don’t nail the bottom corners down, though, as this could cause the flashing to leak.


 left and 9 in. to the left of the reference mark. You now have an offset of 6 in., or half the width of a shingle tab, between courses. Staggering the courses like this—so that the breaks between the tabs don’t stack up on top of each other— prevents water from seeping beneath the shingles. Make the З-in. and 9-in. offset marks at the bottom of the roof, near the eave, and at the top, near the ridge. Snap chalklines between the marks to establish your vertical start lines.

 If vou live in a verv vvindv area, you can make the starter course even more secure with I just a little extra effort. For the bottom layer of I the starter course, cut off the three tabs on each shingle just below the tar strip. Snap a line the width of this narrower shingle around I the roof’s perimeter. When you install the narrow shingles, the tar strip will be very close to the edge of the roof. Nail the narrow shingles. in. or so from the roof’s edge with their tar strips down. When the sun heats up the tar strip, this layer of shingles will be sealed to the roofing felt below.


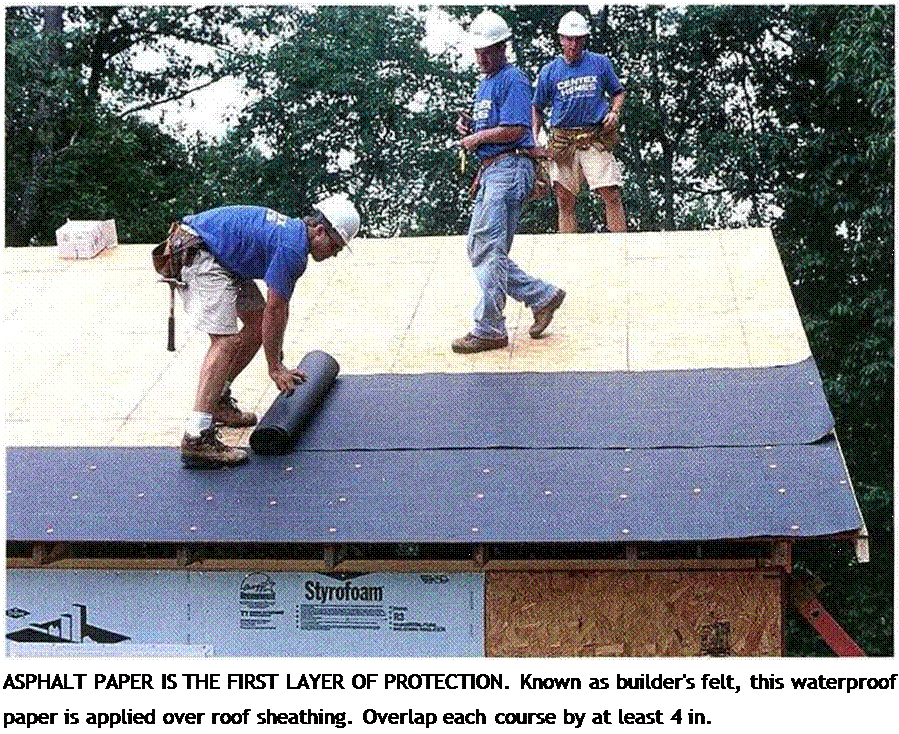
 to that line. This makes the roll lay down straight. Alternatively, you can hold the felt Hush with the edge of the roof. Unroll the felt Hat (with no bumps or wr nkles) and tack it down with roofing tacks. A roofing tack is a small nail with a large plastic button (generally green, orange, or red) on top (see the bottom photo on p. 136). Stepping on felt that is not nailed well can cause you to slip off the roof, so use plenty of roofing tacks (6 in. o. c. at the bottom and ends and 10 in. o. c. from top to bottom every 24 in. o. c. across the roof). Roofing tacks hold the felt in place, which is especially important if the roof won’t be shingled for several days. Pick up any tacks that fall to the ground so that no one steps on them. Finally, trim the felt flush with the gable ends.

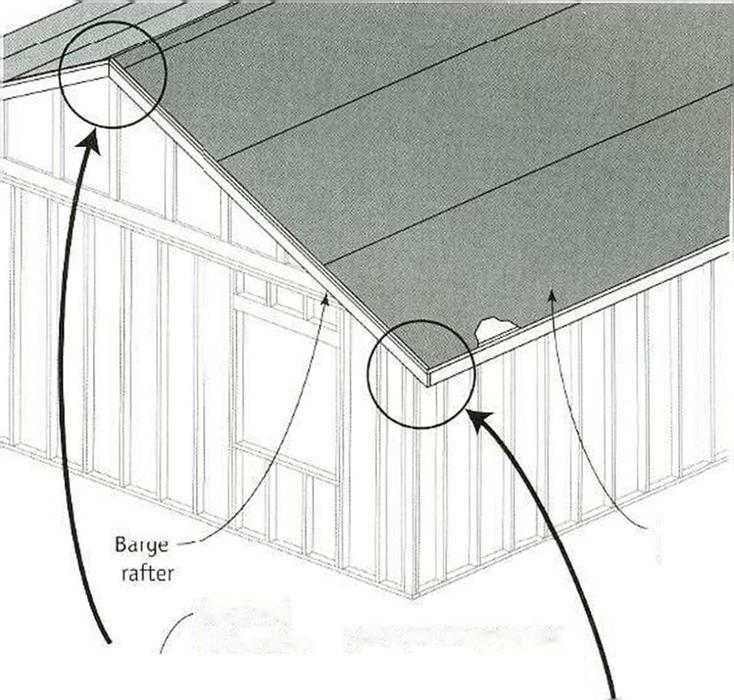
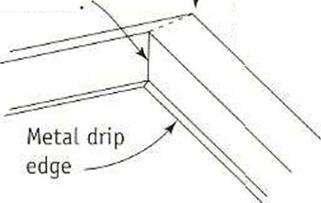
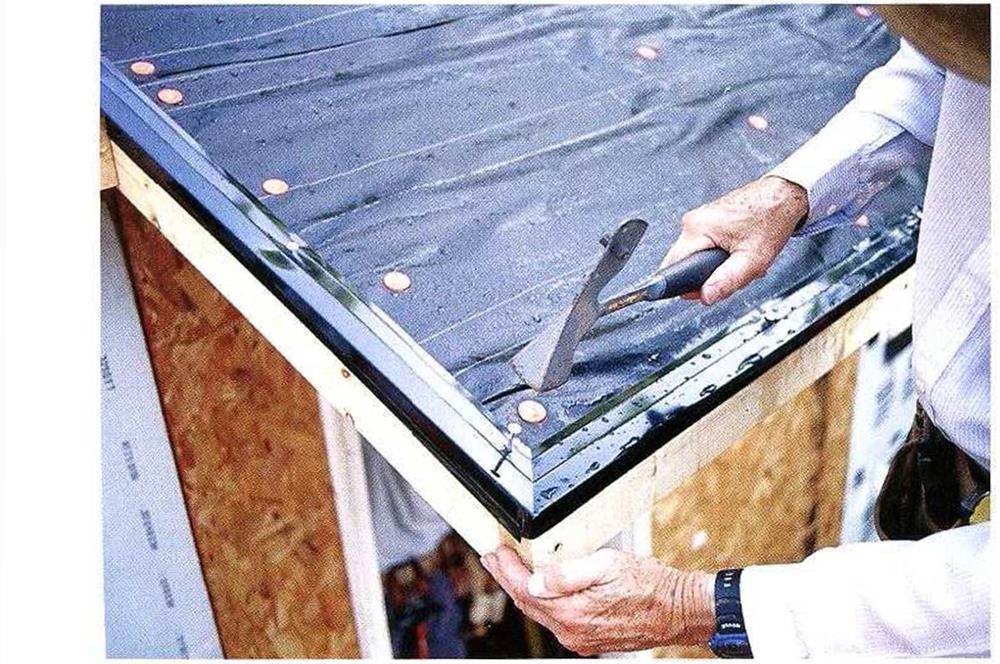 Whether you are tacking down roofing felt or nailing on shingles, it’s important in consider whether the nails can be seer, from below. When the eaves around t he house are open (no soffit), a long nail penetrates the roof sheathing and is visible to anyone who looks up. I kindreds of shiny nails sticking through the plywood or OSB is ur at tractive. Therefore, when tacking felt around the perimeter of the roof, take care to nail the tacks into the barge rafters and gable-end rafters—not just through the sheathing into the air. When nailing shingles, use %-in. nails at the gable overhangs and eaves. When working over the house frame, nails that penetrate the sheathing in the attic are not a problem.





 A SAFE STRATEGY for hoisting sheathing onto a roof is to build a simple staging platform, as shown in the photo at right. Nail the platform’s two horizontal supports (a pair of 2x4s works fine) to the wall framing or, if the wall has been sheathed already, to a 2x cleat nailed through the sheathing and into the studs. The supports must be a couple of feet above the bottom plate of the wall. Space them about 32 in. apart, and make them roughly level. Support the outboard end of the platform with 2x legs firmly attached to the horizontal supports. Nail a 2x on top of the platform near the outer end to provide additional stability. If necessary, install diagonal braces between the supports and the legs or the wall framing for added strength. Then set 4×8 sheets of plywood or OSB on edge on the platform; workers on the roof can grab the sheets as needed.

 sheathing (but not on %-in. sheathing), these clips hold each row together and make the roof’s surface stronger. Start the second row at one end with a 4-ft.-scj. sheet so that the courses will he staggered, just as they are with floor sheathing. Continue sheatiing until von reach the top. If a ridge vent will be installed, leave a gap at the ridge so that air inside the attic can move up into the vent. If the vent is available, read the manufacturers instructions regarding the size of the gap and check with your building inspector regarding these construction details. The gap need not run all the way to the barge rafter. Start it about 1 ft. in on the main rook