UPGRADING ROADSIDE BARRIER SYSTEMS
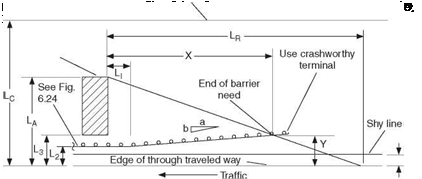
Table 6.6 provides a checklist that can be used to review existing barrier installations and determine adequacy for either structural or functional (design or placement) causes. Factors to be considered in determining the scope and extent of upgrading include the nature and extent of the deficiency, past accident history, and the cost-effectiveness of the recommended improvement. Remember to always consider the cost-effectiveness of eliminating or relocating the shielded feature.
Longitudinal median barriers are used to separate opposing traffic on divided highways, to separate local and through traffic, or to separate traffic in designated lanes. Median barriers designed to redirect vehicles striking from either side require some different considerations from those for roadside barriers. However, performance requirements are the same as given in NCHRP 350 for roadside barriers.
Median barriers should be installed only if the consequences of striking the barrier are less severe than those of striking the feature in question. Figure 6.25 provides suggested warrants for median barriers on high-speed fully controlled-access roadways with relatively flat, traversable medians. The median width and the traffic volume dictate the need. There has been a trend to use median barriers for somewhat wider median widths than in the past as a result of studies of cross-median crash history. Site-specific data should also be considered. Also, special consideration should be given to barrier needs for medians separating roadways at different elevations.
The information presented in Arts. 6.6, 6.7, and 6.8 on selection, placement, and upgrading of roadside barriers applies generally to median barriers as well. Some additional information on transitions and placement follows in Arts. 6.9.2 and 6.10. End treatments are discussed in Art. 6.12.
I. Structural adequacy*
A. Longitudinal section
1. Standard barrier designf
2. Adequate post spacing
3. Rail element blocked out on strong-post system
4. Adequate splices in rail element
B. Terminal
1. Standard terminal designf
2. Adequate anchorage strength
C. Transition section
1. Standard transition designf
2. Adequate anchorage strength
3. Adequate stiffening in advance of rigid system
4. Adequate blockout and/or rubrail
II. Functional adequacy^
A. Longitudinal section
1. Adequate length to shield area of concern
2. Proper height of rail§
3. Proper flare rate
4. Barrier-to-object distance exceeds barrier deflection distance
5. Placement behind curb consistent with vehicle trajectory data
6. Placement on flat slopes (1:10) or on slopes up to 1:6 consistent with vehicle trajectory data
7. Beam backup plates present on steel strong-post system
B. Terminal
1. Adequate clear recovery area behind yielding terminal
2. Adequate offset of terminal end
*Structural adequacy is inherent in the barrier itself, rather than resulting from design, placement, or maintenance.
fStandard systems or elements are those which are currently an approved agency standard or have been successfully crash tested. Certain barriers that fall outside these categories may be left in place depending on the characteristics of the barrier and the results of an engineering analysis of the site.
^Functional adequacy results from barrier design or placement and is essential for barrier effectiveness.
§Generally, a 3-in (75-mm) variation from the nominal height is acceptable.
Source: From Roadside Design Guide, AASHTO, Washington, D. C.,
2002 and 2006, with permission.




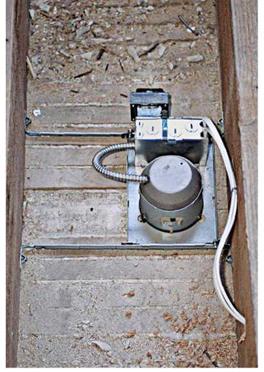
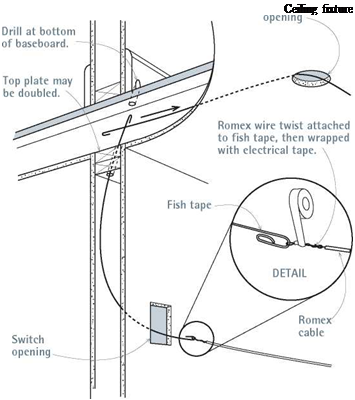
 If the cavity above isn’t accessible, cut out a larger area of ceiling to expose the ceiling joists, so you can fish cable and mount the box. If the ceiling fixture’s location isn’t critical, use nail-in boxes with brackets, which have the smallest footprint to patch. If you use a hanger bar, cut a channel in the ceiling from joist center to joist center so you’ll have something to attach the patch ends to. If the ceiling is plaster, drill 18 in. holes to find the width of one piece of lath, usually 1 in. wide. You’ll reduce patching if you can remove just one lath strip. See Chapter 15 for more about patching plaster and drywall.


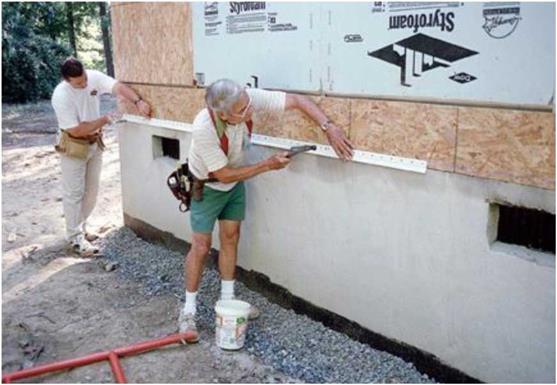

![STEP2 Install the Housewrap and Flash Openings Подпись: HOUSEWRAP KEEPS OUT WIND AND WATER. Modern house- wraps can be applied over sheathing or directly over framing, as was done here. After wrapping the walls completely, make "X" cuts at the window and door openings, then fold and staple the flaps inside. [Photo * Memo Jasso.]](/img/1312/image549.gif)


 Carefully remove the sashes. swing the inside sash out of the window opening, and cut the counterweight cords to free the sash. Remove the small parting bead between the sashes, and take out the outer sash the same way.

 Remove the weights. open the counterweight doors to remove the weights and cords; then unscrew the pulleys and remove them. some installation guides suggest hammering the old pulleys into the jamb, but I disagree. The pulley holes make good view spots when installing insulation.