Thermostats
■ BY SEAN GROOM
|
I |
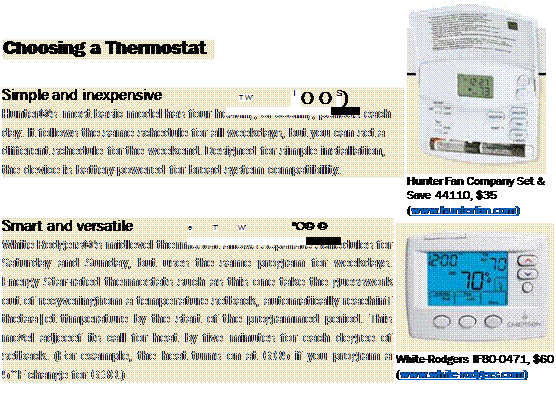
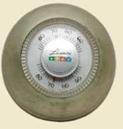
nstead of turning down the thermostat on the way to bed and again on the way out the door, you can cut home-heating costs and count on a reliable, comfortable temperature with one of today’s programmable thermostats. Basic models ($30 and up) store different settings for weekdays and weekends. More advanced models ($90 and up) store a different program for each day of the week.
Minimize Operating Time to Save Money
Whether a thermostat is manual or programmable, your savings result from the setback, or the reduction in temperature from the typical occupied setting. Studies by the U. S. Department of Energy have found that the energy required to raise a home’s temperature to its normal level approximately equals the energy saved as the temperature falls to the lower setting. For each degree of setback over an eight-hour period, you’ll reduce energy consumption by 1%; the longer the setback, the more energy savings you enjoy.
During the heating season, utility companies recommend a 68°F setting in the morning and evening and 55°F overnight and when you’re not home. You can economize
on cooling costs with a setting of 78°F to 85°F when you’re out or sleeping.
A programmable thermostat has to be compatible with your HVAC system. Be especially careful when choosing one for use with heat pumps or radiant floors. A temperature setback in heating mode can cause a heat pump to operate inefficiently. And because high-mass radiant floors are slow to lose and gain heat, temperature setbacks have to be timed differently.
Finally, look for an Energy Star rating, which ensures the thermostat is capable of four daily temperature settings and is preprogrammed for efficient operation.
Replacing a standard thermostat with a programmable one is easy on most HVAC systems, but there are a few things you need to pay attention to that usually aren’t included in the instructions. Hydronic (boiler) sys-
 |

![]()
 Easy, flexible programming
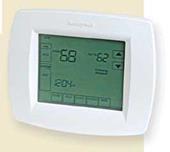
![]() The flexibility of a high-end model like Honeywell®’s Vision Touch Screen allows you to enter a different schedule for each day. The touch screen relies on a menu-driven program similar to an ATM. A feature called “adaptive intelligent recovery system” tracks heating and cooling periods over time to “learn” how long it takes to bring your house to the programmed temperature, minimizing the system’s run time. The “auto changeover” setting of thermostats in this price range switches between heating and cooling modes automatically.
The flexibility of a high-end model like Honeywell®’s Vision Touch Screen allows you to enter a different schedule for each day. The touch screen relies on a menu-driven program similar to an ATM. A feature called “adaptive intelligent recovery system” tracks heating and cooling periods over time to “learn” how long it takes to bring your house to the programmed temperature, minimizing the system’s run time. The “auto changeover” setting of thermostats in this price range switches between heating and cooling modes automatically.
tems are wired differently; a professional can advise you on the best approach for your setup.
• First, cut power to the HVAC unit. That’s usually done by shutting off one or more circuit breakers: one if the unit is a heat pump, two if it’s an air conditioner and furnace. The breaker for a heat pump or AC compressor is a two-pole breaker, usually two breakers with a handle tie. Most thermostats operate at low voltage (24v), which comes from the unit, and you want the power off to protect both the
transformer in the unit and the new thermostat. Remote thermostats for electric baseboards are typically line voltage (either 120v or 240v). In that case, be sure the thermostat you’re installing is made for line voltage, and be sure the power is off to protect yourself.
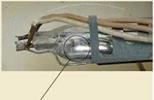
• Remove the old thermostat body from its base. It will either be a press-fit unit or be held together with screws. The leads from the thermostat cable usually are attached to terminal screws on the base.
Each screw has a letter next to it; often, they’re molded into the plastic base and are not easy to see. If standard thermostat
Energy-Saving Thermostats 183


![]()


cable was used, the colors usually match up: red lead (wire) to the terminal marked "R," green lead to "G," yellow to "Y," and white to "W." By convention, the red lead is the power supply, green controls the air mover or blower, yellow controls cooling/ air-conditioning, and white controls heat. The simplest programmable thermostat typically has two R-terminals: RC for power from the cool transformer, and RH from the heat transformer. If your cable has only one R lead, connect it to one of the two R terminals, and leave or install the provided jumper wire between the two. If the color of the wires doesn’t match the terminal designation, use masking tape to label each wire before you disconnect it.
• Pull out a few inches of cable, and put a
clothespin or binder clip on the wire to
keep it from slipping back into the wall. If there isn’t any slack, I wrap some electrical or masking tape around the cable, leaving a tail long enough to stick to the wall. If you’re lucky, there’ll be enough slack in the cable to cut off the bare copper and to restrip. For a clamp-type terminal, strip
about 3/8 in. For a screw terminal, I usually strip about 11/2 in. off each wire and cut off the excess after I’ve tightened the screw.
• Run the cable through the hole in the
new base, and fix the base to the wall with a suitable anchor. Insert each wire into the terminal clamp, or wrap each wire around its terminal clockwise so that tightening the screw closes the loop. Make sure there’s no insulation caught under the clamp or screw. If the cable is so short that I can’t make the new connections or if I want to relocate the thermostat, I splice on a length of new cable. For low-voltage wiring like this, no junction box is needed. I use a crimp connector or small wire nuts, and I tape or cable-tie the two cables together to take the strain off the splices.
• Before you complete the installation, plug the cable’s hole in the wall with caulk or non-hardening putty. This keeps drafts inside the wall from influencing the thermostat.
• Run the thermostat cable to an interior wall close to the return-air location and out of direct sun.
• Keep runs of low-voltage cable at least 2 in. away from line-voltage cables. Use 6-conductor, 20-gauge standard thermostat wire unless you are sure that your HVAC unit and thermostat need fewer wires.
• Run the cable into the stud bay and
through a 3/8-in.-dia. hole in a 1×6 block affixed to adjacent studs, flush to their faces. Make a service loop by leaving 2 ft. of cable in the stud bay, taped to the side of a stud.
• Wrap 6 in. of cable around a nail driven partway into the block. This helps to keep it from being buried under drywall.
Sean Groom is a freelance writer in Bloomfield, Conn. Mark Eatherton, a heating contractor in Denver, provided technical information. “Installing a Programmable Thermostat” is written by Clifford A. Popejoy, a California electrical contractor.
[1]Go back to step 1 and reduce the size of the mechanicals. An airtight house with insulation on all six sides of the cube and good windows provides predictable performance, so the mechanical contractor won’t have to guess at the quality of the enclosure. Downsized mechanical equipment can defray the cost of steps 2-5.


Leave a reply