Wood Flooring over Concrete
Before purchasing wood flooring for installation over concrete slabs or in subgrade areas, check the flooring warranty to see if subgrade installations are allowed. If so, be sure to correct excess moisture conditions beforehand. In general, engineered wood is a better choice than solid-wood flooring in such locations because engineered wood’s cross-ply construction is more dimensionally stable. And thanks to impregnated acrylics and other factory finishes, it’s also more water resistant.
Solid-wood flooring is typically installed by first covering the concrete slab with a 6-mil polyethylene vapor barrier, spacing 2×4 sleepers on-face every 12 in. to 16 in. over the plastic, and then using power-actuated fasteners to attach the sleepers to the slab. Although it’s possible to nail 3/4-in. T&G flooring directly to sleepers, it is likely to deflect. Most flooring manufacturers specify a 3/4-in. plywood subfloor, with panels run perpendicular to the 2x4s, a %-in. gap between panel edges, and a V2-in. expansion space around the perimeter of the subfloor.
Engineered wood and plastic-laminated flooring can be nailed or stapled to wood subflooring, glued directly to a slab, or "floated" over it. Floating systems typically call for the planks to be glued or attached to each other, rather than to the subfloor or slab. Many systems feature proprietary underlayments that block moisture and cold and cushion the flooring so you feel less like you’re walking on concrete. Cosella-Dorken’s DELTA®-FL underlayment is a dimpled plastic membrane, and other systems employ foam or felt pads. Floating systems can be used over slabs with radiant heating, as well.


![]()

![]()


Resilient flooring surfaces, such as vinyl and linoleum, bounce back from use and abuse that would gouge or crush harder, less flexible materials. However, vinyl and linoleum are relatively thin, so their durability depends on a sufloor that’s thick enough and an underlayment layer that’s smooth, stiff, and flat.
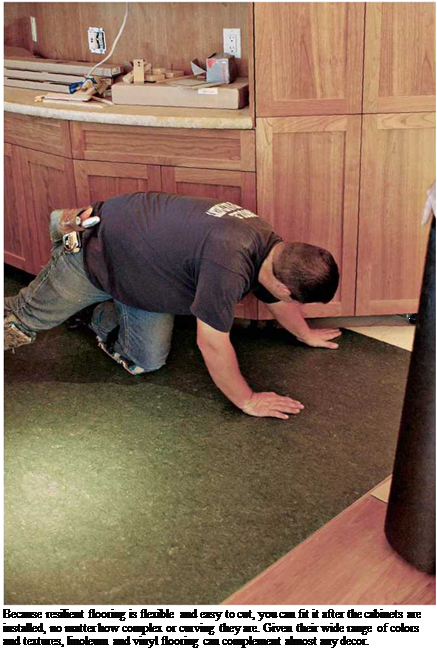
Resilient flooring is installed either as tiles or as sheets; both require underlayment. Tiles are generally easier to install—their layout is similar to that for ceramic floor tiles, as described in Chapter 16, but are poorly suited to high-moisture areas because of their many seams. Resilient sheets are better for kitchens and bathrooms, as suggested in the kitchen installation shown here.
Overlap paper seams at least 2 in. and tape together.
"Boats" cut out and covered with duct tape
15-lb.
building paper
<-
Alignment
notch
|
|
|
LOW-MAINTENANCE |
Because resilient materials are thin—between /б in. and ъАб in. thick—they will telegraph subsurface irregularities, such as board joints, holes, and flooring patterns. So underlayment materials must be uniformly flat (no holes or voids), smooth, stiff, and dimensionally stable. Few materials fit the bill. Note: It’s possible to adhere resilient flooring directly to concrete slabs, old resilient flooring, and wood flooring, but that often requires a lot of prep work to make such surfaces perfectly smooth. So in addition to creating a more durable, smoother resilient floor, underlayment speeds up its installation.
Plywood. Plywood is universally acceptable if it’s correctly installed and is exterior-grade APA – rated CDX underlayment. It will be stamped “underlayment” or "plugged crossbands.” Also, it should be at least ‘/a in. thick and have a fully sanded face (FSF)—not plugged and touch sanded (PTS). Type 1 lauan plywood, which has an exterior glue, is also specified by many resilient flooring makers; panels should be at least 14 in. thick. Three face-grades of lauan are acceptable as underlayment: BB, CC, and OVL. Type 2 lauan is not acceptable. APA Sturd-I-Floor® plywood is another option: It’s a structural plywood that serves both as subfloor and underlayment. Sturdi-I-Floor panels range from ‘132 in. to ”A in. thick; span distances and loads dictate the thickness.
Hardboard, particleboard, and OSB. Hard- board, a very dense fiberboard, is generally an acceptable underlayment for resilient flooring in dry locations, but it should not be used in kitchens and bathrooms because its joints tend to swell when they get wet. Particleboard also swells along its edges when it absorbs moisture. OSB underlayment panels are more stable, but surface roughness can telegraph through resilient flooring. In dry locations, most of these materials are acceptable underlayments, but check your flooring manufacturer’s recommendations to be safe. Those specs will also include nail lengths and spacing, as well as acceptable filler materials.
Follow panel and flooring manufacturer specifications for the length and spacing of fasteners, and acceptable filler materials. In the installation shown here, the installer attached ІЗб-in. underlayment panels, using 113-in. staples spaced every 4 in. to 6 in. in the field and every 1 in. to 112 in. along the panels’ edges. Stagger underlayment joints so they don’t align with subfloor joints.
 Before filling panel joints and irregularities with a patching compound, use a wide spackling knife or drywall-taping knife to scrape off splinters. If the blade clicks against a nail or staple, use a nail set to sink the fastener below the surface.
Most resilient flooring makers specify a portland cement-based patching compound, which may contain a latex binder. If you use any under – layment other than hardboard, fill and level the panel joints and surface imperfections. But don’t fill nail holes because if nails work loose, they’ll raise the patching compound as well, creating a bump in the flooring. Apply one or two coats of compound, feathering it out along the edges of the seam. If you’re careful, you won’t need to sand the compound.


Leave a reply