WATER RESISTANCE AND DURABILITY
There are almost as many physical distinctions among tiles as there are tile types, but the most important traits to consider are water resistance and durability.
Water resistance. Here, three of four official categories of tiles include the word vitreous, which means glasslike, and suggest how much the tile will resist or absorb water. The categories are nonvitreous, semivitreous, vitreous, and impervious. Nonvitreous is the most absorptive, and impervious the most water resistant.
Use nonvitreous tiles on dry areas, such as interior fireplace surrounds and hearths. Use semivitreous or better on shower walls, tub surrounds, backsplashes, and areas that are intermittently wet. Use vitreous and impervious tiles for wet installations like pools, hot tubs, and outdoor surfaces in rainy climates. In general, the less water a tile absorbs, the less hospitable it will be to bacteria and mold. That’s why hospitals and laboratories usually use impervious tiles.
Durability. Tile durability ratings, based on structural strength and surface imperfections, typically assign softer, weaker tile to less demanding areas and harder, impervious tile to heavily trafficked, wet, and outdoor areas. In like manner, tiles are rated for walls, floors, and counters. A reputable
tile supplier will give you good advice on appropriate uses and durability and will stand behind the tiles you buy.
Many tile suppliers sell or rent tiling tools and offer workshops on techniques and tool use.
Tools and safety. Tiling is deliberate, methodical work and is not as inherently dangerous as some remodeling tasks. Still, it poses hazards; so for starters, please note these minimal safety rules:
► o Use a voltage tester to ensure that power has been shut off to outlets, fixtures, switches, and devices you’ll work near. In addition, ensure that bathroom and kitchen receptacles have ground-fault circuit interrupter (GFCI) protection, as spelled out in Chapter 11. Corded power tools should be double insulated and grounded with a three – prong plug. Or use cordless tools instead.
► Rubber gloves reduce the risk of electrical shock and prevent skin poisoning from prolonged handling of mortar, adhesives, sealers, and the like.
► Wear goggles when cutting tiles, whether making full cuts with a wet saw or nibbling bites with a tile nipper. Tile shards can be as sharp as a scalpel.
► Wear a respirator mask when mixing masonry materials, applying adhesive, cutting cementitious backer board, and so on.
► Knee pads will spare you a lot of discomfort. Buy a pair that’s comfortable and flexible enough to wear all day. Flimsy rubber knee pads won’t protect your knees.
► Open windows and turn off pilot lights on gas appliances when using volatile adhesives or admixtures. Closely follow manufacturer’s instructions.
► Safety equipment: rubber gloves, goggles, respirator mask, voltage tester, and knee pads.
► Measuring and layout: straightedges, framing square, spirit level, pencil or felt – tipped pen, chalkline, tape measure, story pole, and scribe (or an inexpensive student’s compass).
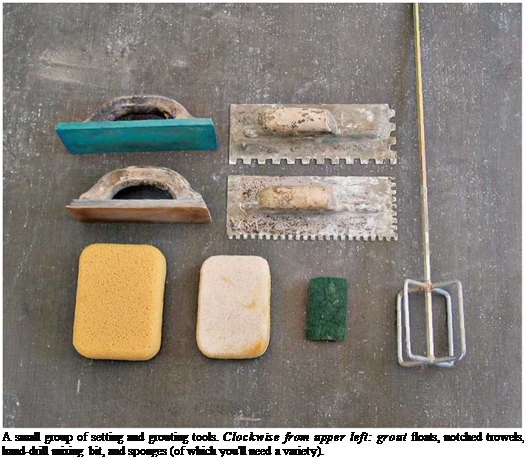
► Setting and grouting: notched trowel, margin trowel, plastic spacers and wedges, beater board, rubber mallet, grout float, round-cornered sponge, and clean rags.
► Cutting: snap cutter, tile nippers, utility knife with extra blades, and wet saw.
► Cleanup: sponges, rags, plastic buckets, plastic tarps, and shop vacuum.
► Miscellaney: hammer and wire cutters.
Substrates are never absolutely flat or perfectly plumb, so layout is a series of reasonable approximations. Clean tools give the most accurate readings, so wipe off mortar or stray adhesive before it dries.
► A 4-ft. spirit level is long enough to give you an accurate reading. It’s indispensable for checking plumb and leveling courses of wall tiles. If a 4-ft. level proves unwieldy on the short end walls of a bathtub, use a 2-ft. level or a torpedo level instead.
► A tape measure lets you measure areas to be tiled, triangulate diagonals for square, and perform general layout.
► Snap a chalkline to mark tile layout lines before applying adhesive.
► Straightedges are useful for aligning tile courses, marking layout lines on substrate, and guiding cuts on backer board and plywood. Professional tilesetters have metal straightedges of different lengths, but wood’s okay if it’s straight and sealed to resist water.
► A framing square establishes perpendicular layout lines on floors, walls, and countertops.
► A story pole is a long straight board marked in increments representing the average width of a tile plus one grout joint (see "Storytelling," on p. 395). With it, you can quickly see how many tiles will fit in a given area, as well as where partial tiles will occur.
► Use a scribe to fit sheet materials (cementitious backer board, plywood) to a bowed wall or to transfer the arc of a toilet flange to a tile.
Always wear goggles when cutting or nipping tile, especially when using power tools.
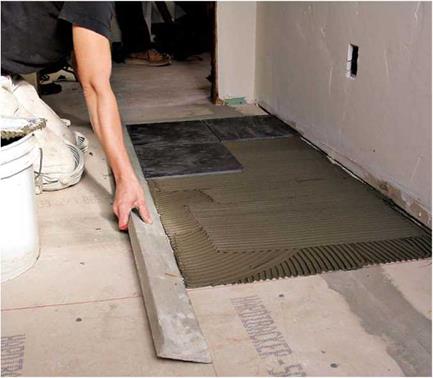
A snap cutter works well on manufactured vitreous and impervious tile. This tool has a little cutting wheel—make sure it’s not wobbly or
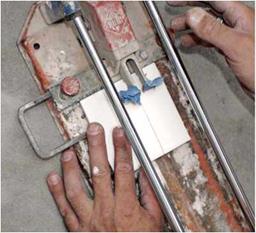 |
Snap cutters work great for straight cuts on vitreous tile. With this model, you score the tile in one pull and then push down on the tool’s wings to snap the tile along the scored line. Here, blue painter’s tape keeps the cutter’s wings from scratching the tiles.
|
chipped—that should score the tile in one pull. Then reposition the handle so the "wings” of the tool rest on the scored tile, and press sharply to snap it. Note: When using a snap cutter, it’s tough to get a clean break on nonvitreous tile, tiles with textured surfaces, and floor tiles. For those you’ll need to rent a wet saw.
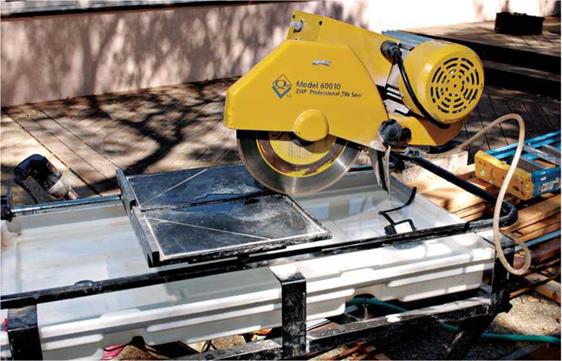
A wet saw, which you can rent, is especially useful when cutting nonvitreous or irregular tiles or trimming less than 1 in. off any tile. It cleanly cuts all tile types. To make U-shaped cuts around soap dishes and the like, make a series of parallel cuts with the wet saw before removing the waste with tile nippers.
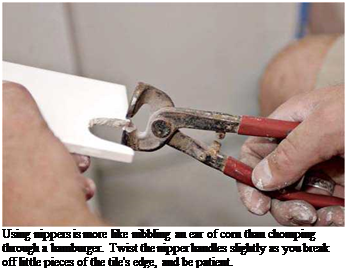
Tile nippers allow you to cut out sections where tiles encounter faucet stems, toilet flanges, and the like. Nippers require some practice and lots of patience. Take small nibbles—use only part of the jaws—nibbling away from the sides of a cut into the center, gradually refining the cutout.
As you approach your final cut-lines, go slowly.
A carbide-tipped hole saw is perfect for cutting holes for faucet stems and pipe stubs. To be safe around pipes and water, use a cordless drill with this saw.
A handheld grinder with a diamond blade can cut curved lines in tile (make a series of shallow passes) or plunge cuts for holes in the middle of a tile. Be sure to stop the cuts short of your cut-lines and remove the waste with a pair of
nippers. Because a grinder is noisy and throws lots of dust, use it only outdoors, and wear a respirator mask and eye protection.
A utility knife scores cementitious backer board (which you snap like drywall), marks off tile joints in fresh mortar, cleans stray adhesive out of joints, and so on. However, if you’ve got much backer board to cut, instead use a handheld grinder with a diamond blade.
Keep tile from overheating and cracking as you drill by immersing it in a water-filled box just larger than the tile—build the box from scrap wood and caulk it so it won’t leak. If countertop tile is already installed, build a dam of plumber’s putty around it and add water before drilling. Mexican and other handmade tiles tend to crack when drilled without mortar support underneath, so install them before drilling. To avoid electrical shocks, use a cordless drill.
 1111
1111


Leave a reply