POSITIONING THE CARPET
Carpet is heavy. So get help rolling it up and carrying it. Unroll it in the room where you’ll install it. If you measured and cut properly, the edges of the carpet should curl up about 3 in. at the base of the walls. To adjust the carpet slightly once you’ve unrolled it, lift a corner about waist high. Then, as you stand with one foot on the carpet and one behind it, raise the foot that was on the carpet and, with the side of that foot, kick the carpet sharply. Note: By using the side of your foot, rather than your heel or toe, you’ll be less likely to stretch or tear the carpet.
Many installers don’t cut fill pieces of carpet till they’ve positioned the drop piece and measured from the drop piece to the wall. This allows them to double-check the size of the fill piece(s) needed. As with finish carpentry, "measure twice, cut once” is good advice, especially if the walls aren’t parallel. Once you’ve cut the fill pieces and positioned them next to the edge of the drop piece, go around the perimeter of the floor and loosely notch the carpet where it butts against door jambs and corners, so the carpet will lie flat—but don’t trim the carpet edges yet. First you need to join the carpet sections, using hot – melt seam tape.
 |
 |
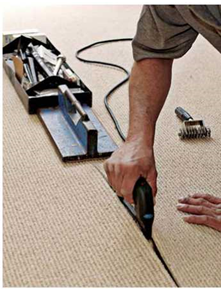
Join carpet seams before stretching and trimming the carpet. Correctly installed, hot-melt seams are strong enough to withstand stretching without separating.
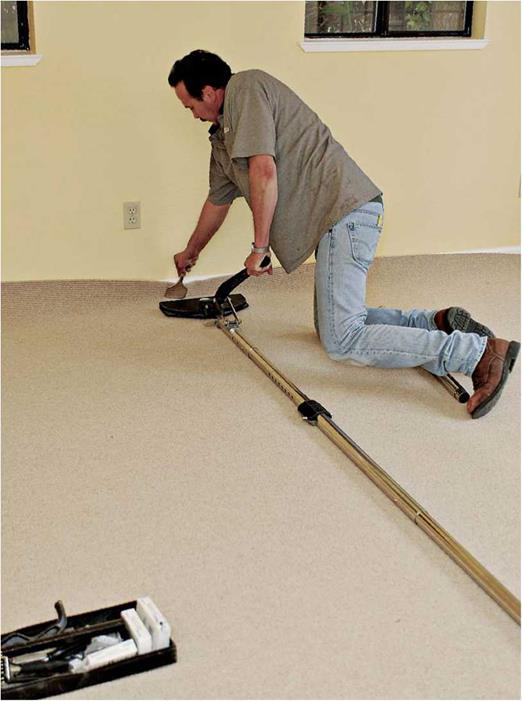
Use the knee-kicker to draw the seam edges together. After lining up the carpet sections, roll back one section slightly and slip a piece of hot-melt seam tape under the carpet edge so that the tape will run exactly down the middle of the seam. The tape’s adhesive-coated side should face
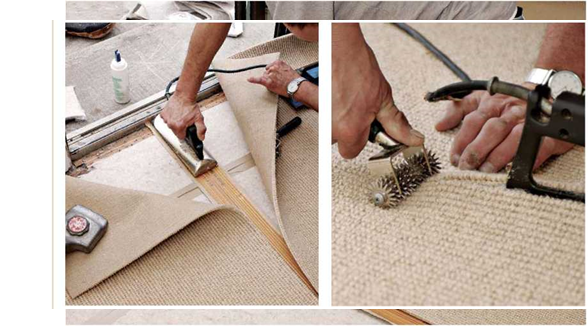
up. Plug in the seam iron, and let it heat up. Once it’s hot, place the iron on top of the seam tape at the start of the seam and let the carpet flop down on both sides, covering all but the handle of the iron. Most irons take about 30 seconds to heat the tape at a given point.
Once the adhesive has melted, move the iron farther along the tape. Then use a seam roller to embed the carpet backing in the melted adhesive. This operation isn’t difficult, but you must make sure that carpet edges butt together over the tape, rather than overlap each other. (Back-cutting the

![]()
 |
 |
carpets edges slightly with the row runner helps.) If it’s a cut-pile carpet, use a smooth roller to press the carpet backing into the seam tape; if it’s loop-pile carpet, use a star roller. After you roll a section of seam, weight it down as shown in the bottom right photo on p. 511. Continue along the seam—in roughly 12-in. increments—till the whole seam is bonded. Allow the adhesive to cool for 20 minutes to 30 minutes before stretching the carpet.


Leave a reply