Drywall over Plaster
![]()
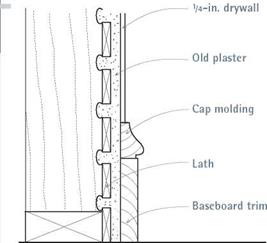
 Drywalling over plaster is a cost-effective way to deal with plaster that’s too dingy and deteriorated to patch or too much trouble to tear out. But this requires some important prep work.
► If you see discoloration or water damage, repair the cause of the leak or excessive indoor moisture before attaching drywall.
► Locate ceiling joists or studs behind the plaster. Typically, framing is spaced 16 in. or 24 in. on center, but you never know with older houses.
If ceiling joists are exposed in the attic above, your task is simple; otherwise, use a stud finder or drill exploratory holes. Once you’ve located the joists or studs, snap chalklines to indicate the centerlines you’ll screw the drywall into.
► Use screws and plaster washers to reattach loose or sagging plaster sections before you install drywall. To minimize the number of such fasteners, apply adhesive to the back face of the drywall, and be sure the screws grab framing—not just lath. Plaster washers are shown on p. 373.
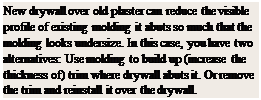
► For ceilings, use 2-in. type-W drywall screws, which should be long enough to penetrate 3/s-in. drywall, 1 in. of plaster and lath, and 5/s in. into joists. On walls, ‘/4-in. drywall is a better choice because drywall sagging
is not an issue, and thin drywall doesn’t reduce the visible profile of existing trim as much. Otherwise, you may either need to build up existing trim or remove the trim and reinstall it over the drywall.
► If there’s living space above the plaster ceiling, attaching resilient channel may be a good move. These channels bridge surface irregularities and deaden sound. Screw the channels perpendicular to the joists. Then screw drywall panels perpendicular to the channels (see the photo on p. 376).
CUTTING DRYWALL

|
|
||
|
|||
|
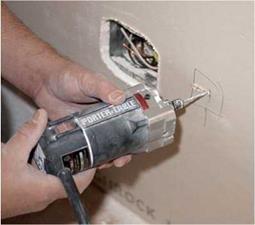
A drywall router quickly cuts out holes around outlet boxes. Beforehand, shut off the electricity to that circuit, and tuck wires well into the box so they can’t get nicked. |
can use them like a workbench, cutting them in place.
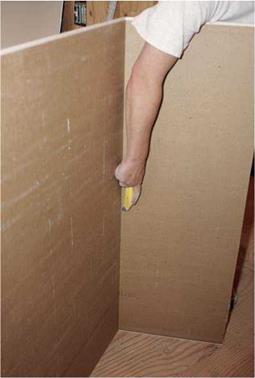
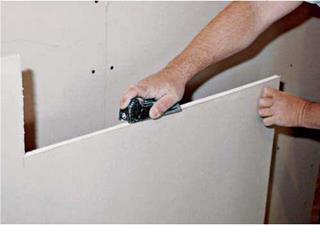
Start by tearing off the end papers that join pairs of panels face to face, allowing you to move panels individually. In this manner, you’ll cut every other panel from the back.
Most professionals would rather score the front face first, but it doesn’t truly matter which side you cut first, as long as your blade is sharp, your snap is clean, and you don’t rip or snag the paper on the front face.
If the gypsum edge is a bit rough or the panel is a little long, clean up the edge with a drywall rasp. But be careful not to fray the face paper.
Outlet box, switch, and duct cutouts can be
made before or after you hang the drywall.
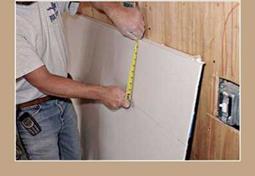
To make cuts before, measure from a fixed point nearby—from the floor or a stud, for example— and transfer those height and width measurements to the panel. A framing square resting on the floor is perfect for marking electrical receptacles. That done, use a drywall saw to punch through the face of the panel and cut out the opening, being careful not to rip the paper facing as you near the end of the cut.
That’s one way to do it. Problem is, the cutout rarely lines up exactly to the box.
Using a drywall router is quicker and more accurate. О e the power is off
and push any electrical wires well down into the box so the router bit can’t nick them. The router bit should extend only!4 in. beyond the back of the drywall.
Next, measure from a nearby stud or the floor to the (approximate) center of the box, and transfer that mark to the drywall. Then tack up the panel with just a few nails or screws—well away from the lumber the box is attached to. Gently push the spinning bit through the drywall and move it slowly to one side till you hit an edge of the box. Pull out the bit, lift it over the edge of the box, and then guide the bit around the outside of the box, in a counterclockwise direction. This method takes a light touch—plastic boxes gouge easily—but it’s fast and the opening will fit the box like a glove.
Most professionals use drywall screws exclusively, although some use a few nails along the edges to tack up a panel temporarily. Corner bead is often nailed up, too.
When attaching drywall, push the panel firmly against the framing before driving in the screw. Fasteners must securely lodge in a framing member. If a screw misses the joist or stud, remove the screw, dimple (indent) the surface around the hole, and fill it later.
The screw (or nail) head should sink just below the surface of the panel, without crushing the gypsum core or breaking face paper. You will later fill the resulting dimple with joint compound.
A Ripping GOOD TIME
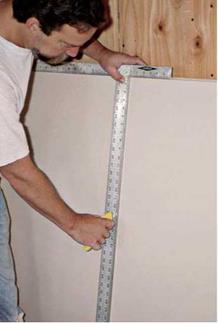
Cutting along the length of a drywall panel— ripping a panel—is fast and easy if you know how. Extend a tape measure the amount you want to cut from the panel. If you’re right-handed, lightly pinch the tape between the index finger and thumb of your left hand to keep the tape from retracting. Your right hand holds the utility – knife blade against the tape’s hook. Using your left index finger as a guide along the edge of the panel, pull both hands toward you evenly as you walk backward along the panel. Remember, the blade needs only to score the paper, not penetrate the core, so relax and keep moving.
|
|
Fastener Spacing
|
FRAMING MEMBERS |
FRAMING SPACING |
MAXIMUM FASTENER FRAMING* |
|
Ceiling joists |
16 in. o. c. |
12 in. |
|
24 in. o. c. |
10 in. |
|
|
Wall studs |
16 in. o. c. |
16 in. |
|
24 in. o. c. |
16 in. |
|
* Fasteners should not be closer than 3k in. to the panel’s edge. |
Screws are generally spaced every 12 in. along panel edges and "in the field,” for ceiling joists or studs 16 in. on center. Drywall edges are a bit fragile, so place screws back at least % in. from the edges. Where butt edges meet over framing, space screws every 8 in. along both sides of the butt joint.
Screws driven in crooked don’t hold as well, are more likely to tear the face paper, and can be tricky to fill with compound. That said, you sometimes need to angle screws slightly when securing both sides of a butt joint to a shared stud or joist. Just go easy.
Nails follow the spacing guidelines in "Fastener Spacing,” except that you should double-nail in the field. Paired nails are 1T2 in. to 2 in. apart, so the center of each pair of nails is spaced every 16 in. on wall panels. Along panel edges, do not double-nail. Instead, space single nails every 8 in. For best holding, use ring-shank nails.
Adhesives are most often used to affix drywall where nails or screws can’t—say, over concrete— but it’s sometimes used in tandem with them. Adhesive applied to wood studs allows you to bridge minor irregularities and to use about one – third the number of fasteners. And adhesive creates a stronger bond than screws or nails alone.
Because adhesive adds a step and requires 48 hours to dry before you can tape the joints, it’s usually more practical to use adhesive only on butt joints. Apply two parallel 18-in. beads of adhesive down the middle of the joist or stud edge. Don’t make wavy, serpentine beads because that allows adhesive to ooze out onto the dry – wall’s back face, wasting adhesive. On such glued butt joints, space screws every 10 in. to 12 in. on both sides of the joint.
If you’re applying a second sheet of drywall over a first, you can apply construction adhesive or roll-on thinned joint compound. Myron Ferguson’s excellent book Drywall (The Taunton Press), discusses adhesives at greater length.
TIP
Mark joist centers onto the top of the wall plates before you install the first ceiling panel. That will enable you to sink screws into the joist centers when they’re covered by drywall. The pencil marks will also help you align screws across the panel, simply by eyeballing from those first screws to the uncovered joists on the other side.
 ini
ini
|
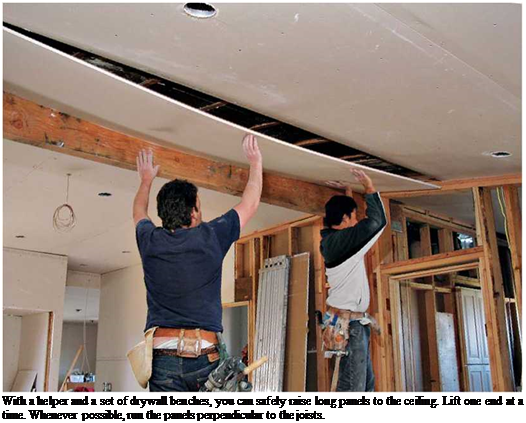
Ceilings. Attach ceiling panels first. It’s much easier to cut and adjust wall panels than ceiling panels, should there be small gaps along the wall-ceiling intersection. Also, wall panels can support the edges of ceiling panels.
First, ensure there’s blocking in place to nail the panels’ edges to. In most cases, you’ll run panels perpendicular to the ceiling joists, thereby maximizing structural strength, minimizing panel sag, and making joists easier to see when fastening panels.
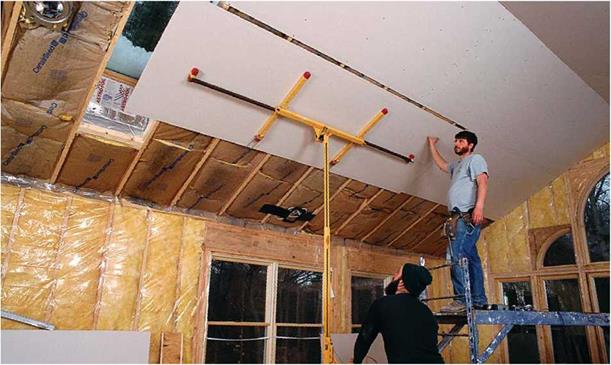
The trickiest thing about hanging ceiling panels is raising them into position. If your ceilings are less than 9 ft. high, drywall benches will elevate you enough to work. As you raise each panel end, keep its other end low. In other words, allow one worker to raise one end and establish footing before the second worker steps up onto the bench. Then, while both workers support the panel with heads and hands, they can tack the panel in place.
If the ceiling is higher than 9 ft., rent a drywall lift. Because the lift holds the panel snugly against ceiling joists, it allows you to have both hands free to drive screws.
Flying solo. If you can’t find an adjustable lift or friends to help, you can hang ceiling panels solo by using two tees made from 2x4s. Lean one tee against a wall, with its top about 1 in. shy of the ceiling joists. (The tee should be h in. to 1 in. taller than the ceiling is high.) Raise one end of
the panel up, onto that tee. Then, being careful not to dislodge the first end, position and raise the lower end of panel with the second tee until the entire panel is snug against the ceiling joists. Gradually shift the tees until the panel’s edges are aligned with the joist centers. Be patient.
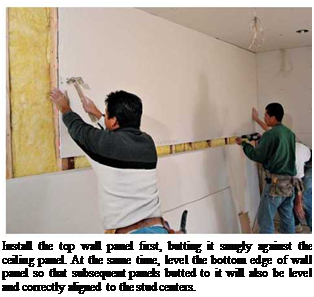
Walls. It’s easier to hang drywall on the walls than on ceilings. Although one person can usually manage wall panels, the job is easier and goes faster with two. Be sure there’s blocking in the corners to receiver fasteners before you begin. To help you locate studs once they’re covered with dry – wall, mark stud centers on the top plates (or ceiling panels) and sole plates at the bottom.
When hanging wall panels, always start at the top, butting the first panel snugly to the dry – wall on the ceiling. That way, you’ll minimize gaps and support ceiling edges better.
Important: If you’re installing wall panels horizontally, the top panel edge must be level and the butt ends, plumb. Otherwise, subsequent panels may be cockeyed and butt ends may not be centered over the studs.
Once the upper wall panel is secured, raise the lower panel(s) snug against it. A homemade
panel lifter is handy because it frees your hands to align the panels and sink the screws. A panel lifter is simply a first-class lever of scrap wood set on a fulcrum. Pressing down on one end of the lever with your foot, raises the other end, which lifts the panel, as shown in the bottom photo on p. 354.
Doors and windows. Joints around doors and windows will be weak and likely to crack if panel edges butt against the edges of the opening. That is, run the panel edges at least 8 in. past door or window jambs, and cut out the part of the panel that overlaps the opening. Pros do this because the wall framing twists and flexes slightly when doors or windows are opened and closed, which stresses the drywall joints.
Finally, expect to waste a lot of drywall when cutting paneling for doors and windows. Old houses are rife with nonstandard dimensions and odd angles, so don’t fight it. You can use some of the larger cutoffs in inconspicuous places like closets, but remember that the more joints, the more taping and sanding. Anyway, drywall panel isn’t expensive. So, when in doubt about reusing a piece, throw it out.
Curves. Curved walls are easy to cover with dry – wall. For the best results, use two layers of!4-in. drywall, hung horizontally. Stagger their butt – and bevel-edged joints. For an 8-ft. panel run horizontally, an arc depth of 2 ft. to 3 ft. should be easy. Sharper curves may require back-cutting
panels (scoring slots into the back so that the panels bend more easily), wetting (wet-sponging the front and back of the sheet to soften the gypsum), or using special flexible drywall, which has heavier paper facings that are better suited for bending.
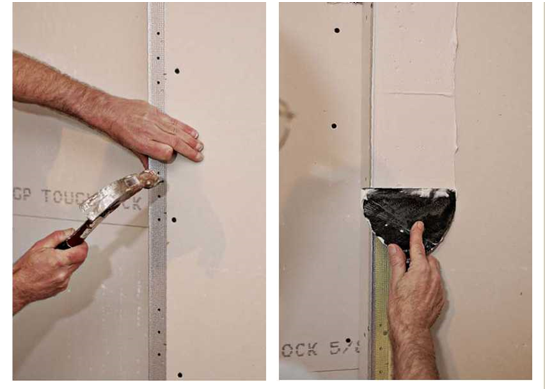
Corners. Cornerbead reinforces and protects outside corners, uncased openings, and the like. It’s available in many materials. For best results, install it in a single piece. Cut the bead for outside corners about h in. short: Push it snugly to the corner and slide it up till it touches the ceiling. The /2-in. gap at the bottom will be hidden by baseboard trim.
Galvanized metal bead was at one time the only type available, and it’s still widely used. To cut it, use aviation snips (also known as tin snips). The metal bead goes on the outside corners before the tape and joint compound are applied. Nail it up, spacing nails 8 in. apart, on both legs of the bead. Then cover it with compound.
Vinyl bead is less rigid than metal and able to accommodate outside corners that aren’t exactly 90°. Attach vinyl bead either by stapling it directly to the drywall, spraying the drywall corner with vinyl adhesive before pressing the bead into the adhesive and then stapling, or using a taping knife to press the bead into a bed of joint compound.
Paper-faced beads are embedded in joint compound. One of the best is the Ultraflex structural corner, which comes in varying widths and has
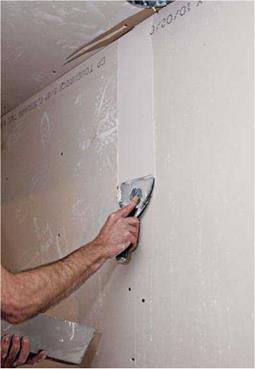 a plastic spine that flexes in or out so it can rein- BEDDING THE TAPE force inside or outside corners. Because they’re flexible, such tapes are great for corners of just about any angle.


Leave a reply